
These Father's Day cookies are perfect for the handyman dad. My dad owns a woodworking company, which is why I decided to make this design for Father's Day.
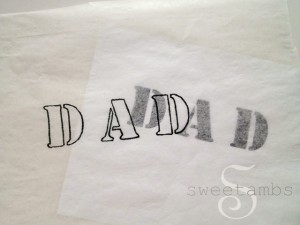
For products used in this and other tutorials, visit the recommended products page. I used the tissue paper method for these cookies. This font is called "stencil". I printed it out at size 120 (my cookie is 4x3", so change the size of the font to fit in whatever size cookie you're using), then traced it onto the tissue paper and used an edible ink marker to transfer the design onto the cookie. Read my Art Deco Cookie post for a tutorial on this method.

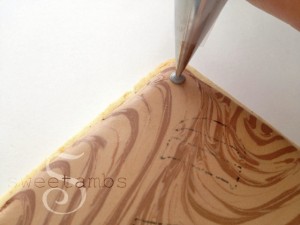
 Watch the video below to see how to create the look of wood grain using royal icing. You can also read the post on wood grain cookies for more information on this technique.
Once the icing is completely dry, pipe screws in the corners using gray flood consistency icing and a tip 1. Use a scribe tool to help shape the screws.
Watch the video below to see how to create the look of wood grain using royal icing. You can also read the post on wood grain cookies for more information on this technique.
Once the icing is completely dry, pipe screws in the corners using gray flood consistency icing and a tip 1. Use a scribe tool to help shape the screws.

 Outline and fill in the letters using a tip 1 and black icing that is slightly thicker than flood consistency. For lettering, I like to my icing to be about the same consistency as yogurt. Use the scribe tool to help shape the letters. There's a video in my tutorial shop with more information on flood consistency royal icing.

 Next, use bright yellow icing and a tip 1 to pipe a rectangle above the lettering. I used my scribe tool to scratch the outline of the rectangle into the icing before I filled it in. Let that sit for about 5 minutes, then add black stripes using the same icing you used for the lettering.

 Let the icing sit for another 5 minutes before filling in the rest of the stripes with yellow. Then add a black outline on the inside rectangle.

 Outline the outside of the rectangle and pipe # 1 in the center.
 Let everything dry for about 4 hours. Paint the screws using a mixture of silver pearl dust and alcohol or flavored extract. I prefer to use Bacardi 151 for this method. Read this post for more information on painting with luster dust.
Use an edible ink marker to draw a line in the center.
Let everything dry for about 4 hours. Paint the screws using a mixture of silver pearl dust and alcohol or flavored extract. I prefer to use Bacardi 151 for this method. Read this post for more information on painting with luster dust.
Use an edible ink marker to draw a line in the center.

 Allow the paint to dry for about 20 minutes before handling the cookie.
Click on the images below for more cookie decorating tutorials
Allow the paint to dry for about 20 minutes before handling the cookie.
Click on the images below for more cookie decorating tutorials 
 Back to top
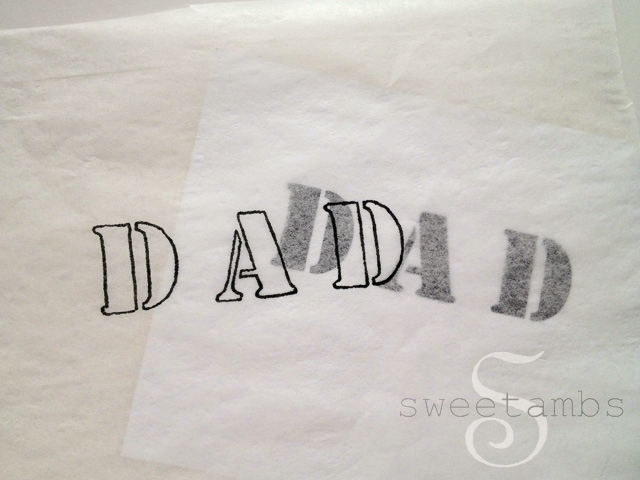
I used the tissue paper method for these cookies. This font is called "stencil". I printed it out at size 120 (my cookie is 4x3", so change the size of the font to fit in whatever size cookie you're using), then traced it onto the tissue paper and used an edible ink marker to transfer the design onto the cookie. Read my Art Deco Cookie post for a tutorial on this method.
 Watch the video below to see how to create the look of wood grain using royal icing. You can also read the post on wood grain cookies for more information on this technique.
Once the icing is completely dry, pipe screws in the corners using gray flood consistency icing and a tip 1. Use a scribe tool to help shape the screws.
Outline and fill in the letters using a tip 1 and black icing that is slightly thicker than flood consistency. For lettering, I like to my icing to be about the same consistency as yogurt. Use the scribe tool to help shape the letters. There's a video in my tutorial shop with more information on flood consistency royal icing.
Next, use bright yellow icing and a tip 1 to pipe a rectangle above the lettering. I used my scribe tool to scratch the outline of the rectangle into the icing before I filled it in. Let that sit for about 5 minutes, then add black stripes using the same icing you used for the lettering.
Watch the video below to see how to create the look of wood grain using royal icing. You can also read the post on wood grain cookies for more information on this technique.
Once the icing is completely dry, pipe screws in the corners using gray flood consistency icing and a tip 1. Use a scribe tool to help shape the screws.
Outline and fill in the letters using a tip 1 and black icing that is slightly thicker than flood consistency. For lettering, I like to my icing to be about the same consistency as yogurt. Use the scribe tool to help shape the letters. There's a video in my tutorial shop with more information on flood consistency royal icing.
Next, use bright yellow icing and a tip 1 to pipe a rectangle above the lettering. I used my scribe tool to scratch the outline of the rectangle into the icing before I filled it in. Let that sit for about 5 minutes, then add black stripes using the same icing you used for the lettering.
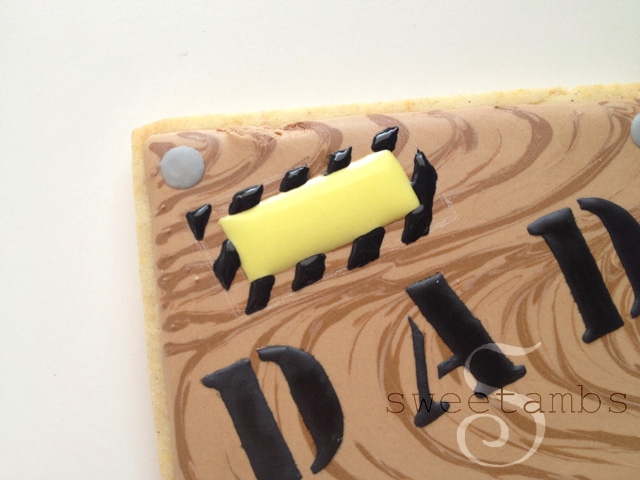 Let the icing sit for another 5 minutes before filling in the rest of the stripes with yellow. Then add a black outline on the inside rectangle.
Outline the outside of the rectangle and pipe # 1 in the center.
Let everything dry for about 4 hours. Paint the screws using a mixture of silver pearl dust and alcohol or flavored extract. I prefer to use Bacardi 151 for this method. Read this post for more information on painting with luster dust.
Use an edible ink marker to draw a line in the center.
Allow the paint to dry for about 20 minutes before handling the cookie.
Click on the images below for more cookie decorating tutorials
Back to top
Let the icing sit for another 5 minutes before filling in the rest of the stripes with yellow. Then add a black outline on the inside rectangle.
Outline the outside of the rectangle and pipe # 1 in the center.
Let everything dry for about 4 hours. Paint the screws using a mixture of silver pearl dust and alcohol or flavored extract. I prefer to use Bacardi 151 for this method. Read this post for more information on painting with luster dust.
Use an edible ink marker to draw a line in the center.
Allow the paint to dry for about 20 minutes before handling the cookie.
Click on the images below for more cookie decorating tutorials
Back to top




Hi, my cookies keep going soft! How do I prevent this from happening?
At the top of the page in your banner you have four pictures of cookies. Do you have a specific page or video showing how you created those designs? If so, I sure would love to see the.
Thanks,
Kelly
I have tutorials for the brush embroidered cookie and for the filigree cookie, but not for the crown or the rose (yet). Here's the link to the filigree cookie: https://www.sweetambs.com/tutorial/filigree-cookies/
There's a blog post about brush embroidery here: https://www.sweetambs.com/tutorial/brush-embroidery-cookie-box-tutorial/
I also have a video with step by step instructions available in my shop: https://www.sweetambs.com/products-page/videos/brush-embroidery-video-tutorial/
Superb as always!!
Please show us the rest!! I'd love to get these made to send to my Dad for Father's Day!
Thanks!!
Thanks, Mary! The next tutorial will be up tomorrow morning!
Love, love, love!!!!
Ur tutorials inspire me so much! U r very creative! 🙂
I want to see the rest!!!! They are so cute!!!
These are super cute! I love wood, I use to carve pendants in high school. Beautiful technique Amber.
I used to...
Thanks, Hani!!