
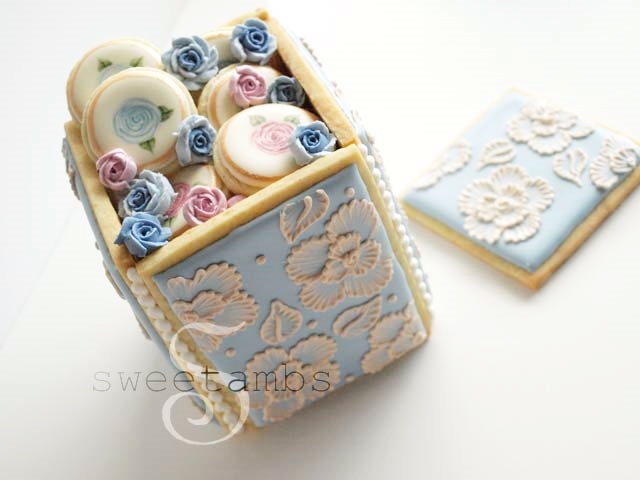
The Brush Embroidery Technique is one of my favorites. I used it here to decorate this beautiful cookie box. It would make a nice presentation for Mother's Day or a special birthday gift. See the step-by-step tutorial below!
This post contains affiliate links. Read my affiliate disclosure here.
Here's what you'll need for this brush embroidery cookie box
These supplies are available in my Amazon Store unless otherwise noted.
- 4 rectangle cookies that measure 3x4" for the sides (my cookie recipe is available in the tutorial shop)
- 2 square cookies that measure 3x3" for the top and bottom
- Flood consistency royal icing in Wilton Delphinium Blue from the Garden Tone set
- Stiff consistency royal icing in ivory (I used Wilton Brown and a touch of Juniper Green from the Garden Tone Set)
- 2 Decorating bags
- Couplers
- Decorating tip 3 for flooding and 2 for brush embroidery
- Bag ties
- Scribe tool
- Square tip brush
- Small dish of water
- Dry paper towel
Instructions
Step 1
Bake and cool the cookies according to the recipe instructions.
Step 2
Ice the cookies with flood consistency royal icing and a decorating tip 3. Use the scribe tool to help shape the icing.
Allow the icing to dry completely (overnight is best).
Visit my tutorial shop for a detailed video on how to flood a cookie.
Step 3
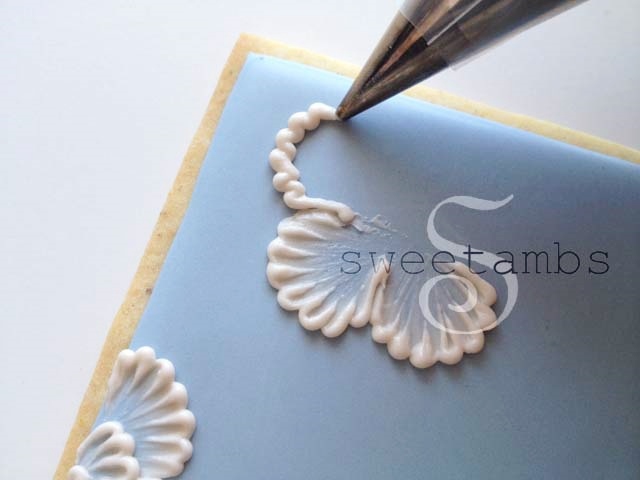
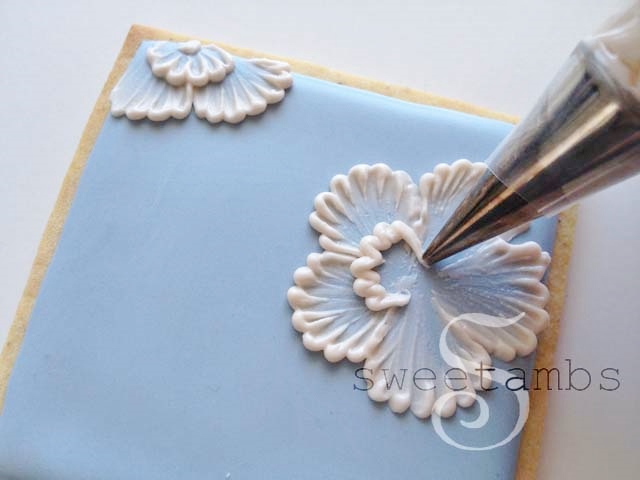
To make the brush embroidered flowers, pipe a ruffled edge using the stiff consistency icing and a decorating tip 2.
Read my Ultimate Guide To Royal Icing to learn all about icing consistencies
Step 4
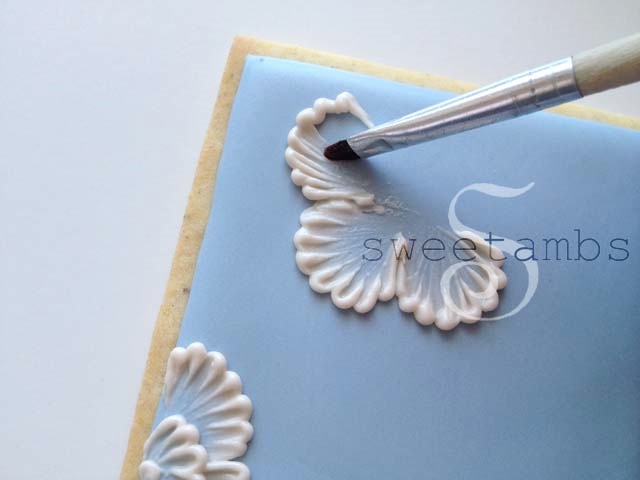
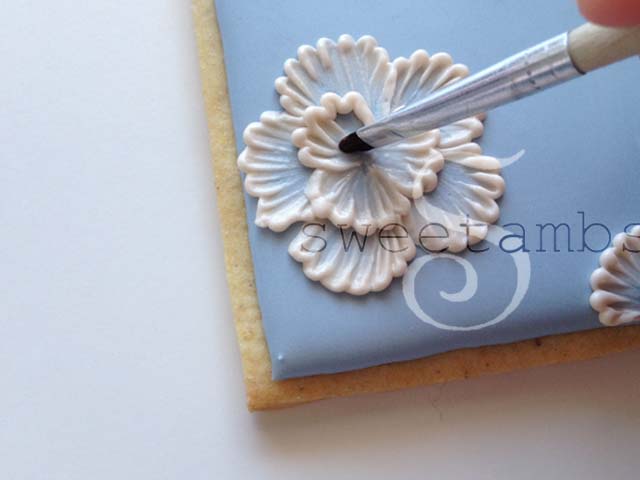
Dip the brush into the water and blot it on the dry paper towel. Drag the icing toward the bottom of the petal.
Step 5
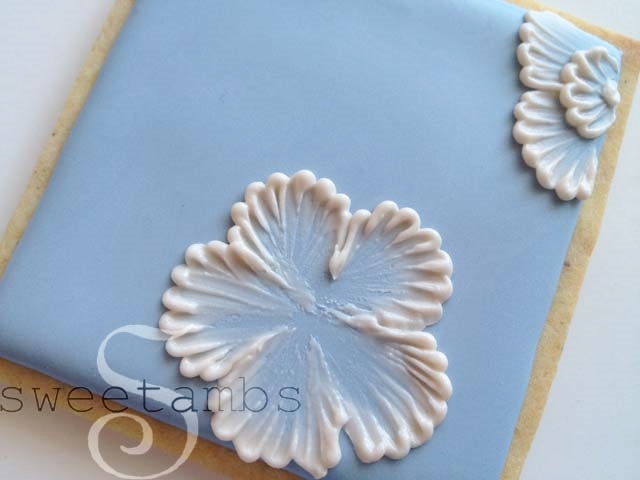
Repeat this process on the inner petals. There's no need to allow the icing to dry between layers of petals.
Step 6
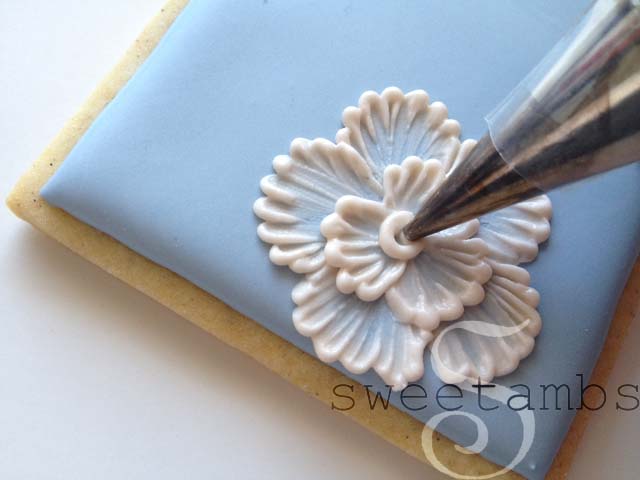
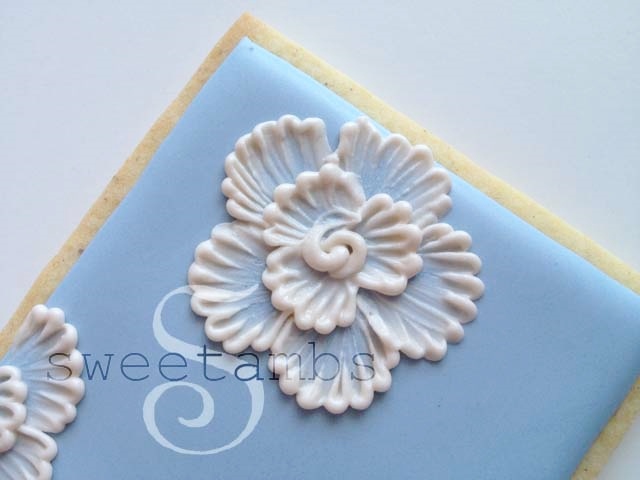
Pipe the flower center.
To see brush embroidery in action with full instructions, download my complete video series from the tutorial shop.
Step 7
Pipe a leaf shape between the flowers leaving the bottom of the leaf open.
Use the brush to drag the icing toward the center of the leaf.
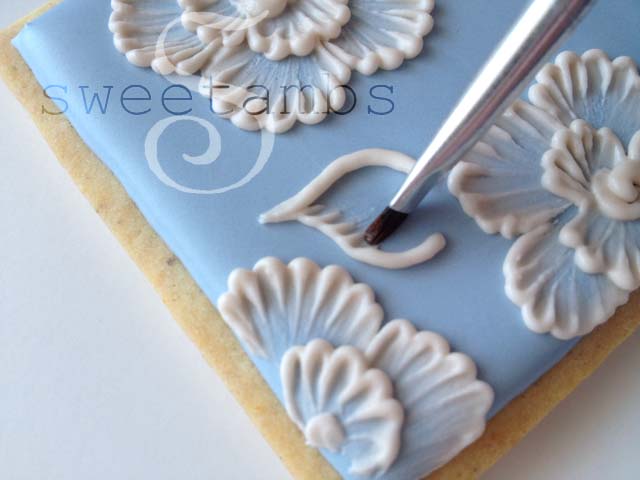
Allow the icing to dry for at least an hour before assembling the box.
To Assemble The Box
Step 1
Apply some slightly thinned stiff consistency icing to the back of a rectangle on one of the shorter sides.
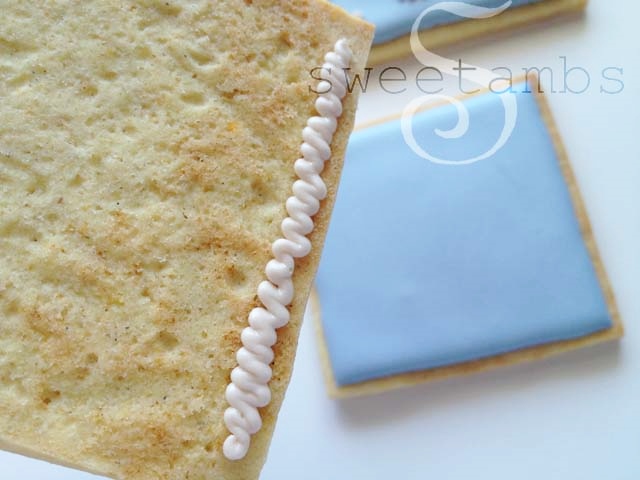
Step 2
Gently press the cookie against the 3" square cookie, which will be the bottom of the box. Hold it for at least 15 seconds. Place something behind it to prop it up while you move onto the next step.
Step 3
Apply icing to the short side of another rectangle and press it against the bottom piece, adjacent to the one you just attached.
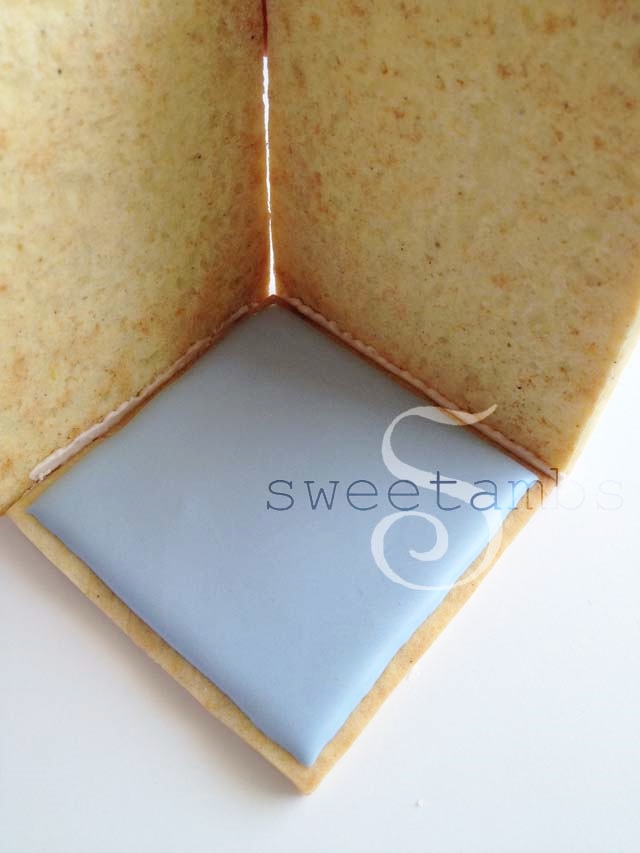
Step 4
Pipe some icing in the seam and use the square tip brush to help push it into the crevice.
This joint will be the anchor for the rest of the box, so it's important to make sure this side is stuck together really well.
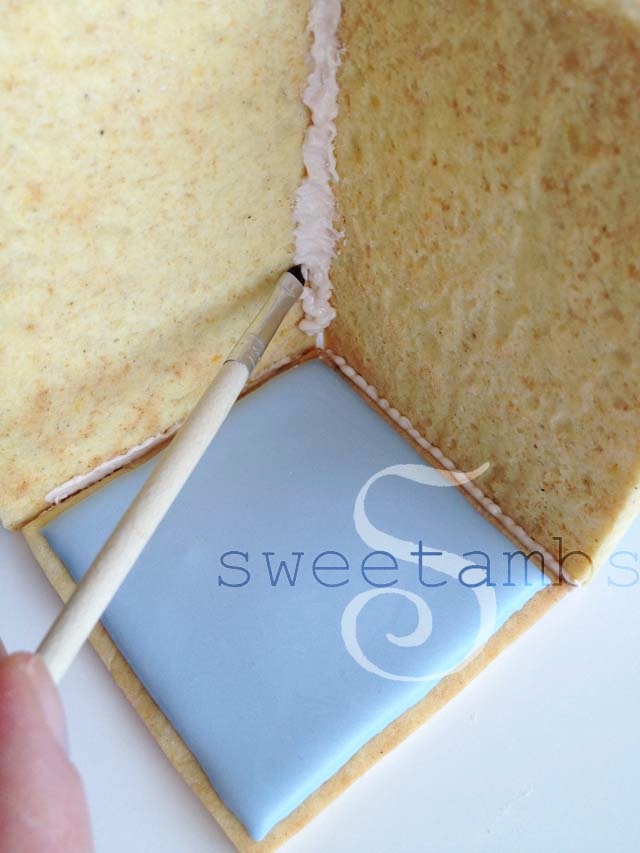
Step 5
On the third side, apply the icing to the bottom edge and side of the cookie and attach it to the box.
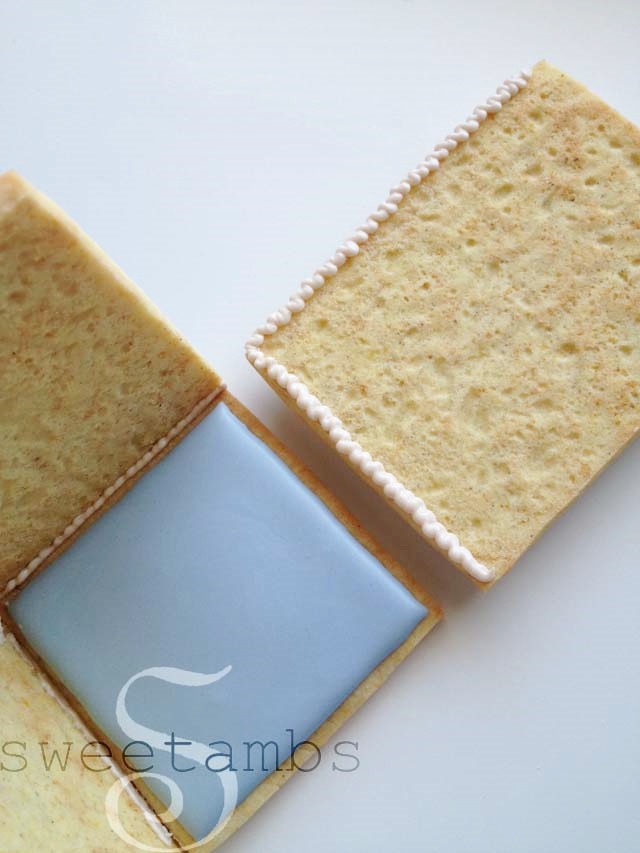
Put some pressure on these for about 30 seconds to make sure they stick.
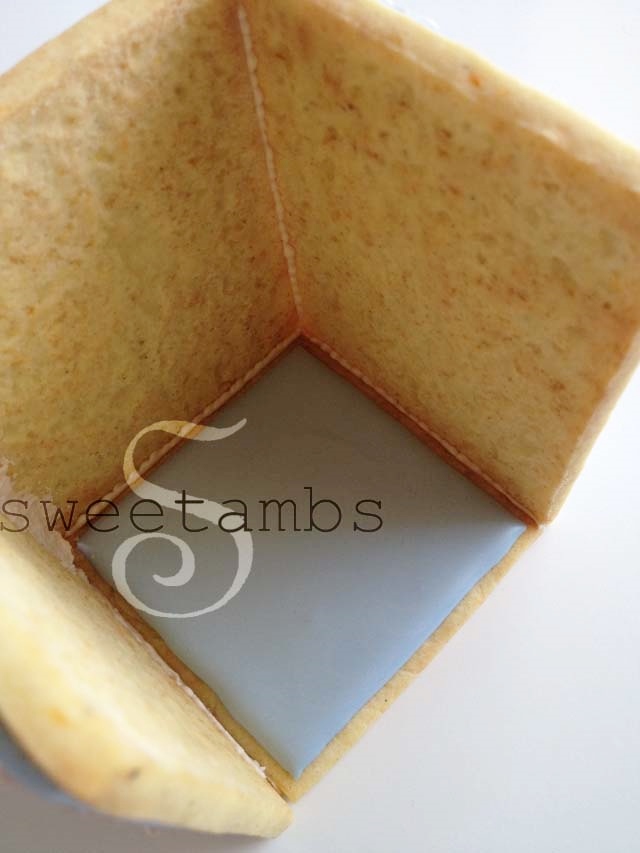
Step 6
Apply the icing to both sides and the bottom edge of the fourth cookie.
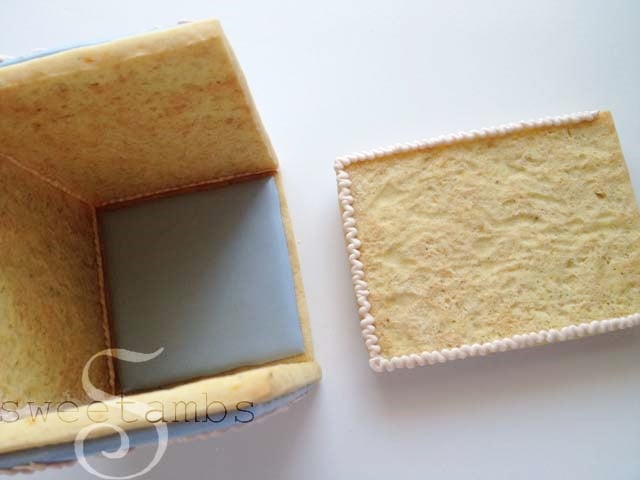
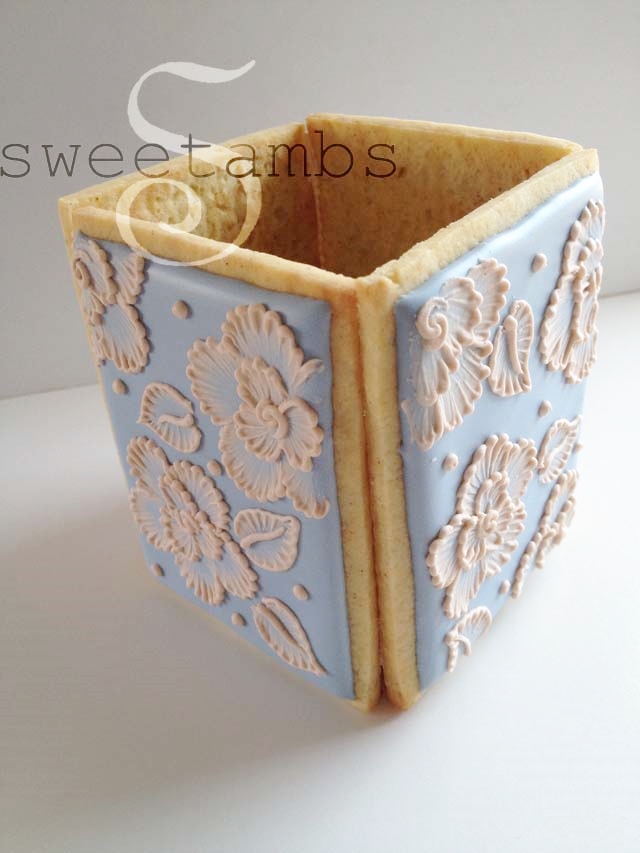
Step 7
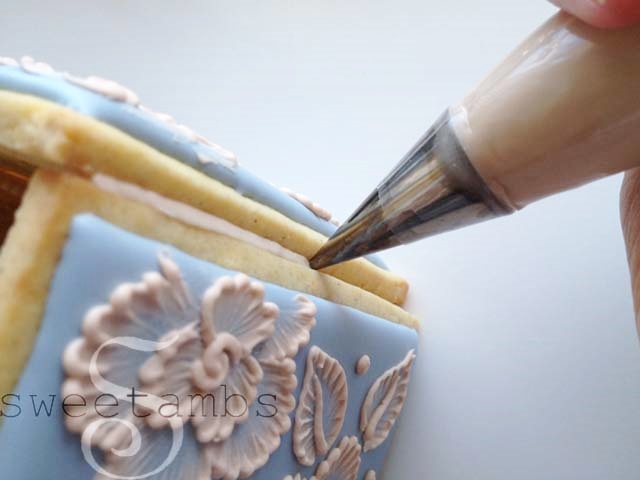
After the box has dried for about an hour, pipe some icing on the outside of the seams.
Step 8
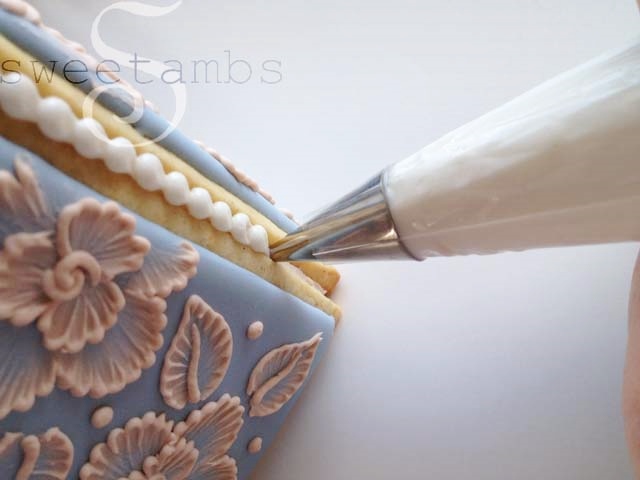
Using a tip 5 and white stiff consistency icing, pipe a bead border over the icing you just piped in the corners. There is a video with full instructions on piping a bead border available in my tutorial shop. Let the box dry completely (overnight is best).
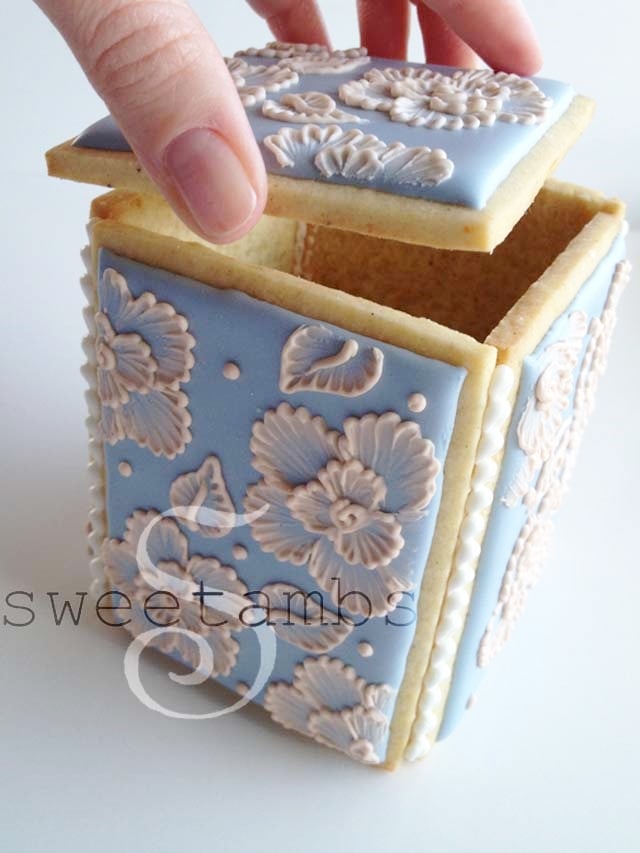
Now the box is ready to be filled.
I filled this box with mini cookies and royal icing roses. There is a video on piping royal icing roses and leaves available in my tutorial shop.
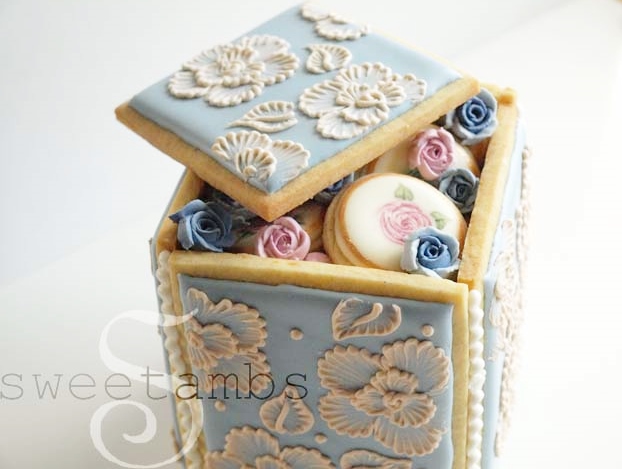





Beautiful!
After you cut the frozen dough, did you completely thaw it before baking?
Bake cold cut outs at 400F?
I recently made a cookie box and mercy my cookies were huge.
Thank you! I bake my cookies straight from the freezer (but I transfer them to a room temperature sheet tray first). They're baked at 350 for 10-12 minutes. This post has more info on cookie dough: https://www.sweetambs.com/tutorial/cookies-some-general-information/
This is incredible! Just beautiful.
Thank you, Karen! <3
Hi I looked at the tutorial & looks great. When you my royal icing is the thickness at that point enough or do you need to do something?(remember novice. Here) I paint with oil paints so I think it should be fun. Thanks sandy
Anna
I hate Brush Embroidery! :p
I hate you!
Kyrile! Do not be so SILLY!
Brush Embroidery is a good way to decorate cookies!
I know, I know!! Just keep practicing... you'll get it! One of the biggest mistakes I see when people are just starting out with brush embroidery is that their icing is too soft. Let me know if you have any questions about how to improve!
Hi Amber!
Can I use Brush Embroidery on decorating cakes?
You know, like White Cake covered with buttercream?
Hi Christine! I haven't tried it myself, but I believe you can use this technique on buttercream that "crusts". I do know that you can definitely use this technique it on a fondant covered cake, though.
I just have to find time to do this I really love it so much. I can already think of 5 people I would love to make this for It would make them so happy and they would feel so special. I always wanted to try the brush stroke icing. GREAT BIG THANK YOU For Sharing.
It's absolutely, amazing, gorgeous jewelry cookie box. To beautiful to eat. I'd rather just admire it. Am going to try n make it. I love it. Very easy explanation on how to make. Thank you for sharing.?
What a wonderful tutorial. And how beautiful. This'll be a great little box for an engagement ring. Then they could eat the sweetness after they got engaged!
You're so talented
beautiful artwork. excited to see more. pls. post the recipe for royal icing too. thanks.
pretty artworks. pls post also the recipe for the royal icing. thanks
Olá, vc tem mãos de fada!
São verdadeira obras de arte, gostaria da receita de biscoitos. Obrigada! Bjs
Your work is really beautiful, I will love following your tutorials.
Thank you, Arlene!
Your technique and artistic ability is unreal! I may try this in soapmaking! Wish me luck! Thanks for sharing!
Thank you, Donna!
estoy maravillada con tu arte y manera de pintar. las pondre en practica. me gustaron mucho. gracias por compartir tu talento. Dios te bendiga.
Fantastic..! I'm fall in love with this and I've tried to make it. How can I do for send you a photo?
As I started looking through your cookies, I suddenly felt a need to dress up with hat and gloves and head to a lovely old tea shop. Thank you so much for the precious fancy delights.
Lou Ann
Haha! Thank you, Lou Ann!
I too feel like I should be dressing for afternoon tea. These cookies are gorgeous.
Thank you, Amy!
hermoso trabajo, soy seguidora de tus creaciones por facebook, gracias por compartir!
you're so gifted! thanks so much for sharing your talent.i love your art!
Wow, I had this idea years ago - making a cookie box holder for tiny cookies, but yours is so much more lovely than mine - bravo! So beautiful it make me want to cry 😉
*CLAP* *CLAP* *CLAP*
Love your technique-your videos have made it all the way to Australia! I have purchased them and now I am on a mission to make my cookies look as good as yours-thanks for sharing! 🙂
Thank you, Sue!
bellissimo!
Absolutely beautiful Amber, as usual!
Amazing!!!!!
espectacular, grandiosa idea, me encantó
Love it! I made something really similar to this for my sister's baby shower a little while ago - except they were alphabet blocks. This is beyond gorgeous!
Beautiful, Its beautiful, I would like to do this cookies, I need practice a lot !! Hugs,
This is so lovely I do love your work is it possible to get your tutorials on to iPads yet I would so love them Dx
Thank you, Doreen! I just started offering my videos through a new service on Vimeo.com, so now you can stream the tutorials on your iPad. Here's the link: https://tutorials.sweetambs.com/