Wet-On-Wet Royal Icing Animal Print Cookies
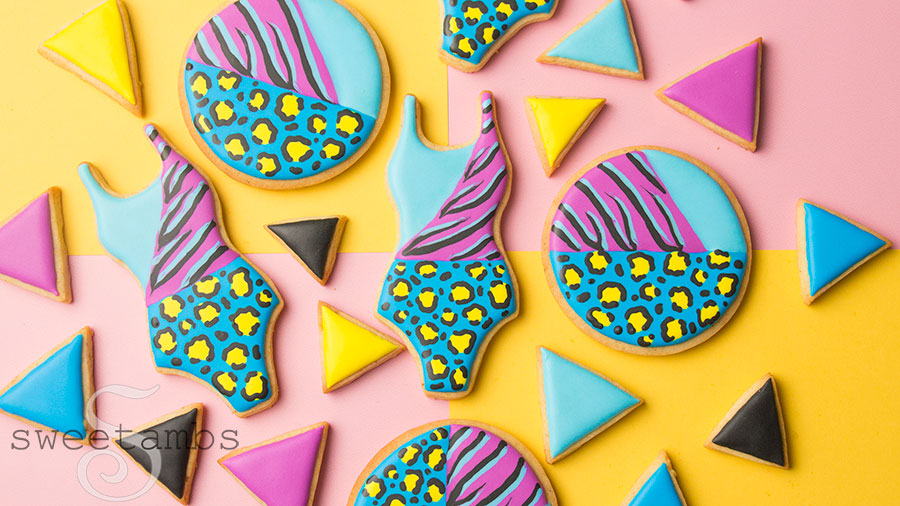

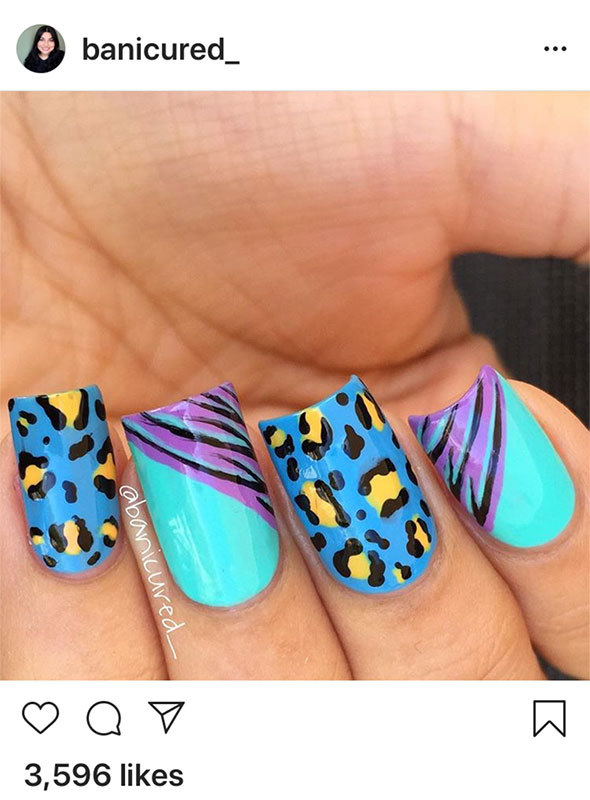
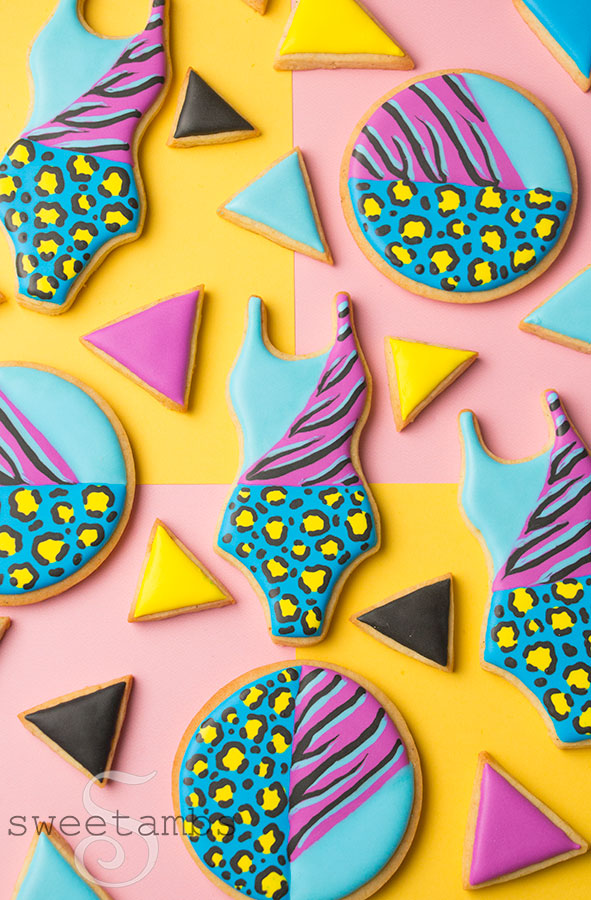
These wet-on-wet royal icing animal print cookies were inspired by a nail design by @banicured_ on Instagram. I thought that the bathing suit shape was perfect for this bright pattern! It could also double as an 80s style aerobics outfit, don’t you think?
See the video tutorial and supply list below!
Get access to exclusive cookie decorating tutorials, my cookie and royal icing recipes, and individualized cookie decorating advice by joining my Cookie Art Club!
This post contains affiliate links. Read my affiliate disclosure here.
A few weeks ago I polled my Patreon Subscribers to find out which shape to use for this animal print pattern. The results were about 60% for the bathing suit and 30% for the round shape, so I decided to include both in the tutorial!
One of my subscribers made a very good point and explained that many cookie decorators have a limited number of cutters, so it’s helpful to see designs like this on simple shapes like round cookies.

It made me think of when I first started decorating and made all of my designs on round, square, and plaque shaped cookies. Nowadays I get carried away with all of the cute cookie cutters out there! I’m glad that she reminded me that you don’t need to have a huge collection of cookie cutters to make awesome cookies.
This bathing suit cookie cutter has gotten a lot of use since I bought it a couple of months ago. This is the third design that I’ve made with it so far and I’m sure there will be more to come! You can see my candy cane striped bathing suit cookies here. The third bathing suit tutorial will be available soon!

This wet-on-wet design took about 8 minutes for each cookie. Depending on the weather, my royal icing recipe will give you up to 10 minutes to work on the design before it crusts over.
Thank you to @banicured_ for the cookie inspiration!

Here’s what you’ll need to make these wet-on-wet royal icing animal print cookies
These supplies are available in my Amazon Store unless otherwise noted.
- Chilled sheet of cookie dough (my recipe is available to my Patreon Subscribers and in my tutorial shop)
- Bathing suit cookie cutter
- 3 to 3-½” round cookie cutter
- Paring knife to cut triangle cookies
- Flood consistency royal icing in purple, light blue, black, bright blue, and yellow (see list of colors below)
- Tipless decorating bags
- Decorating tips 1 and 2
- Bag ties
- Scribe tool
Colors (I used Chefmaster)
- Neon Brite Purple (tip 2)
- Sky Blue (tip 2)
- Neon Brite Blue (tip 1)
- Lemon Yellow (tip 1)
- Black Diamond (tip 1)

Instructions
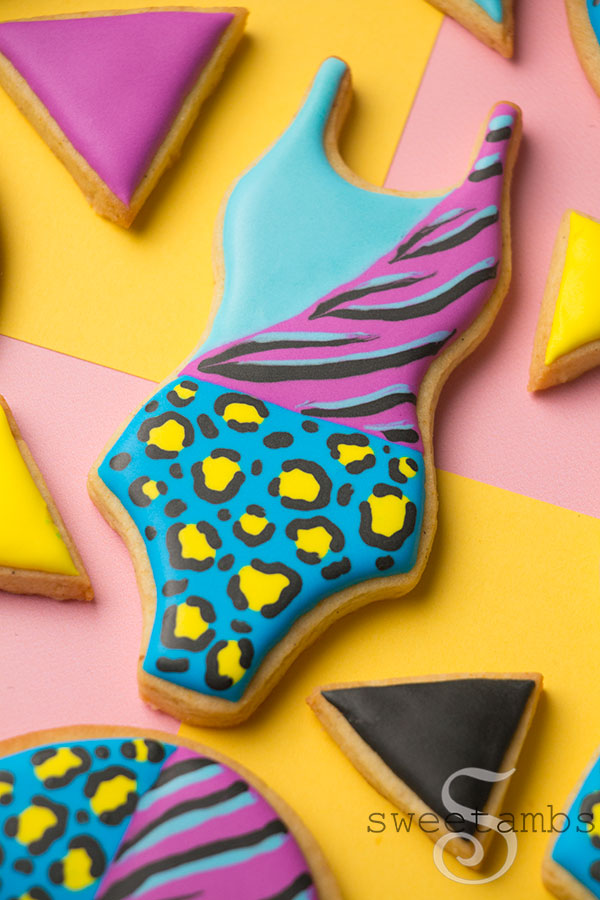
Cut the bathing suit cookies and round cookies from a chilled sheet of cookie dough. Use the paring knife to cut triangle cookies from the dough scraps. Bake the cookies according to the recipe instructions.
Draw lines on the bathing suit cookie with a scribe tool to separate the sections of the pattern.
Ice half of the top of the bathing suit with light blue flood consistency royal icing and a decorating tip 2. Use a scribe tool to help shape the icing.
Fill in the other side with purple flood consistency royal icing and a decorating tip 2. Use the scribe tool to help shape the icing.
Pipe stripes of black flood consistency royal icing with a tip 1 while the purple icing is still wet. This is known as the wet-on-wet royal icing technique. Use the scribe tool to help shape the lines.
Pipe thin lines of light blue next to the black lines and use the scribe tool to help shape the icing.
Fill in the bottom of the bathing suit with bright blue flood consistency royal icing and a decorating tip 2. Use the scribe tool to help shape the icing.
Immediately pipe spots with yellow flood consistency royal icing and a decorating tip 1.
Outline the spots with the black icing.
Pipe a few smaller spots in between.
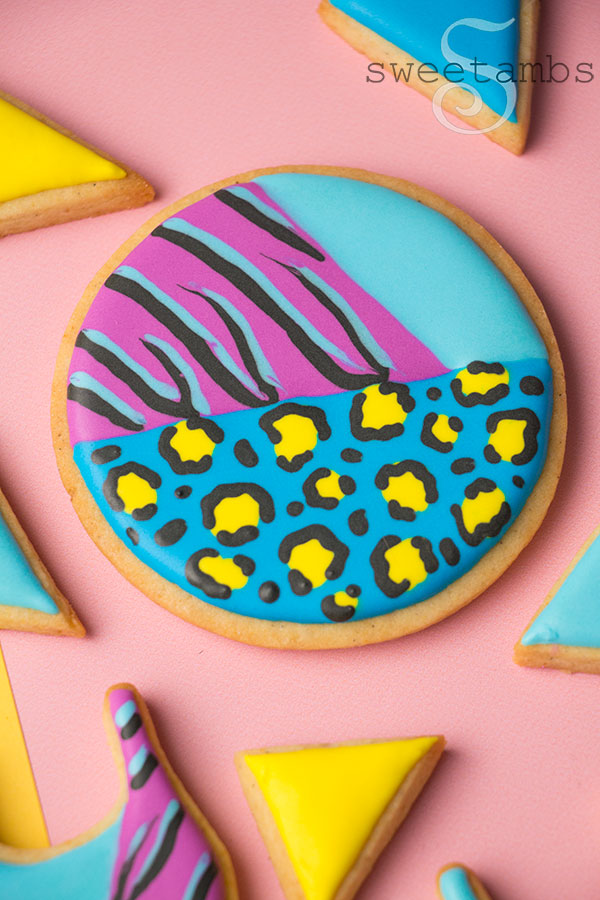
Make this design on a round cookie following the same steps.
Ice the triangle cookies with the flood consistency icing. Use the scribe tool to help shape the icing.
Allow the cookies to dry completely before packaging them (overnight is best).
Printable instructions and supply list
Wet-On-Wet Royal Icing Animal Print Cookies
These wet-on-wet royal icing animal print cookies were inspired by a nail design by @banicured_ on Instagram. The supplies are available in my Amazon Store unless otherwise noted.
Materials
- Chilled sheet of cookie dough
- Bathing suit cookie cutter
- 3 to 3-½” round cookie cutter
- Paring knife to cut triangle cookies
- Flood consistency royal icing in purple, light blue, black, bright blue, and yellow (see list of colors below)
- Tipless decorating bags
- Decorating tips 1 and 2
- Bag ties
- Scribe tool
- Colors (I used Chefmaster)
- Neon Brite Purple (tip 2)
- Sky Blue (tip 2)
- Neon Brite Blue (tip 1)
- Lemon Yellow (tip 1)
- Black Diamond (tip 1)
Instructions
- Cut the bathing suit cookies and round cookies from a chilled sheet of cookie dough. Use the paring knife to cut triangle cookies from the dough scraps. Bake the cookies according to the recipe instructions.
- Draw lines on the bathing suit cookie with a scribe tool to separate the sections of the pattern.
- Ice half of the top of the bathing suit with light blue flood consistency royal icing and a decorating tip 2. Use a scribe tool to help shape the icing.
- Fill in the other side with purple flood consistency royal icing and a decorating tip 2. Use the scribe tool to help shape the icing.
- Pipe stripes of black flood consistency royal icing with a tip 1 while the purple icing is still wet. This is known as the wet-on-wet royal icing technique. Use the scribe tool to help shape the lines.
- Pipe thin lines of light blue next to the black lines and use the scribe tool to help shape the icing.
- Fill in the bottom of the bathing suit with bright blue flood consistency royal icing and a decorating tip 2. Use the scribe tool to help shape the icing.
- Immediately pipe spots with yellow flood consistency royal icing and a decorating tip 1.
- Outline the spots with the black icing.
- Pipe a few smaller spots in between.
- Make this design on a round cookie following the same steps.
- Ice the triangle cookies with the flood consistency icing. Use the scribe tool to help shape the icing.
- Allow the cookies to dry completely before packaging them (overnight is best).
