
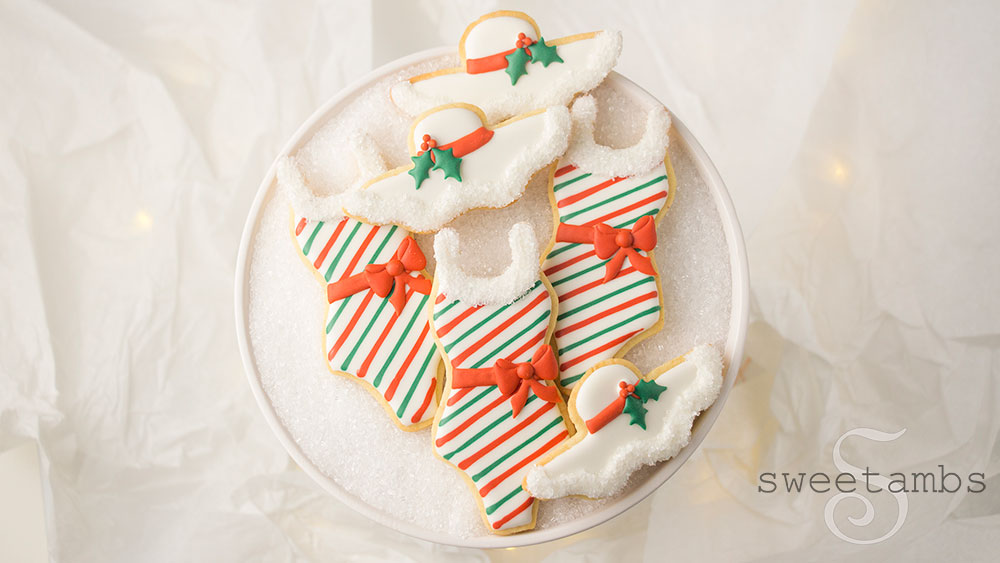
These bathing suit cookies are part of a Christmas In July Instagram collaboration hosted by Cake Ladies Tampa Bay. Take a look at the hashtag #ChristmasInJulyCollab to see all of the edible Christmas creations!
You can watch this members-only video tutorial (without ads!) when you join my Cookie Art Club!
Get access to exclusive cookie decorating tutorials, my cookie and royal icing recipes, and individualized cookie decorating advice by joining my Cookie Art Club!
Get access to exclusive cookie decorating tutorials, my cookie and royal icing recipes, and individualized cookie decorating advice by joining my Cookie Art Club!
This post contains affiliate links. Read my affiliate disclosure here.
I recently purchased this bathing suit cookie cutter on Amazon. It's a copper cutter so it's more expensive than most of my cookie cutters but I've already used it for 3 projects since I bought it! I'm sure I will get a lot of use out of this cutter in the years to come.

I used the wet-on-wet technique to pipe the design on these cookies. You do have to move pretty fast with the wet-on-wet technique, which is why I use extra meringue powder in my royal icing recipe to ensure that I have as much time as possible to work with the icing before it starts to crust over.
Here's what you'll need to make these bathing suit cookies and sun hats:
These supplies are available in my Amazon Store unless otherwise noted.
- Chilled sheet of cookie dough (my recipe is available to my Patreon Subscribers or get it in my tutorial shop)
- Bathing suit cookie cutter
- Hat template (available to my Patreon Subscribers)
- Knife to cut the hat cookies
- Red flood consistency royal icing (I used a combination of Chefmaster Tulip Red with a touch of Forest Green)
- Green flood consistency royal icing (I used Chefmaster Forest Green)
- White stiff consistency royal icing
- 12” decorating bags
- Couplers
- Decorating tips 1, 2, and 3
- Bag ties
- Scribe tool
- Acrylic board or baking sheet wrapped with wax or parchment paper
- Bow template (available to my Patreon Subscribers)
- Sparkling sugar
Read my Ultimate Guide To Royal Icing to learn all about royal icing consistencies.





Amber, I love these cookies and your tutorials! I learn so much from you! I have 2 questions that maybe you can answer for me. I notice you don't outline your cookies right on the edge of the cookie before flooding. Can you tell me why you prefer this?
Also, I notice sometime you use a tipless bag. Is this for achieving tiny lines? I bought some Master brand tipless bags, I think they're called, but have never used them. Can you give me any advice on them?
Thank you so much!
I'm so glad to hear that, Martha! Thank you! I leave space around the edge so that the icing has room to spread out a little bit without going over the edge. I don't use a stiffer outline because I like the way the cookie looks without an outline. I also like that I don't have to mix up two consistencies of the same color. Tipless bags are good for piping tiny lines, like you said, and since the bags are smaller and thinner than regular piping bags, they're also good for when you only need a very small amount of icing. Master brand is the one that I use 🙂