

I got creative with my Tie Dye T-shirt Cookie Kit to make this set of tie dye back to school cookies with a little help from an edible ink marker and backpack and mask templates. Whether the kids are going back to school in-person or online, I hope you all have a great year!
See the full video tutorial, supply list, and templates below.
Get access to exclusive cookie decorating tutorials, my cookie and royal icing recipes, and individualized cookie decorating advice by joining my Cookie Art Club!
This post contains affiliate links. Read my affiliate disclosure here.
My Tie Dye T-shirt cookie kit comes with my cookie and royal icing mix, a t-shirt cookie cutter, food coloring, tipless decorating bags, bag ties, and a scribe tool.
I used a Chefmaster edible ink marker to trace the mask and backpack templates and to write on the notebook cookies. The edible ink marker isn't included in the kit, but you can find them in my Amazon Store.
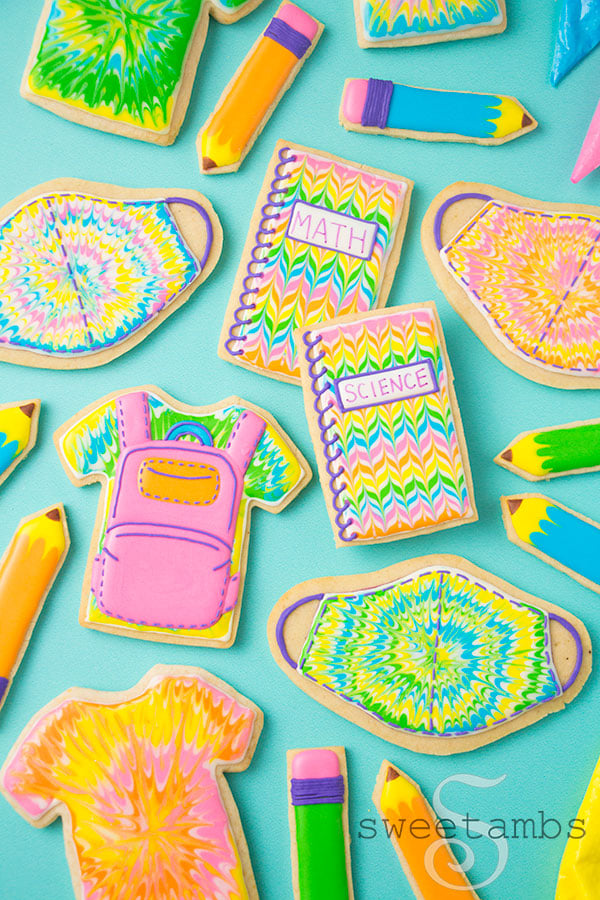
Here's what you'll need to make these tie dye back to school cookies
These supplies come in my Tie Dye T-shirt Cookie Kit unless otherwise noted.
- Chilled sheet of cookie dough
- T-shirt Cookie Cutter
- Backpack and mask templates
- Knife to cut mask and pencil cookies
- Flood consistency (15-20 second count) royal icing in white, pink, orange, yellow, green, and blue
- Medium consistency (soft peak) royal icing in purple
- 7 Tipless Decorating Bags
- 7 Bag Ties
- Scribe tool
- Edible ink marker (available in my Amazon Store)
Read my Ultimate Guide To Royal Icing to learn all about royal icing consistencies.
Color Combinations (I used Chefmaster)
- Pink = Neon Brite Pink
- Orange = 2 parts Lemon Yellow + 1 part Neon Brite Pink
- Yellow = Lemon Yellow
- Green = 2 parts Lemon Yellow + 1 part Sky Blue
- Blue = Sky Blue
- Purple = 2 parts Neon Brite Pink + 1 part Sky Blue
Templates
Right click on the image below to save the template to your computer and print it out.

Instructions
Begin by making the cookie dough according to the kit instructions.
Cut T-shirt cookies with the cutter from the Tie Dye T-shirt kit.
Use my mask template to cut the mask cookies (link in the description).
To make notebooks, trim the sleeves and neck off of a t-shirt cookie.
To make pencils, cut the t-shirt cookie into strips and cut the ends to a point.
Bake the cookies at 350˚F for about 10 minutes and allow them to cool completely before decorating.
Make the royal icing according to the instructions in the kit. Thin and color the icing and fill the bags. Secure the top of the bags with the bag ties (see my Tie Dye T-shirt Cookie Video for instructions on this process).
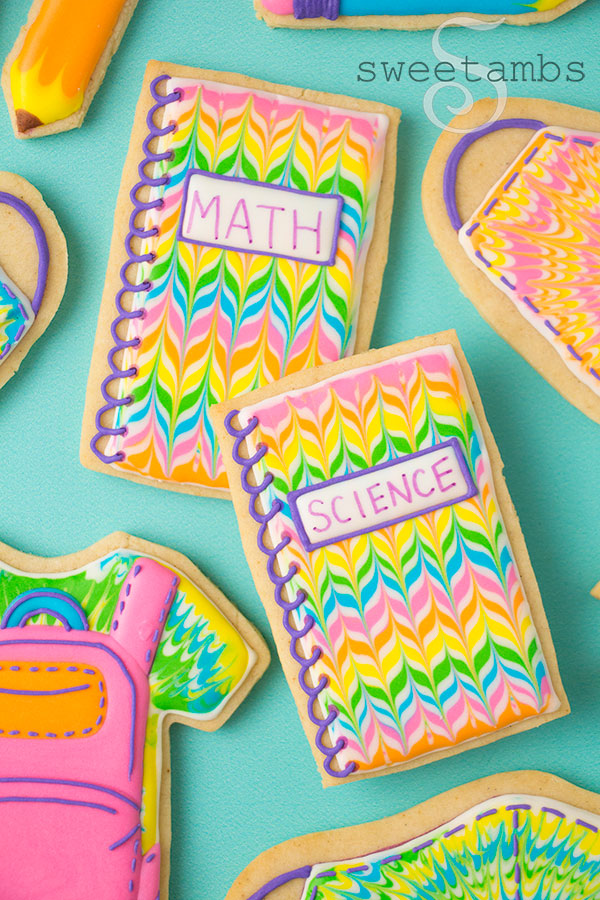
Cut a small opening in the decorating bags and outline the notebook cookie with white icing.
Ice the cookie with stripes of each color of icing.
Add a line of white icing in between each color.
Drag the scribe tool up and down through the icing. Allow the icing to dry for about an hour.
Pipe a small rectangle of white on the notebook cookie. Use the scribe tool to help shape the icing.
Allow the icing to dry completely (overnight is best). You can move on to the other cookies while the icing dries.
Draw a line of dots along the edge of the notebook with the edible ink marker.
Write the subject of the class in the white rectangle.
Outline the rectangle with purple medium consistency (soft peak) icing.
Add a spiraled wire by piping a curved line of icing starting on a dot and ending behind the next one.
Repeat these curved lines all along the edge of the notebook to give the illusion of a spiral.

To make the T-shirt, outline the cookie with white icing.
Pipe spirals with 3 different colors.
Pipe a spiral of white icing in between each color. Use the scribe tool to fill in any gaps.
Drag the scribe tool using long strokes starting in the middle and moving out toward the edge.
Make shorter strokes with the scribe tool in between.
Allow the icing to dry completely (overnight is best). You can move on to the other cookies while the icing dries.
Trace the backpack template with the edible ink marker (link in the description).
Ice the straps with pink icing or the color of your choice. Use the scribe tool to help shape the icing. Allow the icing to dry for about 30 minutes.
Ice the top section of the backpack with pink leaving a space for the pocket.
Use the scribe tool to help shape the icing. Allow the icing to dry for another 30 minutes.
Fill in the bottom section with pink and fill in the pocket with orange. Use the scribe tool to help shape the icing.
Allow the icing to dry for another 2 hours.
Pipe zippers and stitches with purple medium consistency icing.
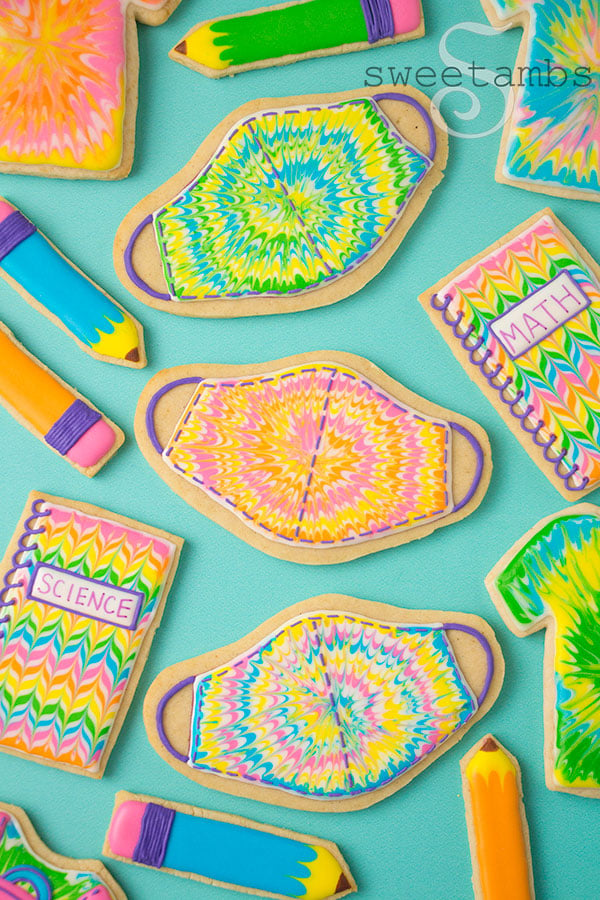
Trace the mask template on the mask cookie with an edible ink marker.
Outline the mask with white icing.
Pipe spirals with 3 different colors.
Outline each swirl with white icing.
Drag the scribe tool using long strokes starting in the middle and moving out toward the edge.
Make shorter strokes with the scribe tool in between.
Allow the icing to dry completely (overnight is best). You can move on to the other cookies while the icing dries.
Pipe stitches with purple medium consistency icing.
Use the purple medium consistency icing to pipe the straps on the mask.
Add a line of stitches in the middle of the mask.
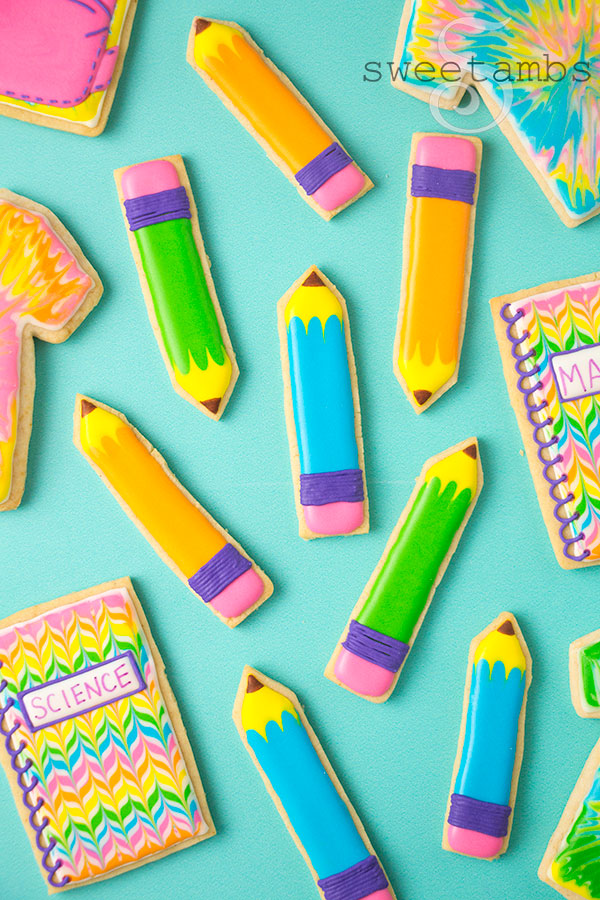
To make the pencils, ice the top with yellow icing. Use the scribe tool to help shape the icing.
Ice the handle with blue icing (or another color of your choice). Use the scribe tool to help shape the icing.
Pipe the eraser with pink icing. Use the scribe tool to help shape the icing.
Allow the icing to dry completely (overnight is best).
Use an edible ink marker to draw the tip of the pencil.
Add a ferrule by piping lines of purple medium consistency icing.



