
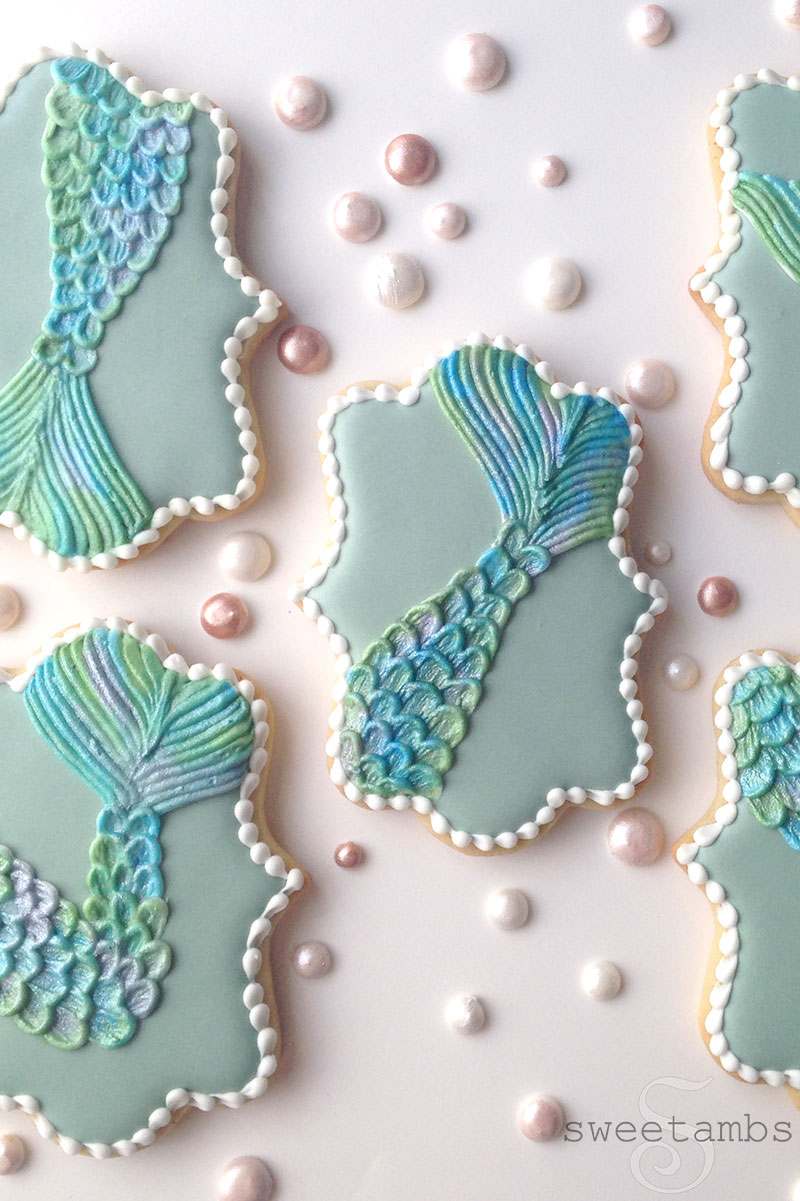
These mermaid tail cookies were inspired by a technique that I used to create a set of dinosaur cookies a few weeks ago.
This time, I used the brush embroidery technique to create the scales rather than using SugarVeil® as I did on the dino cookies, but the SugarVeil® Mesh Mat would work really well here, too. The pearlescent finish is achieved by applying a combination of colorful pearl dusts.
You can watch this members-only video tutorial (without ads!) when you join my Cookie Art Club!
Get access to exclusive cookie decorating tutorials, my cookie and royal icing recipes, and individualized cookie decorating advice by joining my Cookie Art Club!
 --
--
This post contains affiliate links. Read my affiliate disclosure here.
Here's what you'll need to make these mermaid tail cookies:
- Roll out cookie dough (use your favorite recipe or get mine in the tutorial shop)
- Plaque cookie cutter
- Flood consistency royal icing
- Stiff consistency royal icing
- Decorating tip 3
- Decorating tip 2
- 12" decorating bags
- Scribe Tool
- Purple Pearl Dust
- Blue Pearl Dust
- Green Pearl Dust
- Square tip brush
- Soft brush
- Paint palette or small dish
- Alcohol (I like to use 160 proof vodka) or flavored extract (why? read this post on painting with pearl dust)
- Pale green icing made with the Wilton Color Right color system
--
To make the mermaid tail cookies, start by icing a plaque cookie with pale green flood consistency royal icing and a tip 3. This color was made using the chart that comes in the 
Once the icing is completely dry (I usually allow my icing to dry at least 8 hours), scratch a mermaid tail shape into the icing using a scribe tool. 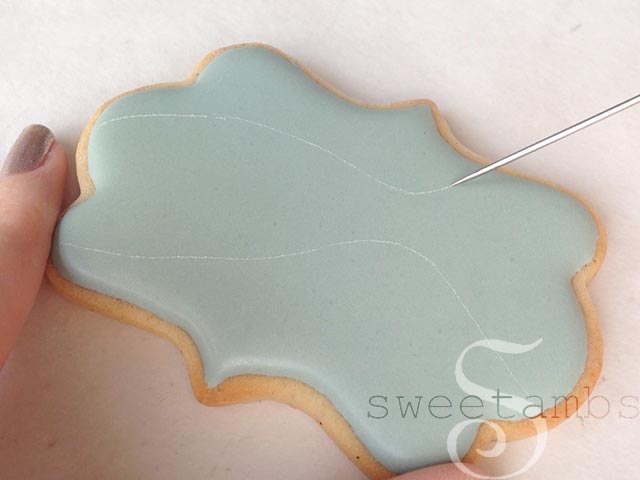
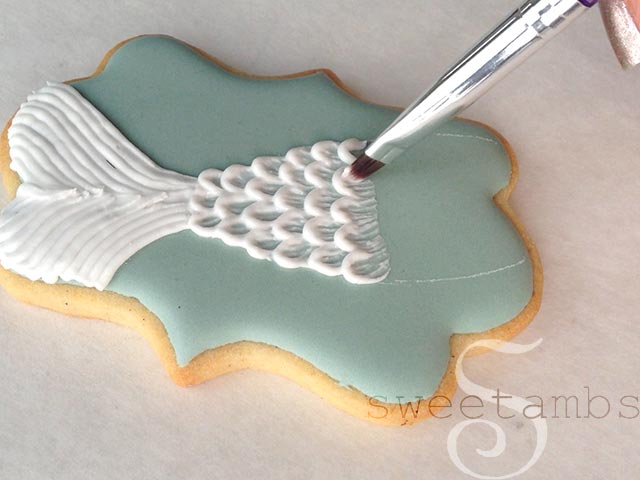
Fill in the fin with lines of stiff consistency royal icing and a tip 2. 
Fill in the rest of the tail using the brush embroidery technique. Start by piping a ruffled line with stiff icing and a tip 2, and then drag the icing with a square tip brush. Allow the icing to dry about 30 minutes.

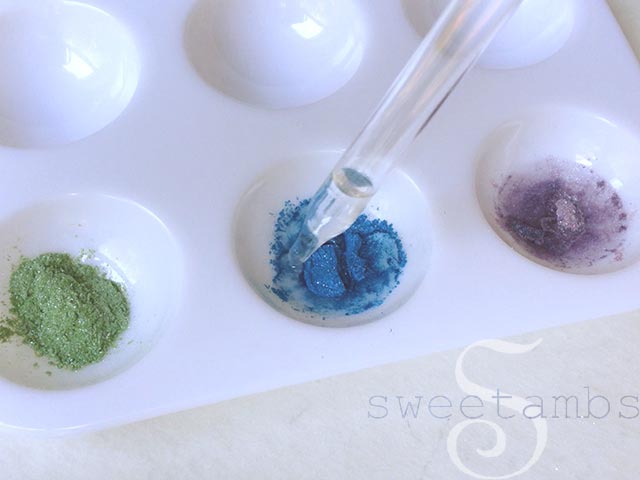
Place a small amount of pearl dust into a paint palette or small cups. I used Wilton blue, purple, and green pearl dusts. These are available at the craft store in the cake decorating aisle, or find them on Amazon.
Add a few drops of alcohol or flavored extract and mix well. Read this post to learn more about painting with pearl dust.
Use a soft brush to apply the edible pearl paint to the dry icing. Start with blue, then add purple, then green. The paint will be dry within a couple of minutes. I used this technique to make reptile skin on this
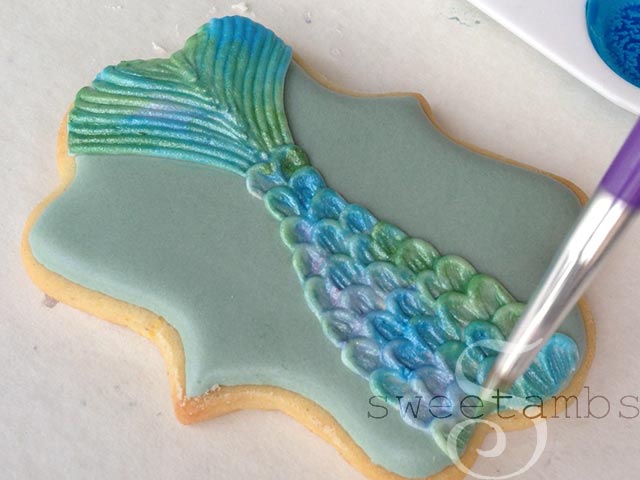
Finish the cookie by 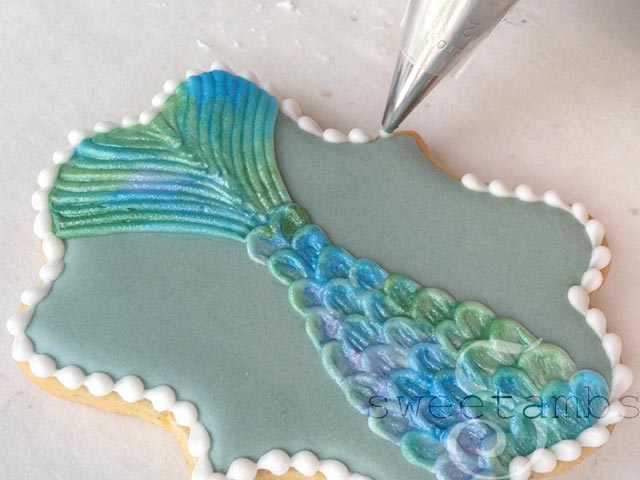
--
--
--




These are beautiful!
Can you taste the alcohol once everything has dried? Looking to make some cookies for a 1 year old's birthday and not sure this would be safe for children. Would clear vanilla extract work just as well?
Thanks!
Thanks, Annie! Vanilla extract works just as well (vanilla extract also contains alcohol). The alcohol evaporates very quickly and you can't taste it, but I recommend letting the parents know the process for painting the cookies before the kids eat them.
You can actually use water instead, but then there's the chance that the icing might start to dissolve as you're painting. This post has more information about that: https://www.sweetambs.com/tutorial/gold-royal-icing-alternatives-to-alcohol/
What a joy to have found your website today! It's very artistic - and inspiring for my own creations! Thanks!
Thank you, Ashlyn!
Wow looks gorgeous. Literally just stumbled upon your website! Quick q I cannot seem to find the scribe tool anywhere, can you please send me a link, preferably somewhere that ships to Australia
Regards
Gulshen
Thank you, Gulshen! I'm so glad you found my website. You can find scribe tools (aka modeling tool, scriber needle) on Amazon: https://bit.ly/scribetool
As always, spectacular! Thanks for sharing the process and tutorial. I may try to do this. lol Hold your breath! lol
I did a very large cookie and I am somewhat pleased with it. Not overly joyed but it was a good attempt. I goofed doing the hair and plan on trying to fix that area. I am not confident... I want to use the piping technique that you used to pipe in the tail. With that in mind, to me, the rows won't be large enough. I'm looking at tips to use but still am not sure I can pull it off.
Thanks again for this great tutorial! When I scrolled down and saw the picture I was agog - lol. You are truly a great lady/artist.
Absolutely stunning! Beautiful work. 🙂
Thank you, Michele!!
Gorgeous as always! I'm wondering if you could explain what you meant by using the mesh mat in this technique. I'm having trouble envisioning it.