How To Transfer A Template Onto A Cookie


I normally pipe my filigree cookies freehand, but this time I wanted my design to be perfectly symmetrical and so I created a filigree template. In this tutorial, I’ll show how to transfer a template onto a cookie 3 different ways (without a projector!). Watch the video and get the supply list below!
Get access to exclusive cookie decorating tutorials, my cookie and royal icing recipes, and individualized cookie decorating advice by joining my Cookie Art Club!
This post contains affiliate links. Read my affiliate disclosure here.


I used these 3 methods to transfer the template onto these Valentine’s Day cookies
The filigree template and stencil file are available in my Cookie Art Club
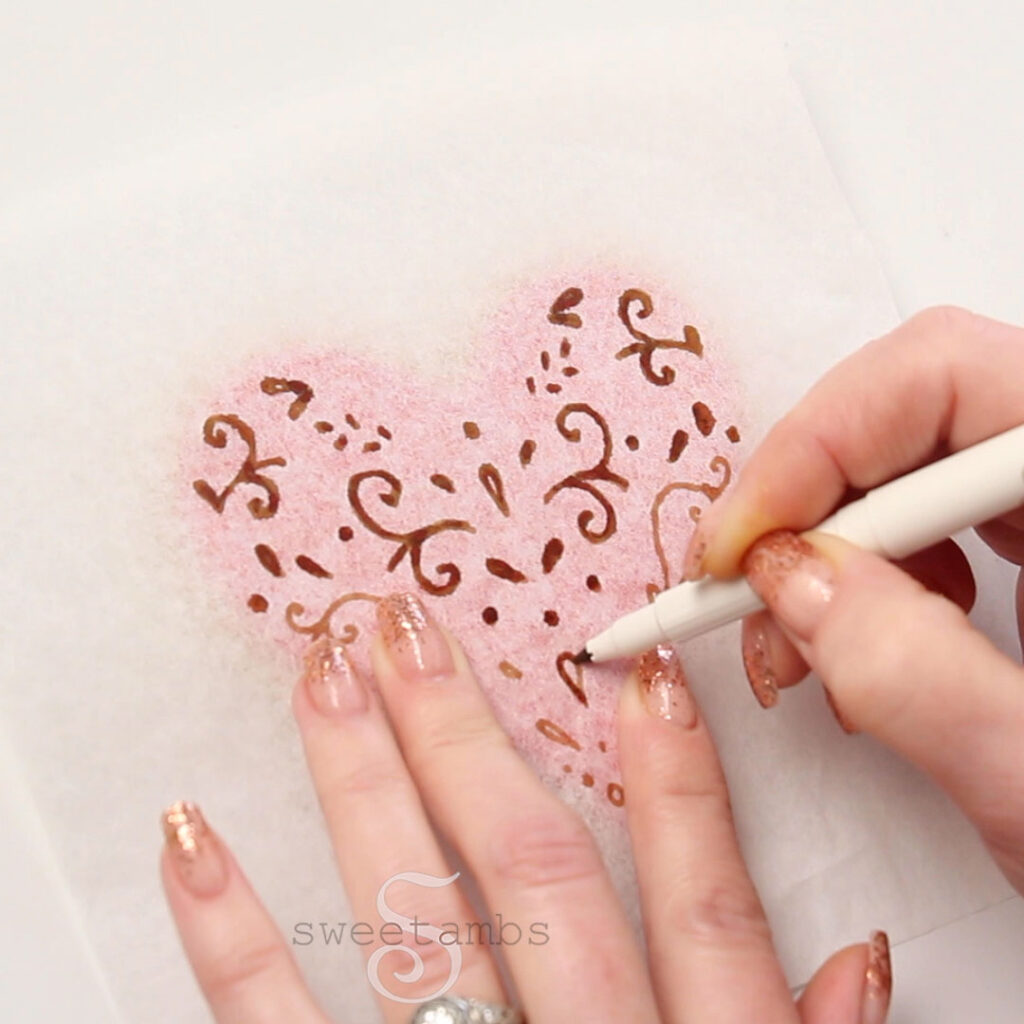
Tissue Paper Method This method is done by tracing the template on a piece of tissue paper with an edible ink marker, then placing the tissue paper over the iced cookie, and tracing over it again with the edible ink marker so that the ink bleeds through the paper onto the cookie.
In this video, you’ll see that only the moisture from the marker bled through the paper, but not the ink. In this case, I was still able to see the design clearly on the icing, but if you are not able to see your design, you’ll need to trace over it again with the edible marker. See this tutorial for another demonstration of the tissue paper method.

Scribe Tool Method This is a technique that I learned way back in my Wilton days. For this method, you’ll place your template over the cookie and poke holes through the template and into the surface of the icing. It’s not a perfect transfer, but it’s good for a general guide when you pipe filigree.
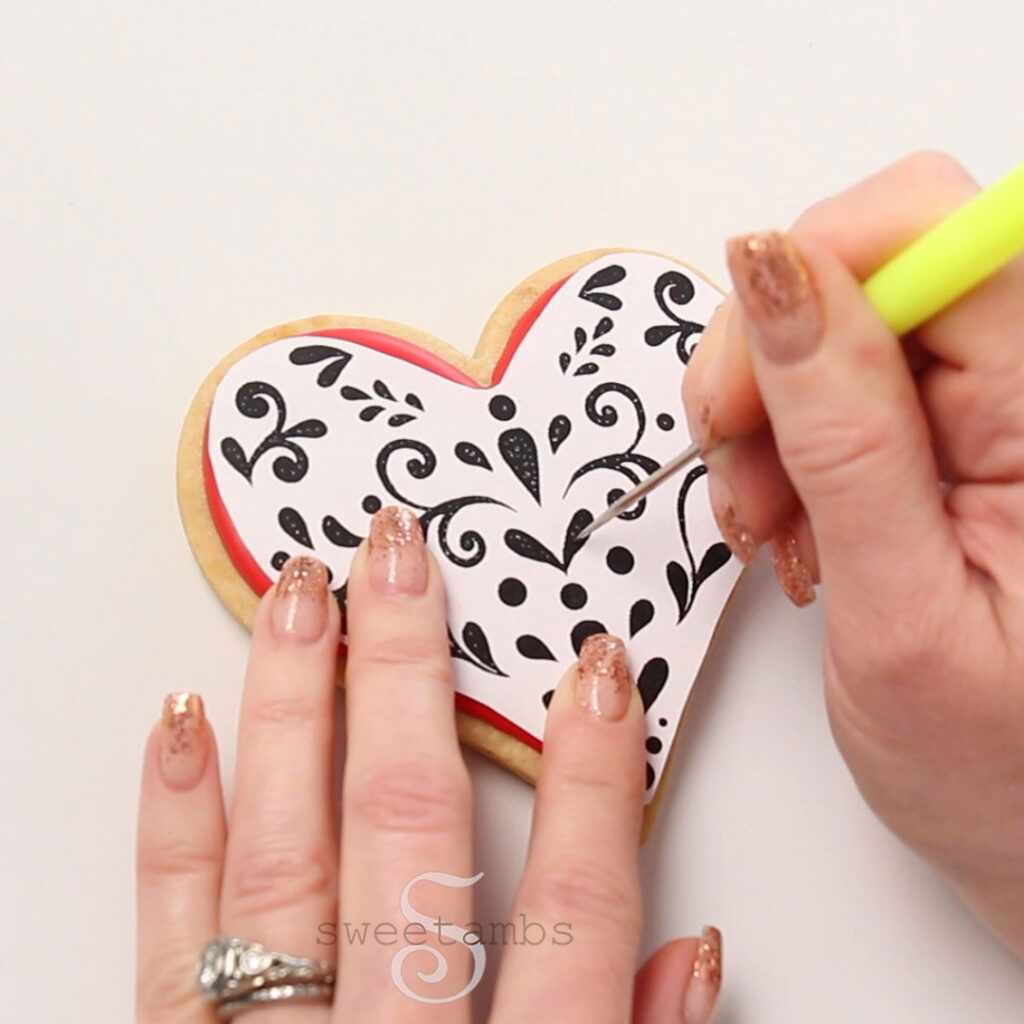

Stenciling Method This method is the most accurate for transferring a template, but it involves a few pieces of equipment. First, cut the stencil with a cutting machine like a Silhouette Portrait or a Cricut (You can download my filigree stencil file by becoming a member of the Cookie Art Club).
Then, airbrush the stencil with a light color like yellow or pink. The color should be visible to you for a guide, but you don’t want it showing around the edges of the filigree when you’re finished piping.

Here’s what you’ll need to make these filigree Valentine’s Day cookies
Supplies
The icing measurements will give you enough to make one dozen cookies. Adjust the amounts depending on how many cookies you need.
- Chilled sheet of cookie dough (recipe in the Cookie Art Club)
- 3-⅝” Heart cookie cutter
- 1-¼” cup red flood consistency royal icing
- ¼ cup light beige medium consistency royal icing
- 2 – 12” decorating bags
- Couplers and bag ties
- Decorating tips 1, 2, and 3
- Scribe tool
- Heart filigree template
- Airbrush (optional)
- Yellow airbrush color (optional)
- Stencil holder (optional)
- Stencil cutting machine and stencil material (optional)
- Edible ink marker (optional)
- Tissue paper (optional)
Read my Ultimate Guide To Royal Icing to learn all about royal icing consistencies.
Colors (I used Chefmaster)
- Super Red
- Light beige = a touch of Buckeye Brown and a touch of Lemon Yellow
Instructions
- Cut the cookies from a chilled sheet of cookie dough and bake them according to the recipe instructions. Allow the cookies to cool completely.
- Fit a decorating bag with a coupler and a decorating tip 3. Fill the bag with red flood consistency royal icing.
- Flood the cookies with the red icing. Use the scribe tool to help shape the icing. Allow the cookies to dry overnight.
- To transfer the design using an edible ink marker, place a piece of tissue paper over the template. Trace the design with the marker. Place the tissue paper on top of the iced cookie and trace over the design again so that the ink bleeds through the paper onto the cookie. If the ink is not showing up on the cookie, you can go over the design again with the marker.
- To transfer the design using a scribe tool, place the template over the iced cookie. Use the scribe tool to poke holes through the design and into the surface of the icing.
- To transfer the design using an airbrush, cut the stencil with your stencil cutting machine. Place the cookie and the stencil into a stencil holder and lightly airbrush it with yellow airbrush color. You can also trace the stencil with an edible ink marker.
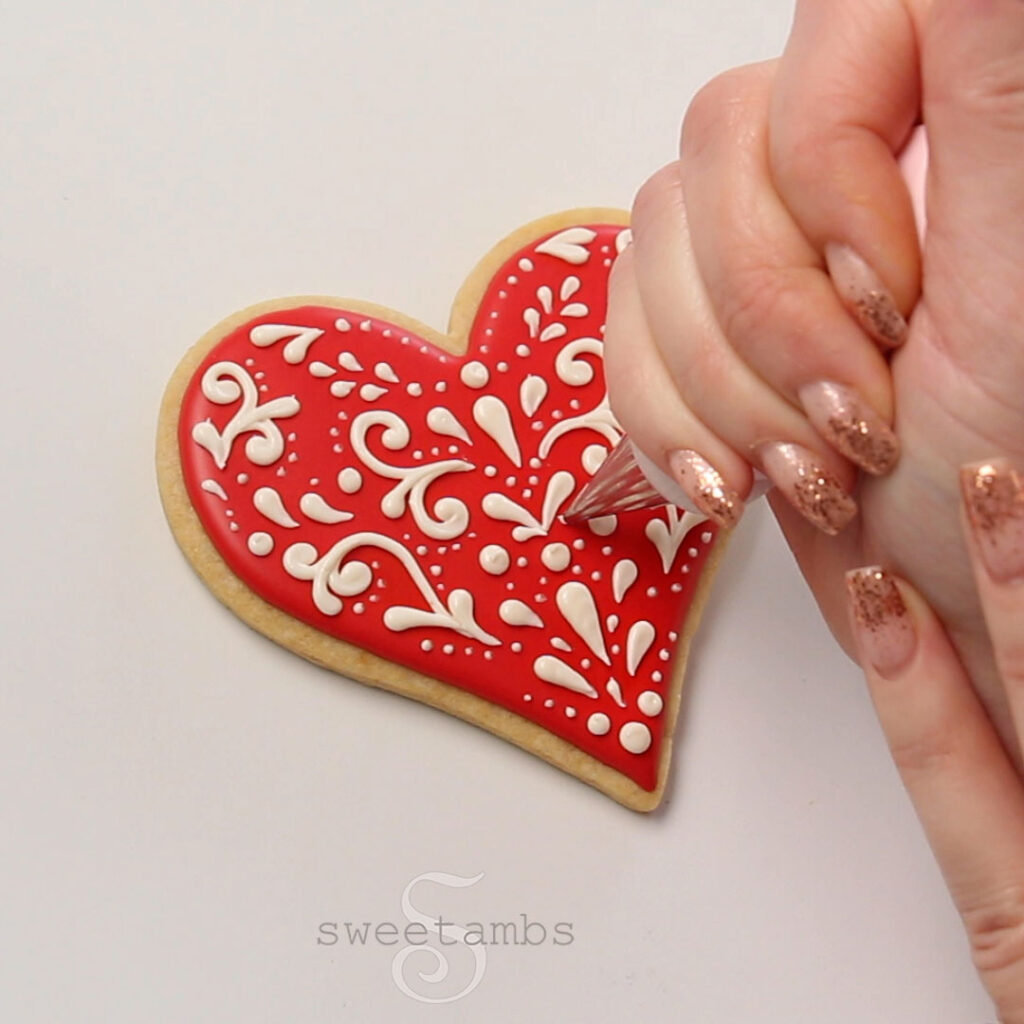
- Fit a decorating bag with a coupler and a decorating tip 2. Fill the bag with light beige medium consistency royal icing.
- Pipe over the design with the medium consistency icing. To pipe the smaller details, switch the decorating tip to a number 1 tip.
- Switch the tip back to a decorating tip 2 to pipe a bead border.
