I’m so excited for the new AWOLNATION album. I've been listening to "The Best" on repeat! The new album Angel Miners and The Lightning Riders comes out April 24th.
This post is sponsored by Better Noise Music
Listen to "The Best" here: https://awolnation.ffm.to/thebestawolnation
Pre-order the album here: https://awolnation.ffm.to/amlr
I recreated AWOLNATION's album art with royal icing and edible paint on a 7x7” cookie. Scroll down for the full tutorial, printable instructions, and supply list!
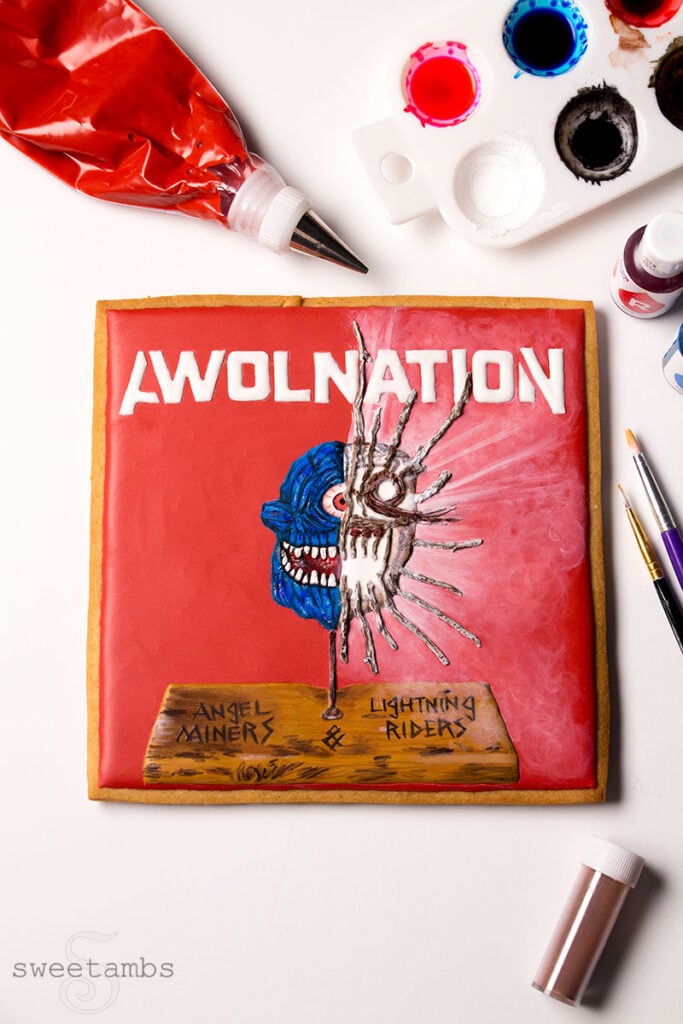
Here's what I used to make this AWOLNATION cookie
These supplies are available in my Amazon Store unless otherwise noted.
- Chilled sheet of cookie dough
- Paring knife to cut the cookie
- Printed artwork to use as a template
- Scissors
- Flood consistency royal icing in red, white, blue, and golden brown (I used Wilton Color Right food coloring)
- Stiff consistency royal icing in gray
- Decorating tips 1, 2, and 3
- Decorating bags
- Couplers
- Scribe tool aka scriber needle
- Edible black dust (I used Crystal Colors Black Coal - available at sugarpaste.com)
- Edible white dust (I used Crystal Colors Snow Flake)
- Edible brown dust (I used Wilton Color Dust)
- Food coloring for painting (I used Wilton Color Right)
- Alcohol or any flavor extract for painting (I use Devil’s Spring 151 proof vodka. Alcohol is used for painting on royal icing because it evaporates very quickly, which means that the liquid won’t dissolve the icing as you are applying the paint.
- Paint palette or small dishes for mixing colors
- Decorator brushes (I used the round brush from the Wilton 5 piece set)
- Thin artist brush
Instructions
- Ice a 7x7” cookie with red flood consistency royal icing and a decorating tip 3. Use a scribe tool to help shape the icing. Allow the icing to dry completely (overnight is best).
- Print the artwork on a piece of paper to use as a template.
- Cut out the letters, keeping them all in one piece.
- Place the template on the dry icing and trace it with something sharp like a scribe tool. Use the scribe tool to complete the letters.
- Cut the rest of the pieces to use as templates. Trace each piece with the scribe tool.
- Fill in the letters with flood consistency royal icing and a decorating tip 1. Use the scribe tool to help shape the icing.
- Fill in the rest of the elements with flood consistency royal icing and a decorating tip 1. Use the scribe tool to help shape the icing. Allow the icing to dry completely (overnight is best).
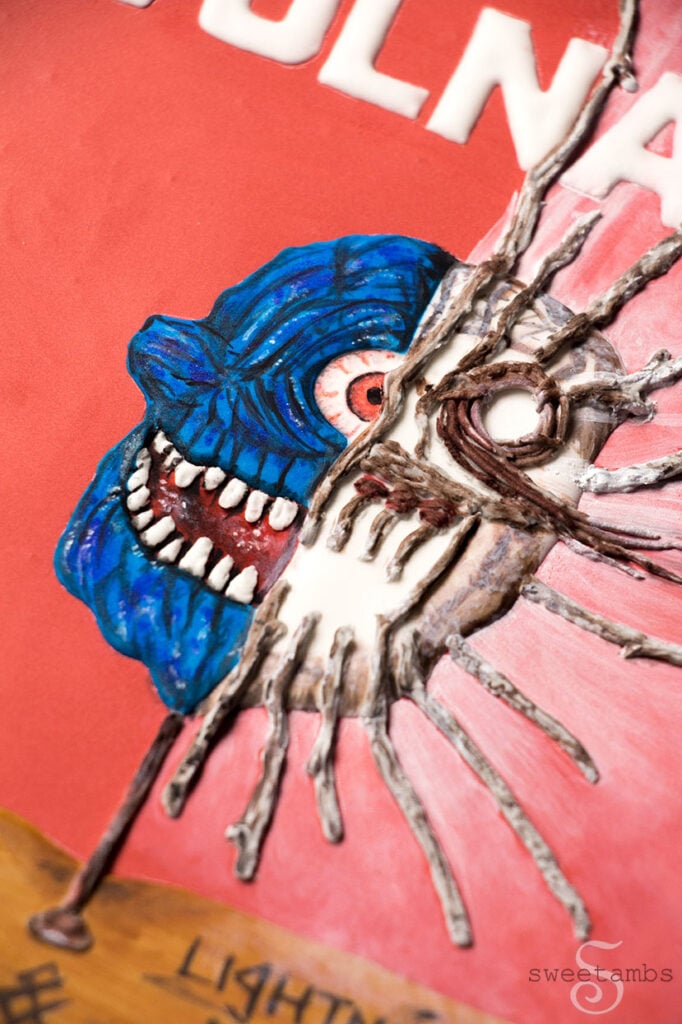
- Pipe the branches with a decorating tip 1 and stiff consistency icing for texture. Use the scribe tool to help shape the icing. Allow the icing to dry for about 30 minutes.
- To make edible paint, mix powdered and liquid food coloring with vodka or any flavor extract, such as vanilla, lemon, or almond. The powdered food coloring creates an opaque edible paint while the liquid food coloring is translucent. Keep the artwork nearby to refer to while painting the details.
- Add teeth with medium consistency royal icing and a decorating tip 1.
Printable instructions and supply list for the AWOLNATION cookie
AWOLNATION Album Art Cookie
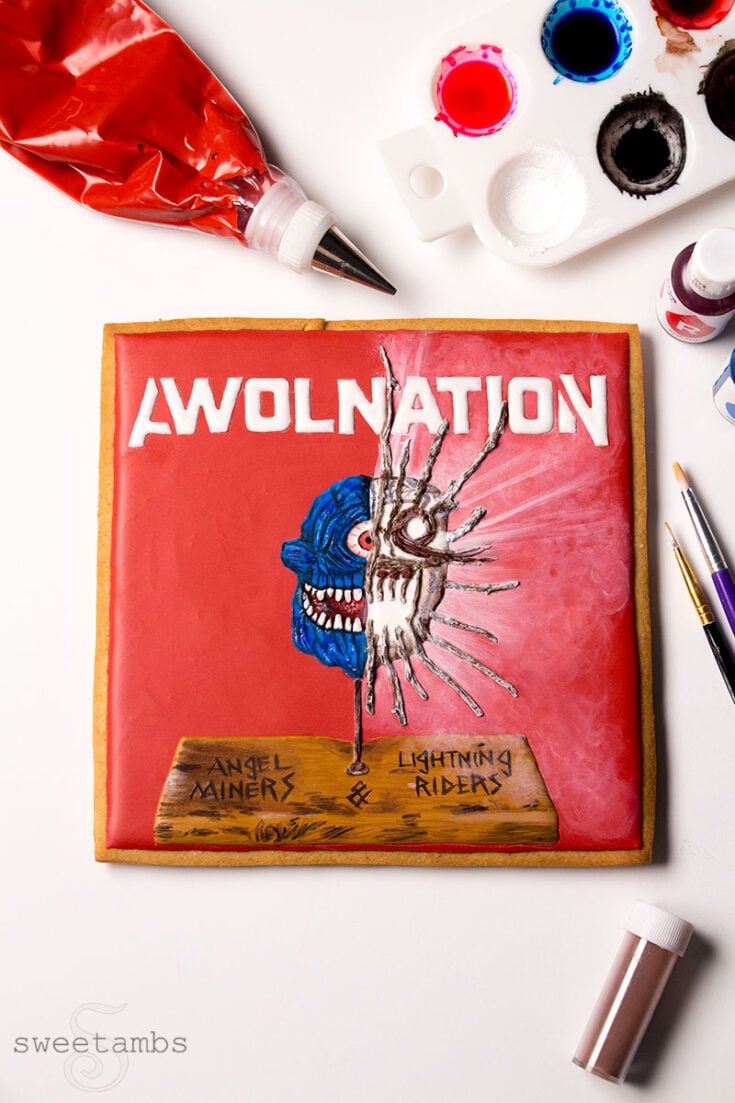
Learn how to recreate album art on a cookie using royal icing in this tutorial by SweetAmbs. These supplies can be found in my Amazon Store unless otherwise noted.
Materials
- Chilled sheet of cookie dough
- Paring knife to cut the cookie
- Printed artwork to use as a template
- Scissors
- Flood consistency royal icing in red, white, blue, and golden brown (I used Wilton Color Right food coloring)
- Stiff consistency royal icing in gray
- Decorating tips 1, 2, and 3
- Decorating bags
- Couplers
- Scribe tool aka scriber needle
- Edible black dust (I used Crystal Colors Black Coal - available at sugarpaste.com)
- Edible white dust (I used Crystal Colors Snow Flake)
- Edible brown dust (I used Wilton Color Dust)
- Food coloring for painting (I used Wilton Color Right)
- Alcohol or any flavor extract for painting (I use Devil’s Spring 151 proof vodka. Alcohol is used for painting on royal icing because it evaporates very quickly, which means that the liquid won’t dissolve the icing as you are applying the paint.
- Paint palette or small dishes for mixing colors
- Decorator brushes (I used the round brush from the Wilton 5 piece set)
- Thin artist brush
Instructions
- Ice a 7x7” cookie with red flood consistency royal icing and a decorating tip 3. Use a scribe tool to help shape the icing. Allow the icing to dry completely (overnight is best).
- Print the artwork on a piece of paper to use as a template.
- Cut out the letters, keeping them all in one piece.
- Place the template on the dry icing and trace it with something sharp like a scribe tool. Use the scribe tool to complete the letters.
- Cut the rest of the pieces to use as templates. Trace each piece with the scribe tool.
- Fill in the letters with flood consistency royal icing and a decorating tip 1. Use the scribe tool to help shape the icing.
- Fill in the rest of the elements with flood consistency royal icing and a decorating tip 1. Use the scribe tool to help shape the icing. Allow the icing to dry completely (overnight is best).
- Pipe the branches with a decorating tip 1 and stiff consistency icing for texture. Use the scribe tool to help shape the icing. Allow the icing to dry for about 30 minutes.
- To make edible paint, mix powdered and liquid food coloring with vodka or any flavor extract, such as vanilla, lemon, or almond. The powdered food coloring creates an opaque edible paint while the liquid food coloring is translucent. Keep the artwork nearby to refer to while painting the details.
- Add teeth with medium consistency royal icing and a decorating tip 1.