
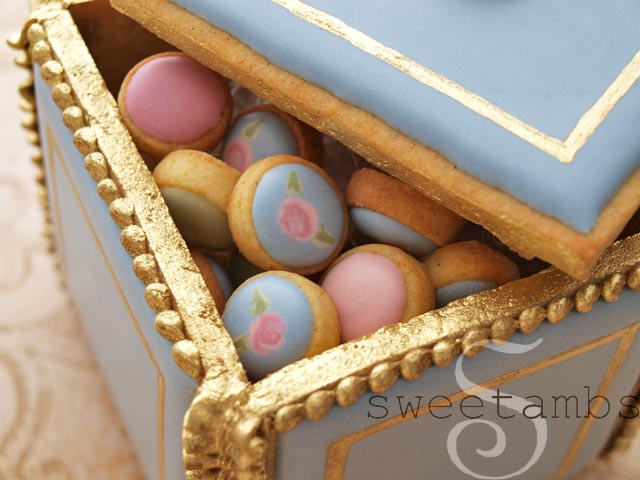
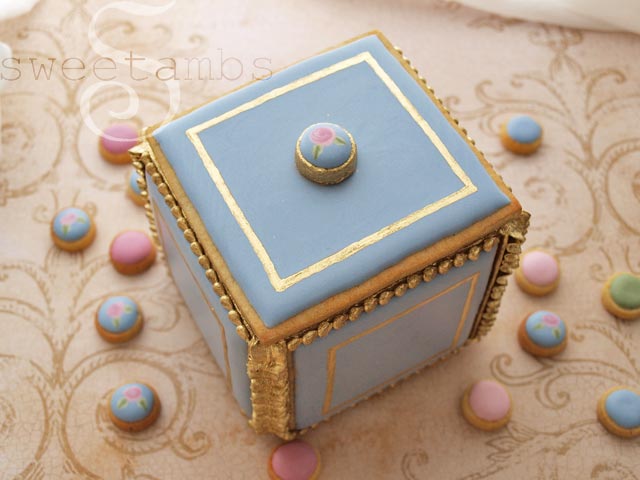
A couple of months ago, my fiancé was hired to film a performance by the Salomé Orchestra at the MET and so I tagged along. Before that day, I could not have told you what a harpsichord was (still can't, but at least now I know what one looks like). As soon as I saw this blue and gold piano-esque instrument, I knew right away that I had to somehow turn it into a cookie! I can't seem to find a photo online that looks like the one that inspired this design, but you can get a glimpse of the harpsichord in the background of the video of the Salomé Orchestra performance.
--
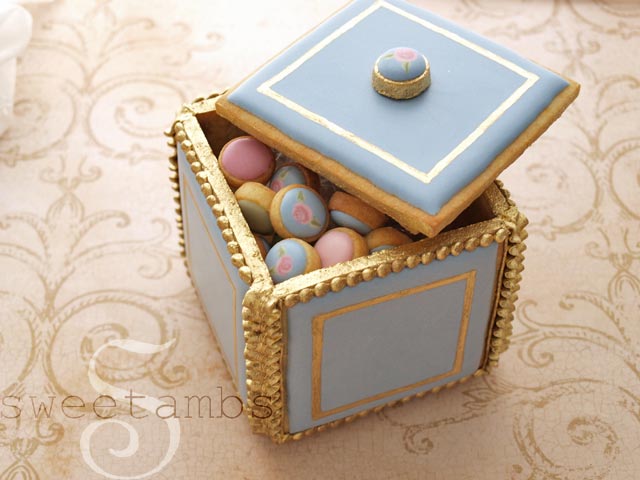
Last year, I posted instructions on how to make a cookie box in a brush embroidered cookie box tutorial. This new harpsichord inspired box that I filled with mini cookies and gave to my parents for their anniversary in January is built almost the same way, but with a few improvements.
--

For this project, you will need: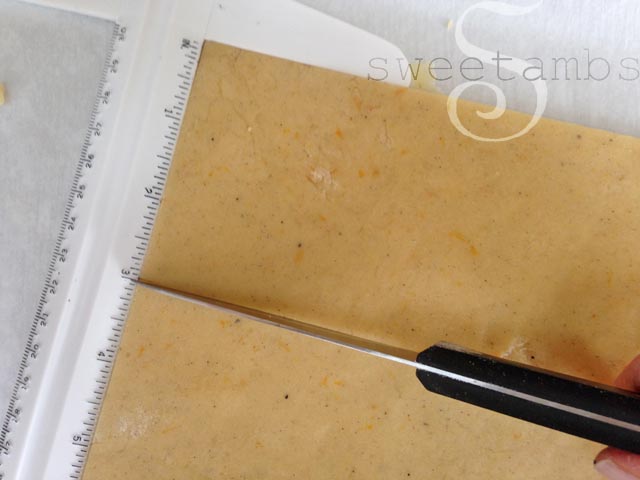 --
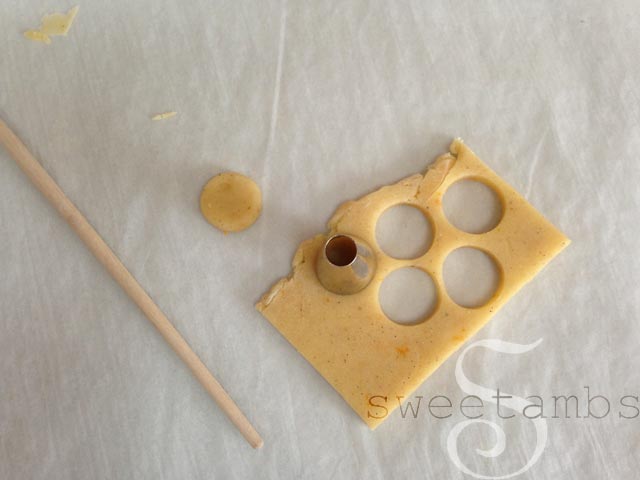
Use the large end of a decorating tip 12 to cut out tiny circles and push the dough out of the tip using the back of a brush. If you use a tip smaller than a size 8, you probably won't be able to fit the brush through it to push the dough out.
--
Use the large end of a decorating tip 12 to cut out tiny circles and push the dough out of the tip using the back of a brush. If you use a tip smaller than a size 8, you probably won't be able to fit the brush through it to push the dough out.
 --
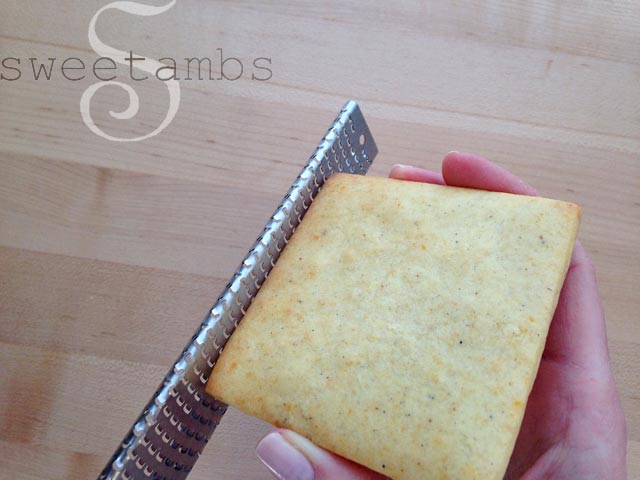
If the edges on your cookies are uneven, you can use a microplane to smooth them out once they are baked and cooled. Even if the pieces don't match up perfectly, it's okay because you can fill in the gaps with icing when you glue them together.
--
If the edges on your cookies are uneven, you can use a microplane to smooth them out once they are baked and cooled. Even if the pieces don't match up perfectly, it's okay because you can fill in the gaps with icing when you glue them together.
 --
Once you have all of your cookie pieces baked, cooled and filed (if necessary), ice them with blue flood consistency royal icing and a tip 3. Visit my tutorial shop for a video with full instructions on flooding with royal icing.
--
Once you have all of your cookie pieces baked, cooled and filed (if necessary), ice them with blue flood consistency royal icing and a tip 3. Visit my tutorial shop for a video with full instructions on flooding with royal icing.
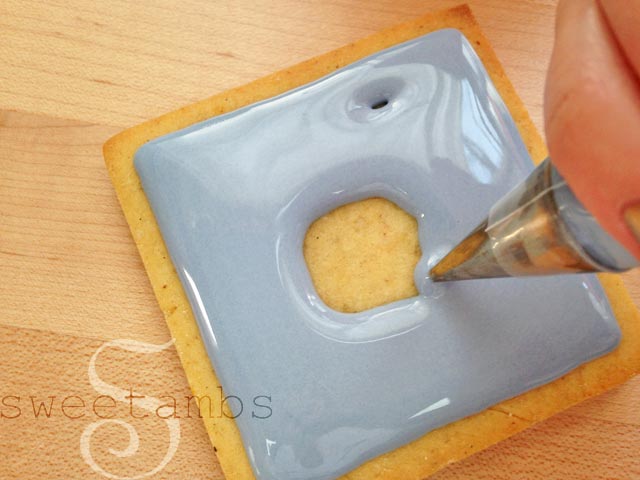 --
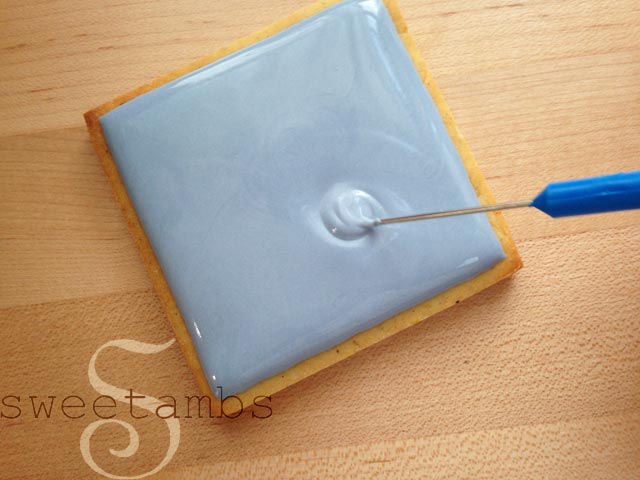
Use the scribe tool to evenly distribute the icing and make the corners sharp (all of this is in the flooding video mentioned above).
--
Use the scribe tool to evenly distribute the icing and make the corners sharp (all of this is in the flooding video mentioned above).
 --
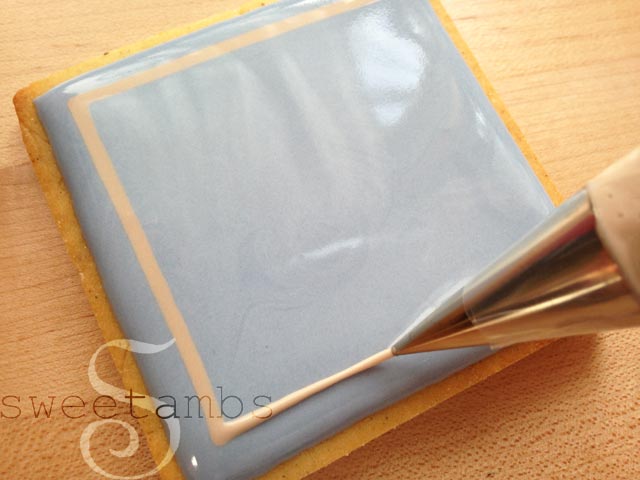
While the blue icing is still wet, pipe a line around the inside edge using tan flood consistency icing and a tip 1.
--
While the blue icing is still wet, pipe a line around the inside edge using tan flood consistency icing and a tip 1.
 --
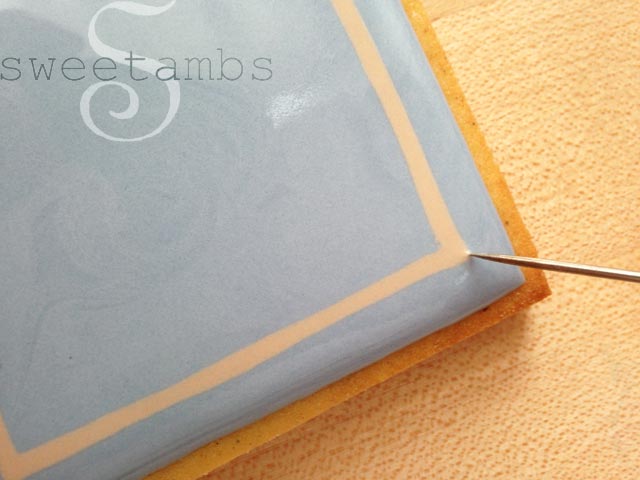
You can use the scribe tool to help sharpen the corners where the lines meet.
--
You can use the scribe tool to help sharpen the corners where the lines meet.
 --
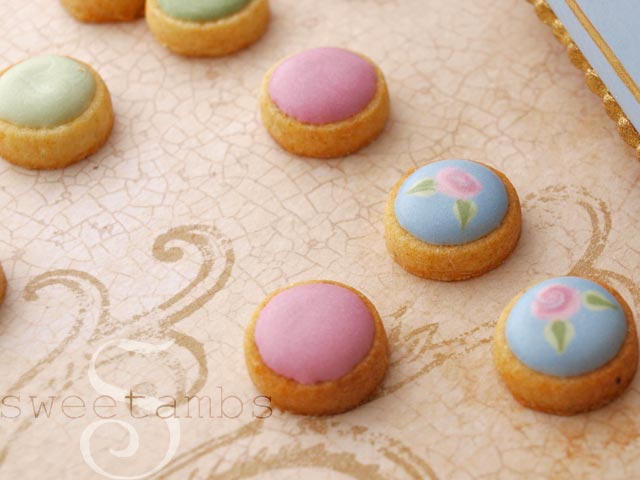
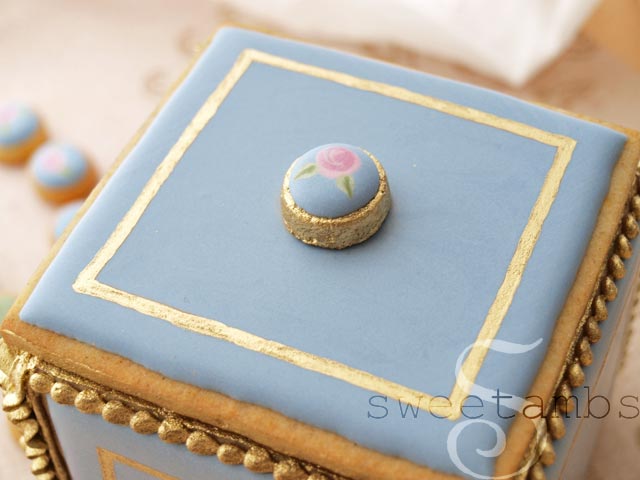
You'll need to ice the 4 side pieces, the lid and one of the tiny circles for the knob that goes on top of the lid. If you want to make a rose on the knob like the one shown here, you can do that using the the wet on wet technique.
--
You'll need to ice the 4 side pieces, the lid and one of the tiny circles for the knob that goes on top of the lid. If you want to make a rose on the knob like the one shown here, you can do that using the the wet on wet technique.
 --
Allow the icing to dry 8-12 hours.
Normally, when I'm painting on cookies, I use products that are meant for use on food, such as the Wilton gold pearl dust or the new FDA approved gold dust from NY Cake. This gold highlighter (also from NY Cake) is non toxic, but not meant to be consumed, so I'm using it only for the box and not on the cookies that will be eaten. This gold highlighter would also be suitable for things like fondant cake toppers or gum paste rose petals as shown on my display at the Claire Pettibone runway show.
--
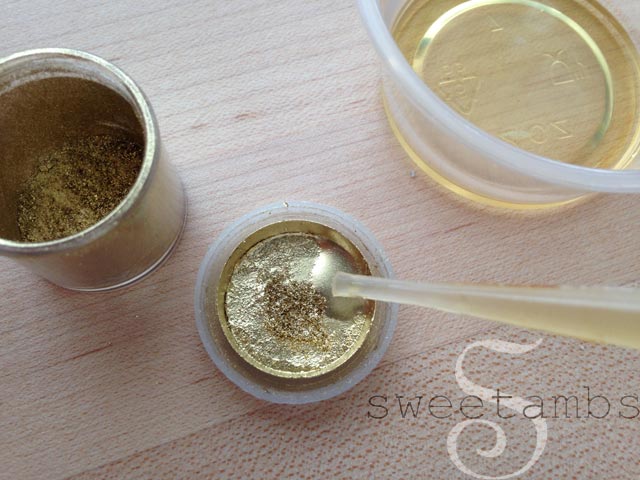
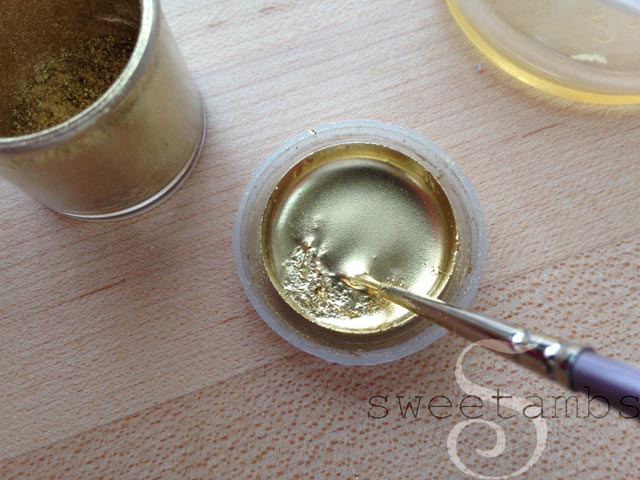
Mix the gold dust with a few drops of alcohol or flavored extract and mix it to form a paint. You can learn more about painting with gold in this post about how to make gold royal icing.
--
Allow the icing to dry 8-12 hours.
Normally, when I'm painting on cookies, I use products that are meant for use on food, such as the Wilton gold pearl dust or the new FDA approved gold dust from NY Cake. This gold highlighter (also from NY Cake) is non toxic, but not meant to be consumed, so I'm using it only for the box and not on the cookies that will be eaten. This gold highlighter would also be suitable for things like fondant cake toppers or gum paste rose petals as shown on my display at the Claire Pettibone runway show.
--
Mix the gold dust with a few drops of alcohol or flavored extract and mix it to form a paint. You can learn more about painting with gold in this post about how to make gold royal icing.
 --
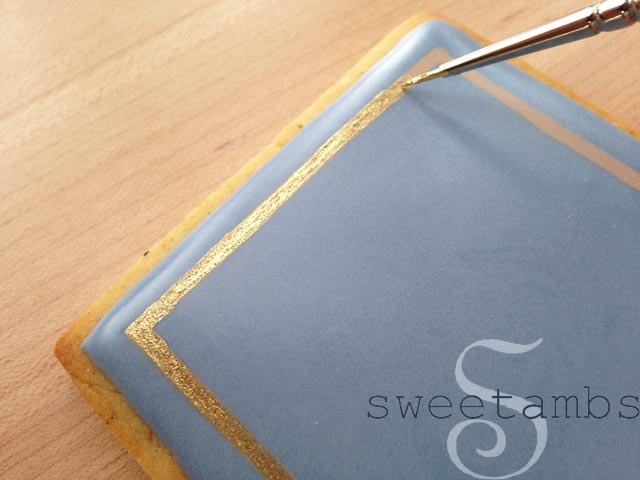
Carefully paint over the tan lines using the small brush.
--
Carefully paint over the tan lines using the small brush.
 --
Now you can put the box together. The sides and bottom of this box are assembled just like they were in the brush embroidered cookie box tutorial. From this point on, the construction is a little bit different.
--
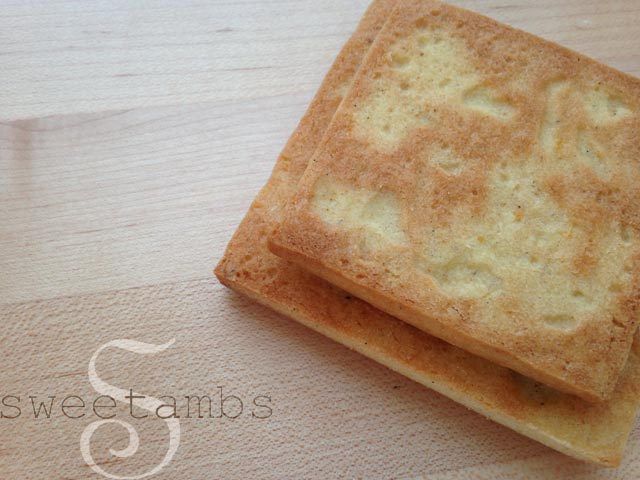
This is the bottom view of the two lid pieces glued together with a little bit of royal icing. The smaller piece fits inside the 4 walls of the box to keep the lid from sliding around.
--
Now you can put the box together. The sides and bottom of this box are assembled just like they were in the brush embroidered cookie box tutorial. From this point on, the construction is a little bit different.
--
This is the bottom view of the two lid pieces glued together with a little bit of royal icing. The smaller piece fits inside the 4 walls of the box to keep the lid from sliding around.
 --
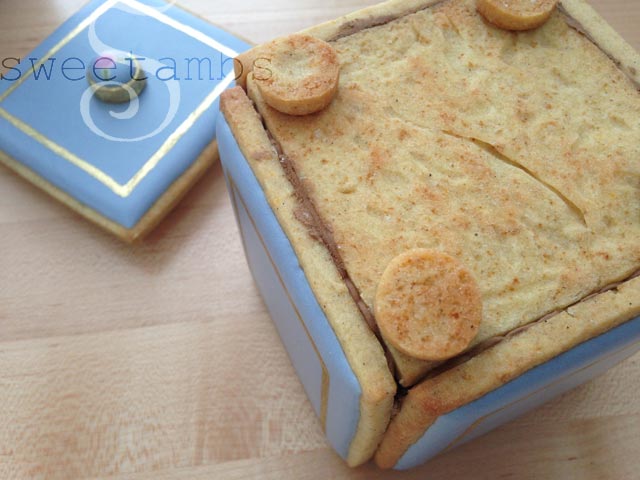
Flip the box over and place the feet on the bottom using a little bit of icing.
--
Flip the box over and place the feet on the bottom using a little bit of icing.
 --
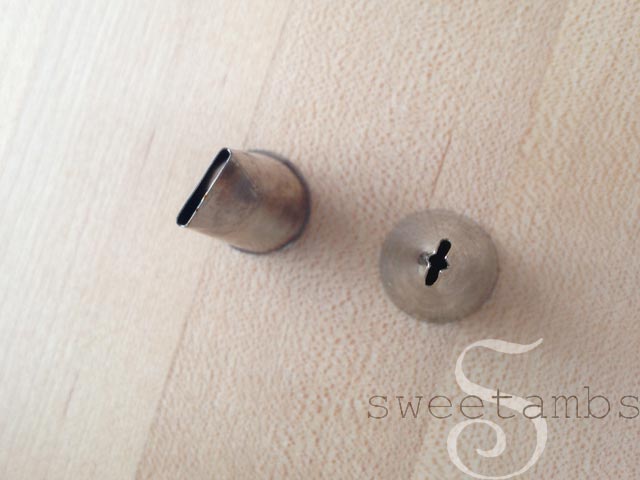
To decorate the corners of the box, I used a flat tip 45 and a leaf tip 67.
--
To decorate the corners of the box, I used a flat tip 45 and a leaf tip 67.
 --
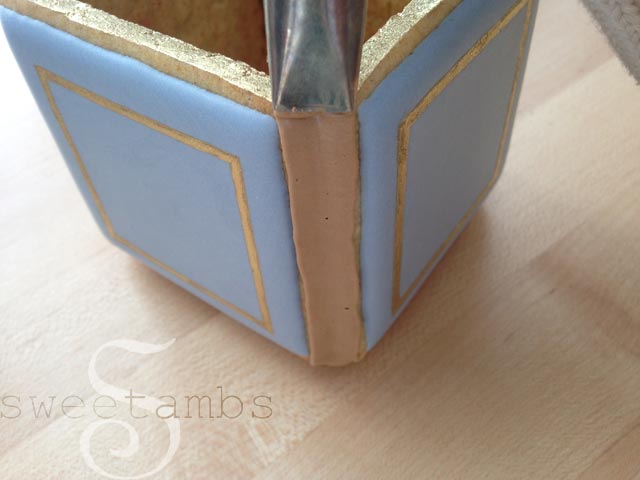
Using stiff consistency tan icing and the tip 45, pipe over the seams of the box.
--
Using stiff consistency tan icing and the tip 45, pipe over the seams of the box.
 --
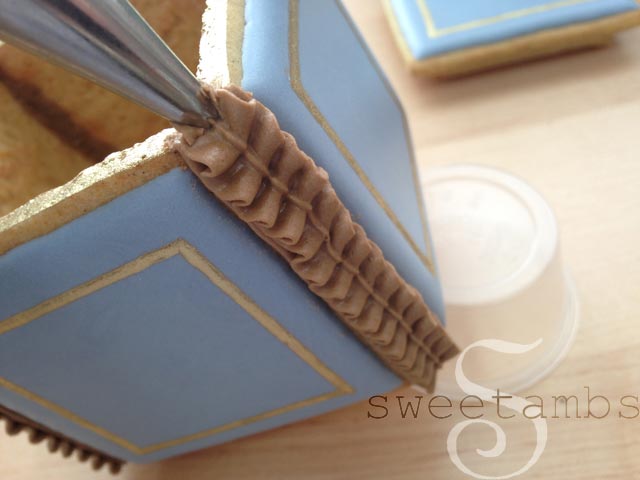
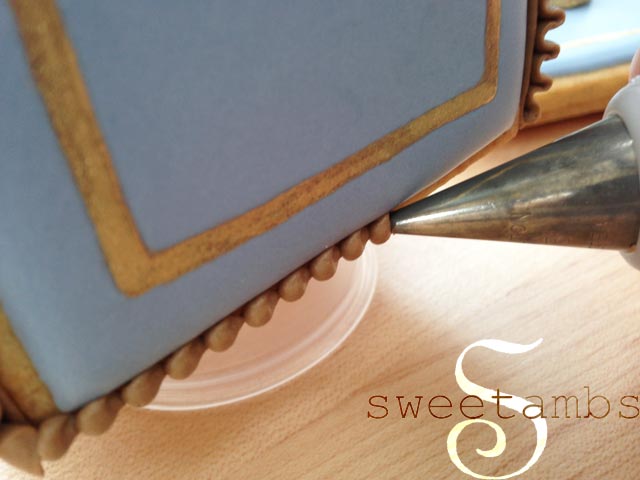
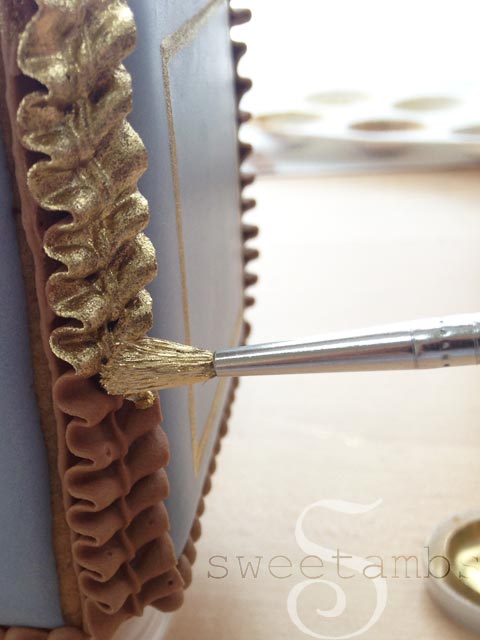
Then, use the leaf tip to pipe a ruffle in each corner with the same stiff icing. To make this ruffle, I started at the bottom and piped up while moving the tip in and out. I also propped one side of the box up on a tiny cup so that the corner of the box was facing slightly up towards me. It was a better angle for piping on the corners.
--
Then, use the leaf tip to pipe a ruffle in each corner with the same stiff icing. To make this ruffle, I started at the bottom and piped up while moving the tip in and out. I also propped one side of the box up on a tiny cup so that the corner of the box was facing slightly up towards me. It was a better angle for piping on the corners.
 --
Add a bead border with a tip 3. There is a video in my tutorial shop with full instructions on how to pipe a bead border.
This is one of the rare times that I used a coupler. I used the same stiff icing with three different tips, so I needed the coupler so that I could easily switch between them.
--
Add a bead border with a tip 3. There is a video in my tutorial shop with full instructions on how to pipe a bead border.
This is one of the rare times that I used a coupler. I used the same stiff icing with three different tips, so I needed the coupler so that I could easily switch between them.
 --
Allow the icing to dry about an hour and then paint the borders with the same gold mixture that was used to paint the lines earlier.
--
Allow the icing to dry about an hour and then paint the borders with the same gold mixture that was used to paint the lines earlier.
 --
If you're interested in learning more about cookie decorating, take my online cookie decorating class!
--
If you're interested in learning more about cookie decorating, take my online cookie decorating class!
This post contains affiliate links. Read my affiliate disclosure here.
For this project, you will need:
- Your favorite roll out cookie dough (My orange vanilla spice cookie recipe is available in the tutorial shop)
- T-square ruler
- Paring knife
- Flood consistency royal icing
- Stiff consistency royal icing
- Round decorating tips 1, 3, and 12
- Decorating tips 45 (flat basket weave tip) and 67 (leaf tip)
- Gold highlighter (I used the one from NY Cake)
- Small brush
- Soft round brush
- Alcohol or flavored extract
- Blue = Wilton delphinium blue from the garden tone set
- Green = Wilton juniper green from the garden tone set
- Pink = Wilton aster mauve from the garden tone set
- Gold base = Wilton brown + juniper green
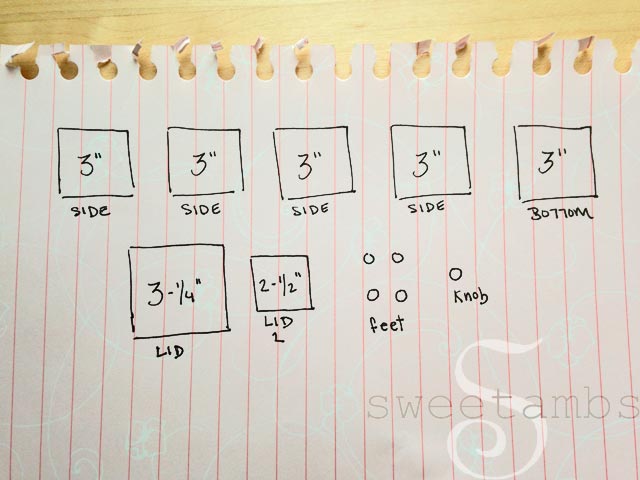
- Five 3" squares for the sides and bottom
- One 3-¼" square for the lid
- One 2-½" square for the underside of the lid
- Four tiny circles for the feet
- One tiny circle for the knob
--
Use the large end of a decorating tip 12 to cut out tiny circles and push the dough out of the tip using the back of a brush. If you use a tip smaller than a size 8, you probably won't be able to fit the brush through it to push the dough out.
--
If the edges on your cookies are uneven, you can use a microplane to smooth them out once they are baked and cooled. Even if the pieces don't match up perfectly, it's okay because you can fill in the gaps with icing when you glue them together.
--
Once you have all of your cookie pieces baked, cooled and filed (if necessary), ice them with blue flood consistency royal icing and a tip 3. Visit my tutorial shop for a video with full instructions on flooding with royal icing.
--
Use the scribe tool to evenly distribute the icing and make the corners sharp (all of this is in the flooding video mentioned above).
--
While the blue icing is still wet, pipe a line around the inside edge using tan flood consistency icing and a tip 1.
--
You can use the scribe tool to help sharpen the corners where the lines meet.
--
You'll need to ice the 4 side pieces, the lid and one of the tiny circles for the knob that goes on top of the lid. If you want to make a rose on the knob like the one shown here, you can do that using the the wet on wet technique.
--
Allow the icing to dry 8-12 hours.
Normally, when I'm painting on cookies, I use products that are meant for use on food, such as the Wilton gold pearl dust or the new FDA approved gold dust from NY Cake. This gold highlighter (also from NY Cake) is non toxic, but not meant to be consumed, so I'm using it only for the box and not on the cookies that will be eaten. This gold highlighter would also be suitable for things like fondant cake toppers or gum paste rose petals as shown on my display at the Claire Pettibone runway show.
--
Mix the gold dust with a few drops of alcohol or flavored extract and mix it to form a paint. You can learn more about painting with gold in this post about how to make gold royal icing.
--
Carefully paint over the tan lines using the small brush.
--
Now you can put the box together. The sides and bottom of this box are assembled just like they were in the brush embroidered cookie box tutorial. From this point on, the construction is a little bit different.
--
This is the bottom view of the two lid pieces glued together with a little bit of royal icing. The smaller piece fits inside the 4 walls of the box to keep the lid from sliding around.
--
Flip the box over and place the feet on the bottom using a little bit of icing.
--
To decorate the corners of the box, I used a flat tip 45 and a leaf tip 67.
--
Using stiff consistency tan icing and the tip 45, pipe over the seams of the box.
--
Then, use the leaf tip to pipe a ruffle in each corner with the same stiff icing. To make this ruffle, I started at the bottom and piped up while moving the tip in and out. I also propped one side of the box up on a tiny cup so that the corner of the box was facing slightly up towards me. It was a better angle for piping on the corners.
--
Add a bead border with a tip 3. There is a video in my tutorial shop with full instructions on how to pipe a bead border.
This is one of the rare times that I used a coupler. I used the same stiff icing with three different tips, so I needed the coupler so that I could easily switch between them.
--
Allow the icing to dry about an hour and then paint the borders with the same gold mixture that was used to paint the lines earlier.
--
If you're interested in learning more about cookie decorating, take my online cookie decorating class!




This is Amazing!! You truly inspire me!!
Thank you, Corina!
what is the consistency of the gold paint? I used the Wilton, only in silver, and it didn't cover. So I made it thicker and it was clumpy and left chunks on it! I sued 151 rum.
Just a tip — I quickly learned that Wilton pearl dust is NOT thick enough for this sort of application. It's better for dry application as a kind of pearlescent sheen to frosting. For the really foiled appearance, you need a much stronger powder. Try looking up lustre dusts on Amazon or Etsy, and check the reviews and example pictures so you know you're getting exactly the right kind.
This is made not to eat, but to put on the Muzeum! too EXTRAORDINARY BEAUTIFUL handmade. my jaw always drop while looking at your cookies tutorial. my head full of compliment but I'm speechless haha - sincerely your biggest fan from Malaysia 🙂
Thank you!! 🙂
Exquisite...extraordinarily beautiful...is there nothing you cannot do. Thank you so much for sharing your talent 🙂
Thank you, Barbara!
You're so clever! I'd love to try this out one day, but I'm sure it'll look nothing like yours 🙂
Wow, wow, wow! Amazing!
Beautiful!!!!!. Beautiful!!!!!...Congratulation!!!
This is exquisite! I love the ruffled edges making the seams so beautifully hidden. The extra layer to make the lid stay in place is brilliant. You never cease to inspire and amaze me! Xxxx
Marvellous .
Congratullations.