
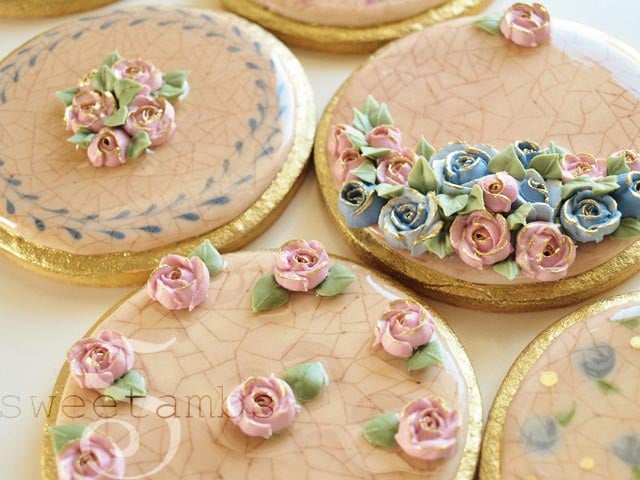
This "cracked glaze" technique is something that I thought of a while back when I accidentally stuck my finger in icing that was dry on the surface, but still wet underneath.
Watch the video to learn how to create this effect!
The pattern that resulted from my clumsy move reminded me of those antique pottery pieces with very fine cracks in the glaze.
A few months later, I was playing around with ways to recreate that effect. The project changed quite a bit from what I thought it would be originally, as you'll see in this tutorial.
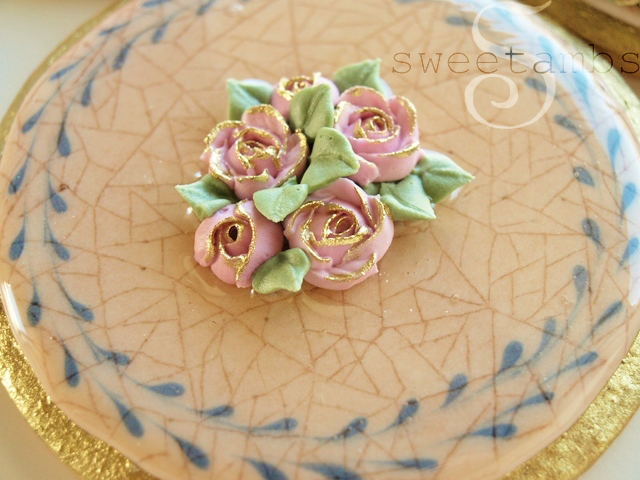
These cookies involve a lot of decoration and, depending on the type of "glaze" you are using (more on that in the video below), they are not ideal for shipping.
I created this design with the idea of an elaborate display cookie, rather than something you'd eat. I think they would be best arranged on a pretty platter and used as a display on a dessert table surrounded by mini cookies and other sweets, or as a centerpiece for an Easter or Mother's Day brunch.
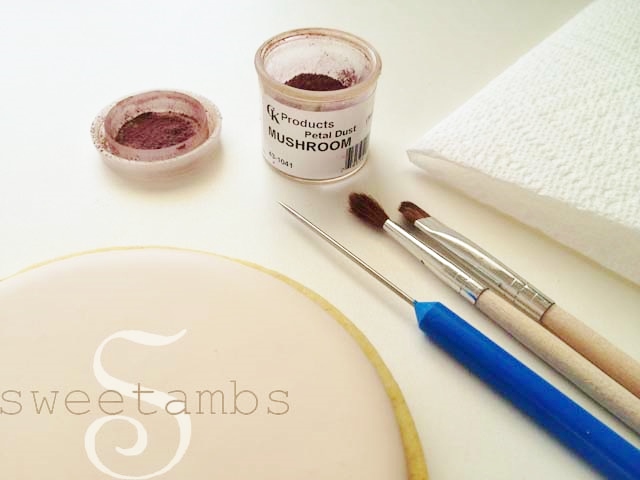
Here are the tools you'll need to create the cracked glaze effect:
- Completely dry, iced cookie (visit my shop for a detailed video tutorial on how to flood a cookie)
- Dark shade of petal dust
- Scribe tool
- Soft round brush
- Angled brush
- Corn syrup mixed with vodka* OR use an edible glaze such as Wilton's Dab-N-Hold (find it in my Amazon Store)
*I originally wrote this post before Wilton's edible glaze was available. I would recommend using the edible glaze as it dries with no stickiness. Keep in mind that it's not quite as shiny as the corn syrup mixture.
Any dark shade of petal dust will work for this method. For this tutorial I'm using CK products petal dust in mushroom, but you could try these FDA approved dusts from Sugarpaste.com.
I also tried using pearl dust, but it wasn't fine enough to get into those small scratches in the surface of the icing.
You can include floral details under the glaze by using the wet-on-wet technique when icing your cookie and then adding the cracked glaze after the icing dries. Read this post for a tutorial on making tiny roses in royal icing using the wet-on-wet technique.
Instructions
Step 1
Use the scribe tool to create scratches in the surface of the icing.
Step 2
Use the soft brush to dust the surface with petal dust. Use a stippling motion rather than a side-to-side motion. The stippling motion will ensure that the dust gets into the scratches.
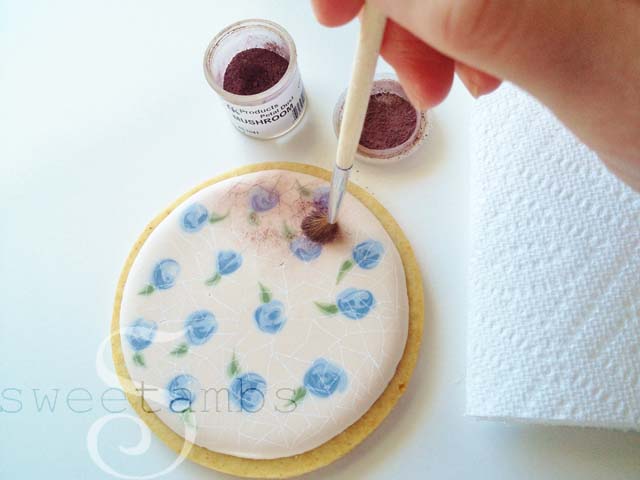
Step 3
Use the angled brush to remove the excess dust from the surface. Use very light pressure to remove the dust so as not to smudge it.
Step 4
Apply the glaze and allow it to dry (if you're using the corn syrup/vodka mixture, it will dry to the touch on the surface but will remain soft underneath).
Once you've finished glazing your cookies, paint the exposed edge of the cookie with a mixture of gold pearl dust and alcohol. Read my post on painting with gold pearl dust to learn more about this process.
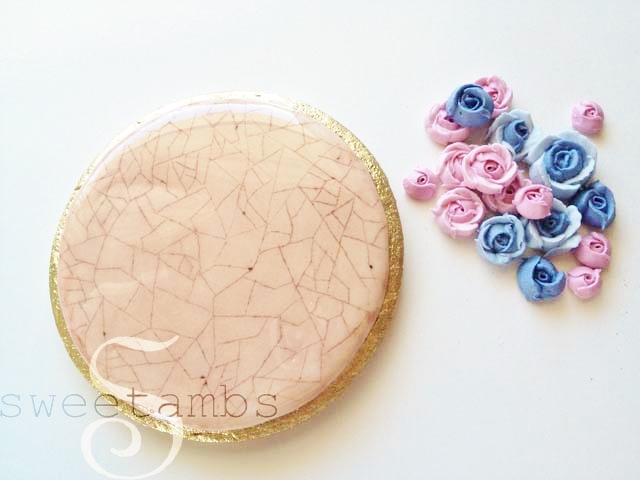
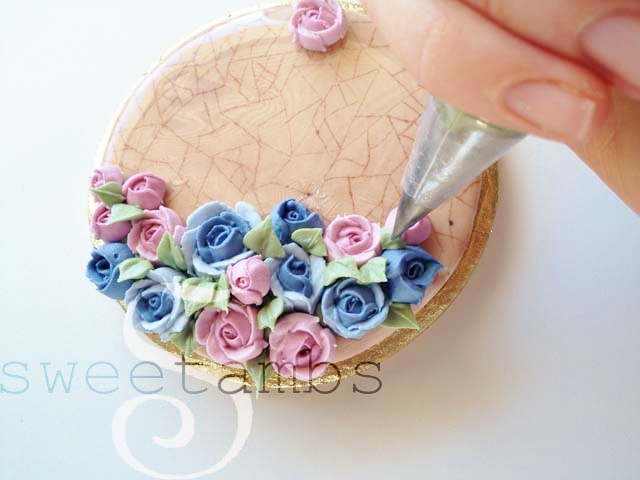
The roses shown here were piped using a petal tip 101 and allowed to dry overnight.
I used the colors from the Wilton Garden Tone 4-Piece Colors Set for the roses and leaves.
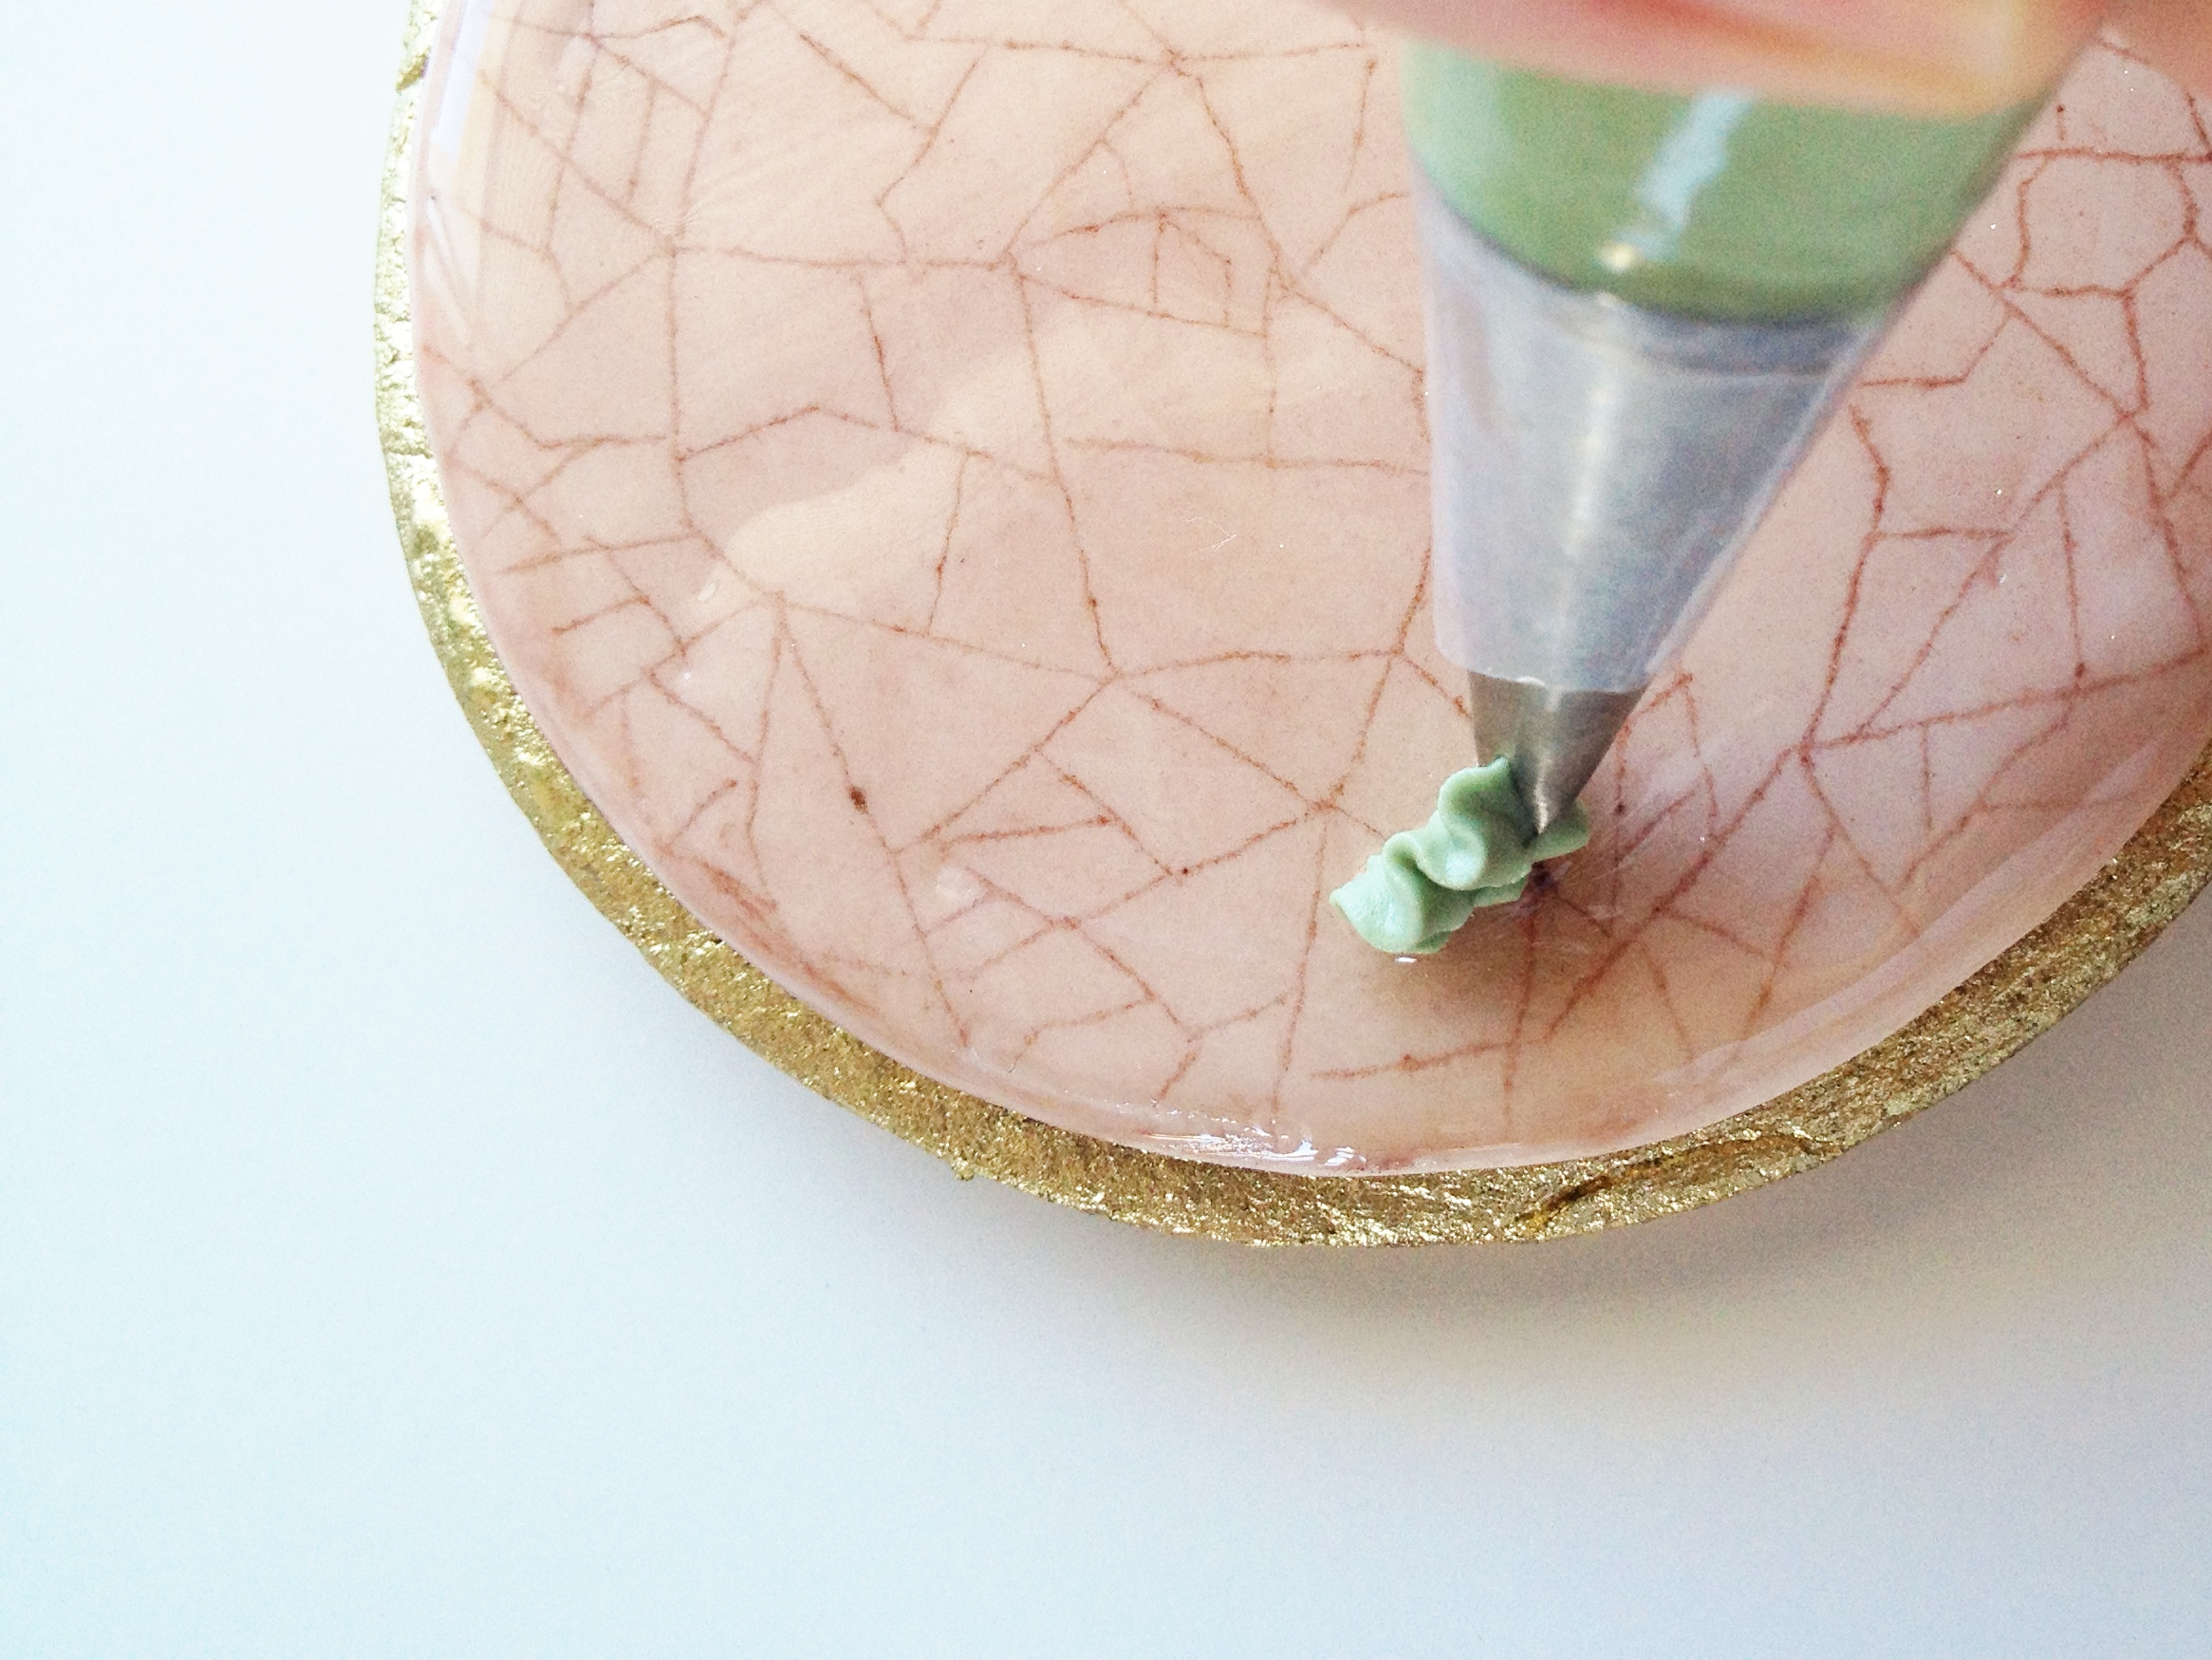
Pipe a mound of stiff consistency icing where your roses will be placed.
Press the roses into the mound of icing.
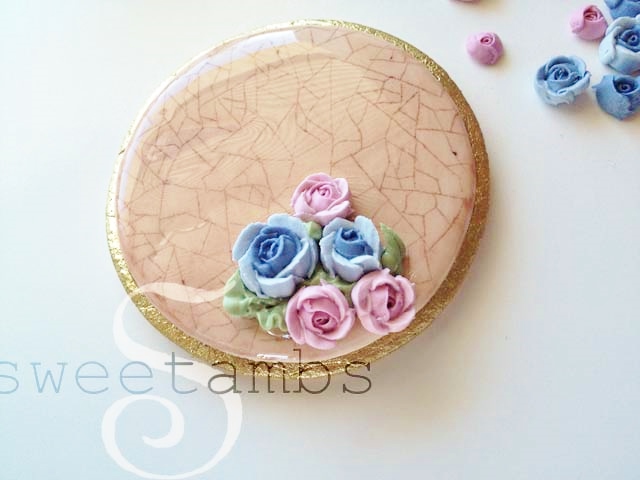
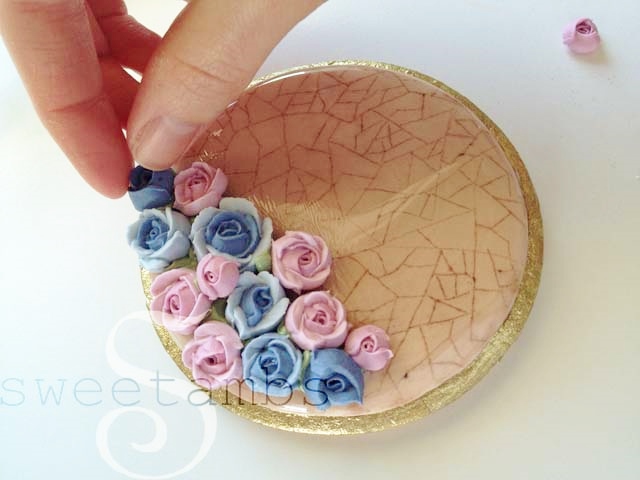
Add leaves using the leaf tip 352.
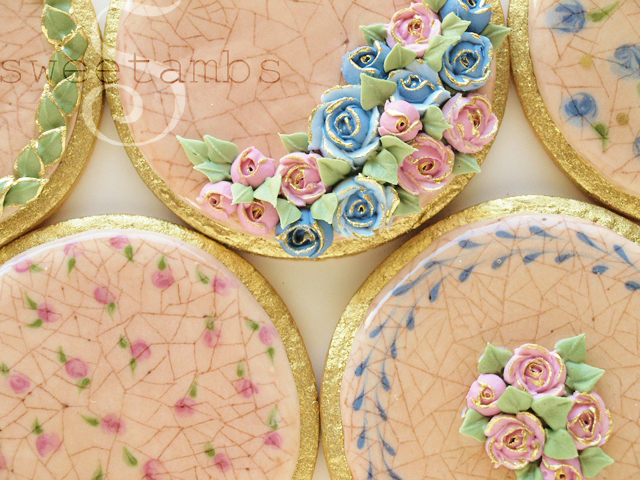
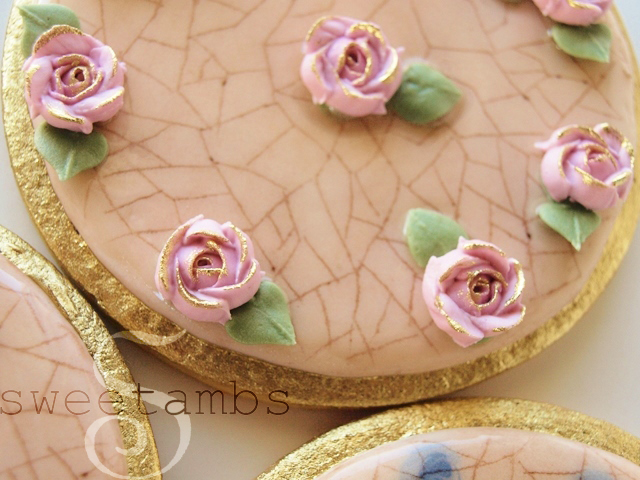
I also added a little gold paint to the edges of the roses.
Troubleshooting
If the dust seems to only stick to the surface of the icing and not in the cracks, it could be because your icing is porous. In order to prevent this, make sure that you have your cookies drying in front of a fan after you ice them.
The faster your icing dries, the smoother the surface will be. If the weather is hot and humid, this will cause the icing to dry slowly and you'll have a dull, porous surface.
Read my Ultimate Guide To Royal Icing to learn more.
If your dust leaves blotchy spots on your icing, it might be caused by fingerprints. To prevent this, only touch the edges of the cookie when handling it.
If the dust is still not getting into the cracks, it could be because your dust is too coarse or because the cracks are not deep enough. Make sure to press hard when scratching the surface of the icing with the scribe tool.
Keep in mind that the dust will leave some color on the surface of the icing no matter what. The cookies shown in this tutorial were iced in white icing.
Shipping glazed cookies
A few months ago, I made some cookies using a similar technique and shipped them to see what would happen. Even though the glaze was dry to the touch, once the cellophane bag touched it, it got stuck.
The cookies that had raised decorations kept the cellophane bag from touching the glazed surface and arrived intact.
So, if you'll be shipping these, make sure to place the roses or other decorations in such a way as to keep the bag lifted up off of the surface of the cookie. Or, use Wilton's edible adhesive instead of the corn syrup and vodka mixture to glaze the cookies.
Read this post for more information on packaging cookies.
This post was originally published in March 2013




Does luster dust work fo this?
Luster dust will work for this as long as it's fine enough to get into the little cracks in the icing. I've used Crystal Colors brand for this technique and it works 🙂
You seem like a really nice person, but your talent is beyond normal and I think you cannot be human. This crackle thing is super crazy. I am in awe. Mind boggling awe. I have followed your work for years, but this is over the top. OVER THE TOP!
Haha! Thank you so much, Tiffany 🙂
Would Confectioners Glaze work well with this? I have to put my cookies in a baggie and I do not want sticky cookies...
I think it could work! Please let me know if you try it.
Muito lindo. Parabéns. Mande uma para mim aqui no Brasil.
What other brands of petal dust are safe to eat? Is Wilton okay?
Yes, Wilton dusts are okay to eat. Other brands that I like to use are Crystal Colors from sugarpaste.com as well as the FDA approved dusts from NYCake.com.
Hi, where can I buy a scribble tool? I am having a hard time finding one. Thanks
Hi Bella. I'm a potter and the scribe tool that she uses is the same that potters use. You can buy them at any potter's supply or ceramic supply store and sometimes even at craft stores. I have even seen them in pottery kits at Hobby Lobby.
Amazon. Scriber needle.
Hello, do you know how achieve a craquelure effect on a cookie? Or the effect of old cracked paint
Hi! I don't have a tutorial on that yet, but a cracked paint effect is on my list of techniques to try!
Trabalho maravilhoso. Só uma artista consegue fazê-lo.
Your work is so very beautiful, that I would find it extremely difficult to eat!
i just love your cookies, they're all amazing... i may ask, how will you make those tiny roses? could you show it to us and teach us? thank you so much....
Wonderful work!!!!!
Congratulationes from Brazil !!
Thank you, Haigli!! 🙂
Hi, I just wanted to let you know that your work is just simply amazing. I mean WOW! Anyways I just wanted to ask if you could do a mosaic piece using this etching technique and food coloring.
Dear Amber,
Is there a "full pack" in your shop where I can buy all your videos and recipes?
Thank you,
Noemi
Hi Noemi,
I don't have that yet, but I'll put it together and let you know when it's ready!
Thank you!
Wow...this is just incredible work. I so wish I had that talent. I would be happy just to be able to bake a pretty cookie. Your products is lovely, looks delish, and so wish I had access to it!!!!
Your work is amazing! I don't have words ! Sorry, I speak a very, very little beat of english. Un abrazo desde México
Thank you!! 🙂
Incredible! Cookie, schmookie! You are an artist and just because your canvas is made of dough doesn't make you any less an artist than Monet! That is what I think of when I look at your beautiful work! Thanks so much for sharing!
Thank you!! 😀
Your designs are the most beautiful I have ever seen! I am order tonite but I just can't wait to try the crackle look! Thanks soo much for sharing your knowledge!
Wow, crazy-amazing!!!! I have been a HUGE fan for a long time. I hope my cookies look like yours when they grow up. 😉 Great job as usual!! ~ Erin, Whip It Good Cookies
Thank you, Erin! 🙂
I have been wanting to write to u a while, tried once but the message didn't go through, discovered your work on youtube in june, and since I have tried to learn some decorating techniques, you keep amazing me, whenever I decorate cookies they look so ugly compared to urs, eventhough everybody else like them! 😀 thank you so much for being a source of inspiration to many including me ofc!
TC
Thank you so much, Rita!
I have just tried this with glucose as corn syrup isn't readily available here. The difference in consistency, however -- glucose being much thicker -- made "brushing" a bit of a challenge. I thinned mine with a wee bit of alcohol which certainly helped the application. They're drying now . . . we'll see!
Thank you Amber. Your work is stunning and truly inspirational!
Thanks, Anna! Let me know how this technique works out with the glucose!
Hi Amber --
I wasn't sure initially as it seemed to stay sticky forever, but now -- a good day later -- it has hardened so that I can touch it and not leave a fingerprint. And the surface is like lacquer or patent leather, that is, a far deeper, shinier glaze than I could get with confectioner's glaze. So if that's what anyone's looking for, it's a winner!
And I can't tell the difference between the alcohol-thinned part and the straight-glucose part, so seems like thinning it down works well. Thank you once again Amber 🙂
Good to know! Thank you so much for the update!
Hi Amber,
I just wanted to pop in and tell you how much I enjoy and look forward to each and every post that you share. Your work is the most innovative, creative and inspiring work I have ever seen and it is so very generous of you to share it with us all. I have followed you from the start and look forward to watching you cosntinu to reach new heights 🙂
Lisa
Thank you, Lisa! It's great to hear from you! Hope business is good for you 🙂
Wonderful tutorial and video! Your work is exquisite. I've never seen that corn syrup glaze effect used. I will have to try that. Thanks for sharing 🙂
Thank you! Let me know how you like this technique if you decide to try it out!
Such beautiful cookies, and I appreciate your tutorials, thank you for sharing and your time.
Thank you, Margie! 🙂
Oh, so incredible! Amazing!
Without words!...ejmmmmm...only one, my favorite AMBERING ...;-)
Congratulations!
😀 Thanks, Moses!!
Brilliant! Every time I think I've seen it all you come up with something else! Your work is amazing.
I left a comment here the other night, but must have not posted it properly. Oh well!
This one worked! Thanks for visiting my blog!
would confectioners glaze work?
Good idea, Alexis! I bet that would be perfect!
hi.
I do not speak English, so I used a translator online to write to you, I hope it to understand.
In tuttorial, shows you to put a gel in the end, that gel would that be? Can you show me the brand? So try something here in Brazil is similar or the same product.
His creations are beautiful, congratulations!
Hi Gislene! Here is the brand of corn syrup I used: https://www.karosyrup.com/products.html
Or you can use piping gel: https://www.wilton.com/store/site/product.cfm?id=3E30E850-475A-BAC0-582D80C4F0374347
This technique is amazing! I already have some ideas on how to maybe use it in future projects. Thanks so much for sharing!
Thanks, Mike! I can't wait to see what you do with it!
I too am a great admirer of your work. Thank you for sharing
You tutorials are so beautiful to watch and the added music just makes them all the more special. Thank you so much for sharing your knowledge . Please keep them coming 🙂
Regards
Caroline
Wow!! These cookies are absolutely amazing. I love the cracked effect. I found your videos on YouTube and followed to your site, you are so talented! All of your cookies are amazing!
Oh,,,my...gosh!! Beyond words beautiful AND original!!! Thank you so much for sharing!!
SweetAmbs you are a GENIUS!!! I can't wait to try this technique! Thank you for sharing!
one word: WOW. Really Ambs you are an amazing cookie decorator!
The sights and sounds of your tutorials are lovely and relaxing. Your cookies are the most beautiful I have ever seen!
You are one of the MOST talented food artists ever. I have been admiring your work since you started on Etsy! All the blessings to you. THANK you for sharing your knowledge with the "not so gifted"!! I will eventually place and order...
Ada
Thank you, Ada! That is so sweet of you!
You are amazing!!!! I just love your videos and the music you chose was perfect. You are truly blessed with an amazing talent. If only I had a tenth of your ability. Keep up the great work, I cant wait to see what you have in store for us next!
Thank you, Kelly!!