

Over the summer my friend Marlyn of Montreal Confections got me into cutting my own stencils with a Silhouette Portrait. I created a mermaid scales stencil for this mermaid tail cookie and it got me thinking about how I could use the same stencil for more than one design. I got a little creative and came up with this vampire mermaid cookie!
Get access to exclusive cookie decorating tutorials, my cookie and royal icing recipes, and individualized cookie decorating advice by joining my Cookie Art Club!
This post contains affiliate links. Read my affiliate disclosure here.
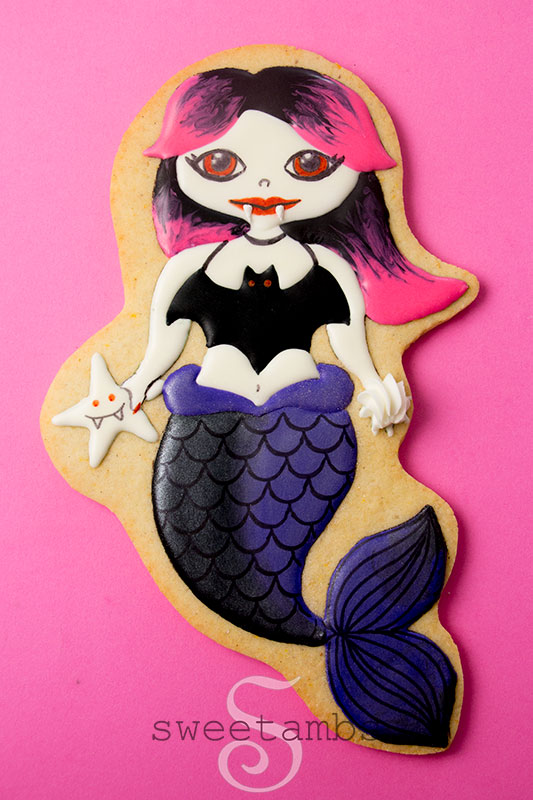
I decorated this vampire mermaid cookie using royal icing, edible ink markers, and luster dust. The digital files to cut the stencil and templates and all of my recipes are available to my Cookie Art Club members.
Here's what you'll need to make this vampire mermaid cookie for Halloween:
- Chilled sheet of cookie dough
- Vampire mermaid cookie templates and stencil files
- Silhouette Portrait, Cricut, or scissors to cut the templates and pencils
- Edible ink markers
- Flood consistency royal icing in black, purple, white, and pink
- Decorating bags
- Scribe tool
- Tapered spatula
- Stiff consistency royal icing in white
- Silver pearl dust
- Decorator brush
- Coupler
- Decorating tip 1
- Decorating tip 21
Instructions
- Cut the cookie from a chilled sheet of cookie dough using the mermaid template.
- Bake the cookie according to the recipe instructions.
- Trace the template on the cookie with an edible ink marker. You don’t have to trace the eyes and mouth yet.
- Ice the tail with black and purple flood consistency royal icing. Use a scribe tool to help shape the icing. Blend the colors with a tapered spatula.
- Ice the bottom layer of hair with pink and black flood consistency icing. Use the tapered spatula to blend the colors.
- Ice the starfish, the mermaid’s thumb, and her torso with white flood consistency icing. Allow the icing to dry for about 20 minutes.
- Ice the rest of the mermaid’s body with the white icing. Use the scribe tool to help shape the icing.
- Ice the top of the tail with purple flood consistency icing.
- Ice the mermaid’s face with the white icing. Allow the icing to dry for about 20 minutes.
- Ice the bat with black flood consistency icing. Use the scribe tool to help shape it.
- Ice the rest of the hair with pink and black icing. Use the tapered spatula again to blend the colors. Allow the icing to dry overnight
- Trace the mermaid’s face with edible ink markers. Draw the details with the edible markers.
- Pipe teeth with white stiff consistency royal icing and a decorating tip 1.
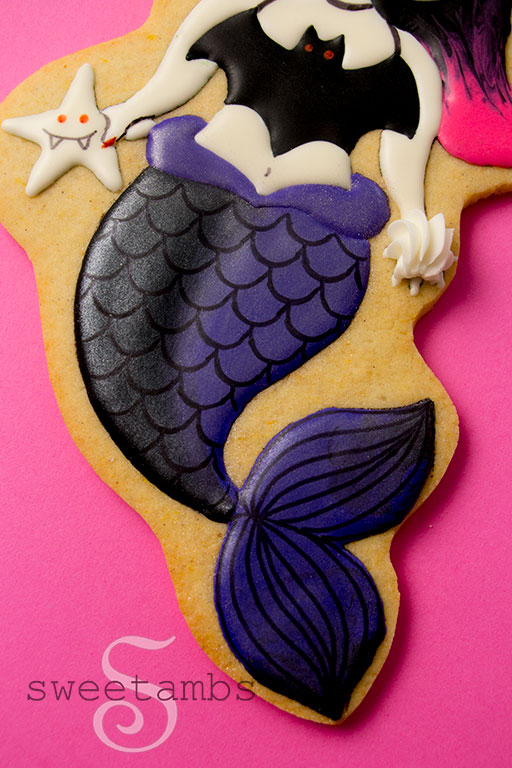
- Apply silver pearl dust on the tail with a dry brush.
- Place the scales template on the tail and trace it with an edible ink marker.
- Use the edible marker to draw lines on the fins.
- Switch the tip on the stiff consistency icing to a star tip 21 and pipe a shell in the mermaid’s hand. Use a dry brush to help shape the icing.



