How To Decorate Cherry Baby Romper Cookies
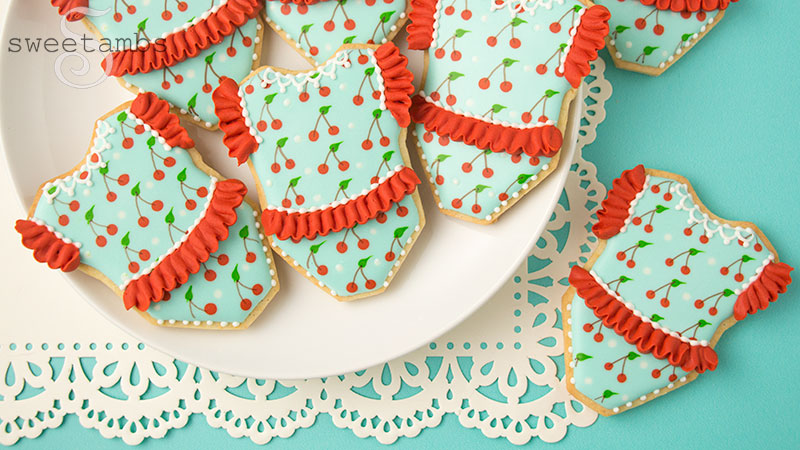

These cherry baby romper cookies were inspired by my 1 year old daughter’s adorable outfit (see the inspiration below!). Baby clothes are just the best. I think this design would be so cute as baby shower cookies!
You can watch this members-only video tutorial (without ads!) when you join my Cookie Art Club!
Get access to exclusive cookie decorating tutorials, my cookie and royal icing recipes, and individualized cookie decorating advice by joining my Cookie Art Club!
Get access to exclusive cookie decorating tutorials, my cookie and royal icing recipes, and individualized cookie decorating advice by joining my Cookie Art Club!
This post contains affiliate links. Read my affiliate disclosure here.
Here’s my daughter wearing the outfit that inspired the cookie! 🙂


Here’s what you’ll need to make these cherry baby romper cookies
These supplies are available in my Amazon Store unless otherwise noted.
- Chilled sheet of cookie dough (my recipe is available in the tutorial shop)
- T-shirt cookie cutter or baby romper cookie cutter
- Paring knife to trim the cookie if using the t-shirt cutter
- Flood consistency royal icing in light teal, red, green, and white
- Tipless decorating bags
- 12″ decorating bags
- Coupler
- Decorating tips 3, 1.5, and 101
- Bag ties
- Scribe tool
- Brown edible ink marker
Icing Colors (I used Chefmaster)
- Light teal = Teal Green
- Red = Tulip Red
- Green = Leaf Green


I used the wet-on-wet technique to pipe the design on these cherry baby romper cookies. You do have to move pretty fast with the wet-on-wet technique, which is why I use extra meringue powder in my royal icing recipe to ensure that I have as much time as possible to work with the icing before it starts to crust over.
Read my Ultimate Guide To Royal Icing to learn all about royal icing consistencies.


