
If you're like me and don't own a Kopykake projector, you can use this tissue paper method to transfer almost any design onto a cookie.
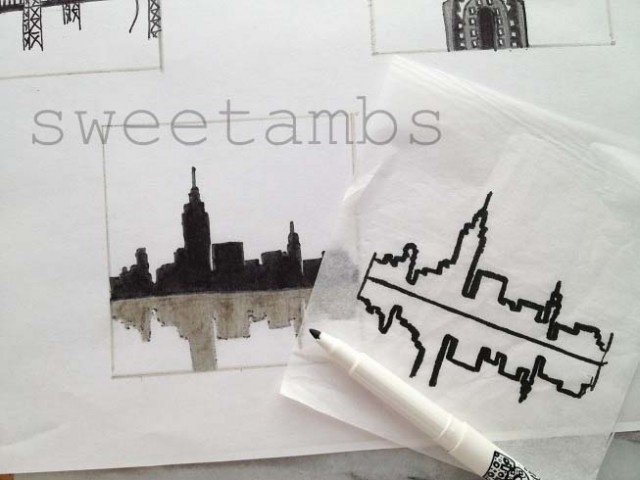
For products used in this and other tutorials, visit the recommended products page.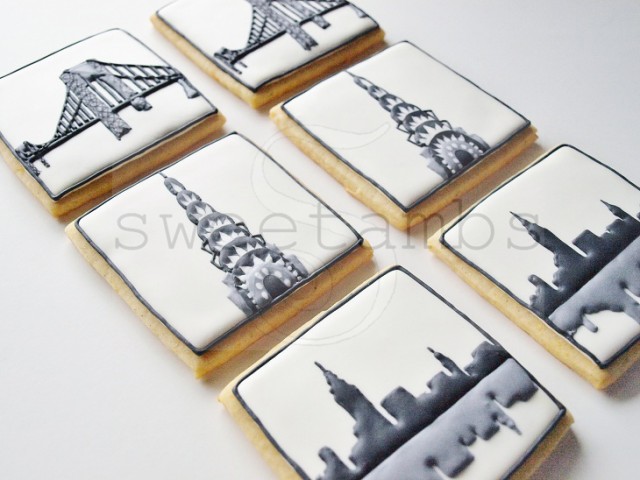 Begin by tracing your image onto a piece of tissue paper using an edible ink marker. You can use Google images to find inspiration for your designs. Then, you can either print them out on a piece of paper or draw them yourself.
 Place the tissue paper with the image over a cookie that has been flooded with royal icing and allowed to dry completely (8-12 hours drying time). This cookie was made using my Orange Vanilla Spice recipe, which is available in my tutorial shop. It measures 3x3".
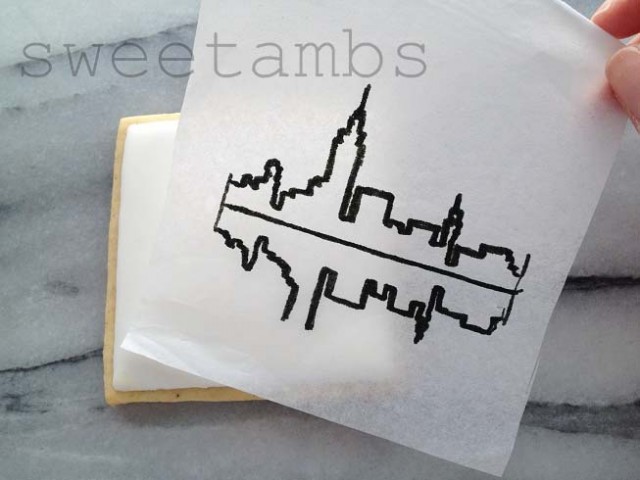 With the image placed over the cookie, go over it again with the edible ink marker. Use a little pressure to be sure that the image transfers onto the icing. The ink will bleed through the tissue paper, transferring your image onto the cookie.
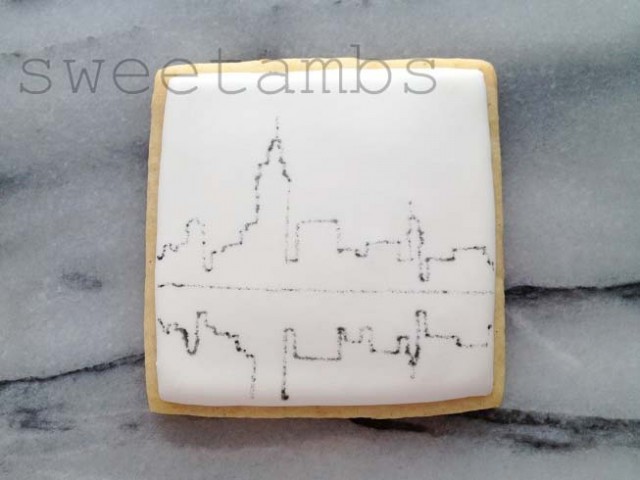
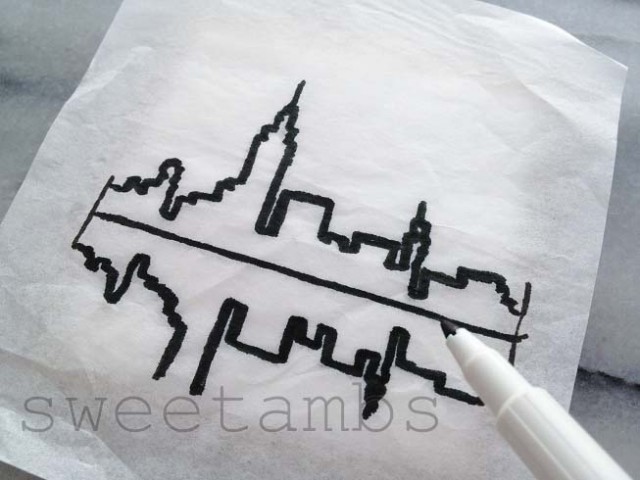 You'll have a rough outline to follow, like this:
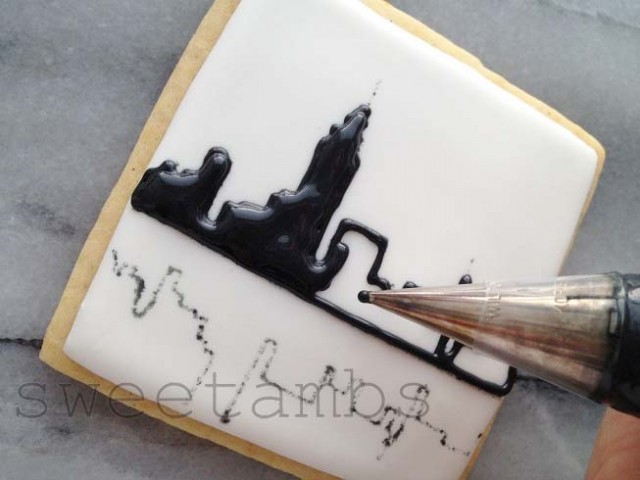
 Outline and fill in the image with a tip 1 and flood consistency royal icing.
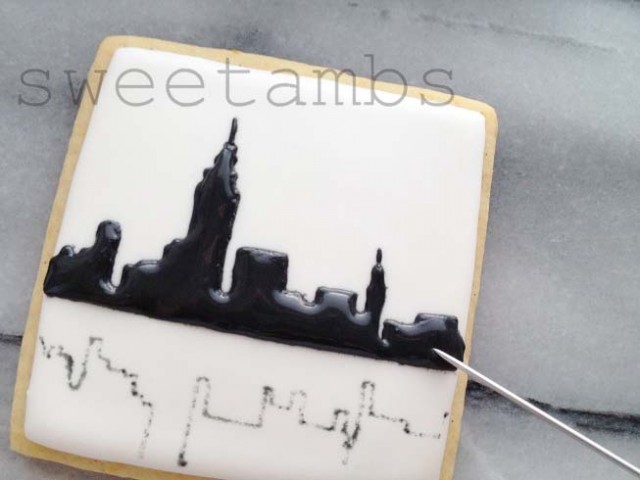
 Then, use a scribe tool or a toothpick to evenly distribute the icing and fix the edges.
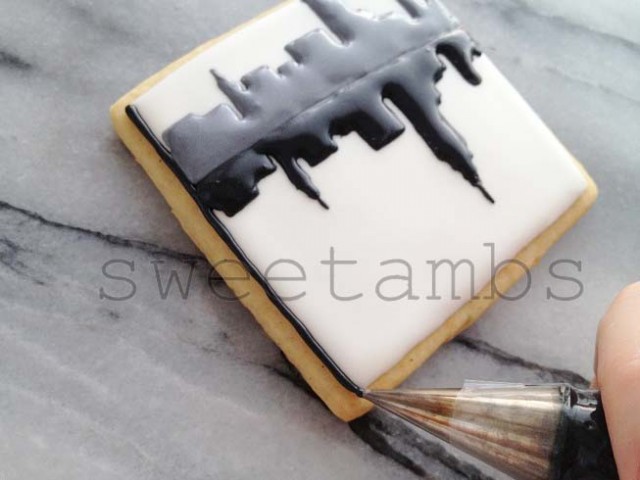
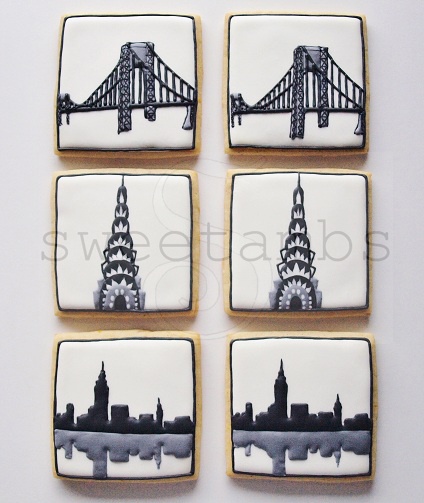
 Immediately fill in the lower section with flood consistency icing and a tip 1. I used gray for the lower section to give the impression that it is a reflection of the city skyline.
Pipe a border by outlining the edges of the cookie using the black flood consistency icing and tip 1.
Immediately fill in the lower section with flood consistency icing and a tip 1. I used gray for the lower section to give the impression that it is a reflection of the city skyline.
Pipe a border by outlining the edges of the cookie using the black flood consistency icing and tip 1.
 Allow the icing to dry another 6-8 hours before handling the cookie.
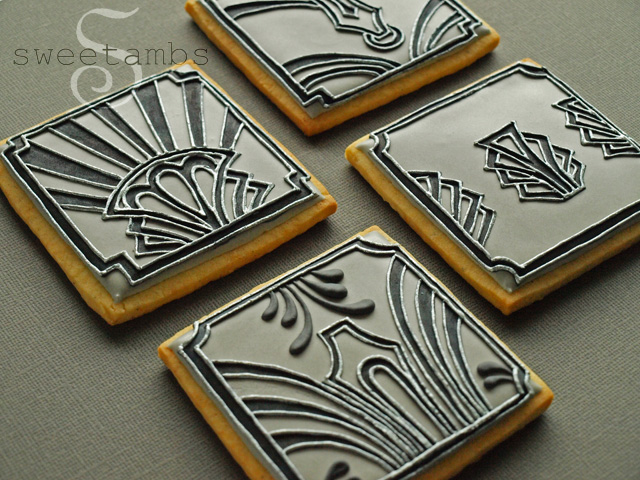
 I also used this tissue paper method to make these art deco cookies.
 Have you tried this method? Share photos of your work on my Facebook page!
Begin by tracing your image onto a piece of tissue paper using an edible ink marker. You can use Google images to find inspiration for your designs. Then, you can either print them out on a piece of paper or draw them yourself.
Place the tissue paper with the image over a cookie that has been flooded with royal icing and allowed to dry completely (8-12 hours drying time). This cookie was made using my Orange Vanilla Spice recipe, which is available in my tutorial shop. It measures 3x3".
With the image placed over the cookie, go over it again with the edible ink marker. Use a little pressure to be sure that the image transfers onto the icing. The ink will bleed through the tissue paper, transferring your image onto the cookie.
You'll have a rough outline to follow, like this:
Outline and fill in the image with a tip 1 and flood consistency royal icing.
Then, use a scribe tool or a toothpick to evenly distribute the icing and fix the edges.
Immediately fill in the lower section with flood consistency icing and a tip 1. I used gray for the lower section to give the impression that it is a reflection of the city skyline.
Pipe a border by outlining the edges of the cookie using the black flood consistency icing and tip 1.
Allow the icing to dry another 6-8 hours before handling the cookie.
I also used this tissue paper method to make these art deco cookies.
Have you tried this method? Share photos of your work on my Facebook page!



Hi. How do you prevent the marker from bleeding on the cookie. It worked for me but the market bled some so the design was not crisp to pipe over.
Fabulous tutorial! So happy to find this. Thank you for sharing!!
Thank you, Beth! 🙂
How do you keep the tissue paper from slipping around on the cookie while you’re writing?
I just hold the tissue paper tightly in place with my fingers while I trace the design.
Is this food safe?
It is with edible food marker!
thank you so much for this tutorial!!! will be trying it this weekend! Was curious, how did you make your black royal icing? What brand of coloring did you use? It's so black!
Hi Lucy! This tutorial is from all the way back in 2013 (wow) and if I remember correctly, I was using Americolor Super Black at that time. These days I either use black from the Wilton Color Right Set or activated charcoal powder to make black icing 🙂
I'm so excited to find your method since I don't have a Kopykake either. My granddaughter is a "flyer" on her cheer team and I found on google the poses she performs. Now I know how to put them on cookies. Thanks so much.
I'm so glad you found this tutorial helpful, Jane! Thank you!
Thanks for all your tips ! I am always very impressed by your amazing cookies.
I would need a clarification regarding this technique : when do we place the tissue paper with the image over the cookie ? Just after the royal icing has been put onto the cookie (wet icing) or after it is completely dry (I would personally do that but I want to be sure !) ? If the answer is that we put the tissue paper when the royal icing is still wet, how can it be taken off without any trace on the cookie ?
Many thanks in advance for your feedback and congratulations to your very elegant and delicate work
Thank you so much, Malvina! The tissue paper goes over the cookie when the icing is completely dry 🙂
These are so amazing! How do you stop your cookies from going soft while the icing is drying?
If you use a sturdy cookie recipe, the cookie should remain firm. I used to use a Betty Crocker sugar cookie recipe, and the cookies crumbled after frosting was applied and cookie was allowed to air dry overnight.
What kind of tissue paper?? Where do you purchase it??
Hi Joyce! It's just regular tissue paper that you'd use for a gift bag.
What type of tissue paper??? Where do you get it??
I would like to use this method for writing names on cookies for shower favors, but I'm concerned that the bleed through is too thick for the dainty cursive writing I'll be using. Any way this can be done with finer lines?
There is an app that you can use to trace and it's $4.99. It's called Camera Lucida.
I'm interested in the Camera Lucida! Never heard of it before!
You can do the pencil technique.
What is pencil technique? Is pencil non toxic?
Have you or anyone used this technique on plain white fondant?? Should be ok, right?
This is a fabulous post - SOOOOO helpful! Thank you!!
Thanks, Debra!!
Thanks for sharing this Amber! Are you using tissue paper that you would wrap gifts with?
Have been very busy since our wonderful class with you.
Hi Susan! Yes, that's right. It's the same tissue paper that you would use to wrap a gift 🙂
I can't wait to try this on Paris Themed Cookies next month
I have never seen this before. I am dying to try it. Thanks so much for sharing.
Let me know how you like this technique if you try it out, Diane! 🙂
Hi , I also do a lot of cookie decorating using the tracing method but I use nontoxic chalk and a tracing tool . It work well also . I will try you method for my Christmas cookies . Thank you I love you work and inspiration . Lucy
Ambs, you are indeed sweet! I was just trying to figure out how to transfer a sketch onto a cookie. I have the app that allows you to do it, but no stand, so I found myself stumped. I really love this tutorial and will be using it when I get home tonight! Thank you! <3
What app is available to do this?
the app is called Lucida here is a link to a blog where she shows how to use it. https://www.klickitatstreet.com/2013/03/how-to-draw-on-cookie-with-ipad.html