
 For this second part of the tutorial you will need:
- Striped cookies that have been allowed to dry at least 8 hours
- scribe tool
- Stiff consistency royal icing
- Round decorating tip 2
- Square tip brush (the one shown here is from the Wilton 3 pack)


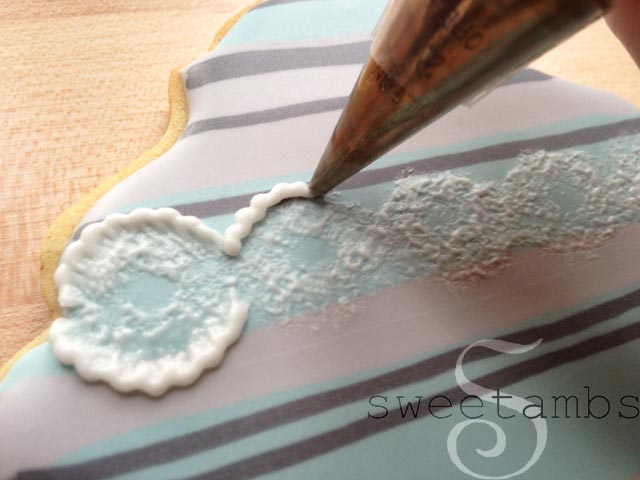




 Allow the icing to dry for about 2-4 hours before handling the cookies.
  Click on the images below for more cookie decorating tutorials





Hi Amber, I just love your work and I love to bake as well. What kind of icing do you use for it to dry like it does.
Amber, This design is so pretty! I definitely want to see THAT tutorial.
Thank you, Theresa!
Just gorgeous - you make it look so simple! Will try this one over the weekend! Thanks so much for your tutorials, I am learning so much from your blog!
Thank you, Anne!!
preciosas very beatiful.thank you are so nice and artist
I have a deep cookie crush on your original eyelet cookies and these are such a fun new take on that! Very pretty!
Haha! Thanks, Michelle!
Thank you so much. You make it look so easy and though not as easy as it looks the first time I try it, practice helps a lot.
It is humbling be artistic has made painting and decorating all come easy for me. I approached this cookie decorating as a simple endeavor and found more of a challenge than ever. Love it!!
Thank-you for just another super cool idea !! So fun to get your posts and tutorials 🙂
Thank you, Sharon!
Thank again for this beautiful tutorial! Love it so much.... ^_^