
It's time to welcome spring! I originally made this platter of hyacinth cookies in 2012 as part of Haniela's "Let's Smell The Flowers" virtual cookie party. It's still one of my favorite sets!
--
This post contains affiliate links. Read my affiliate disclosure here.
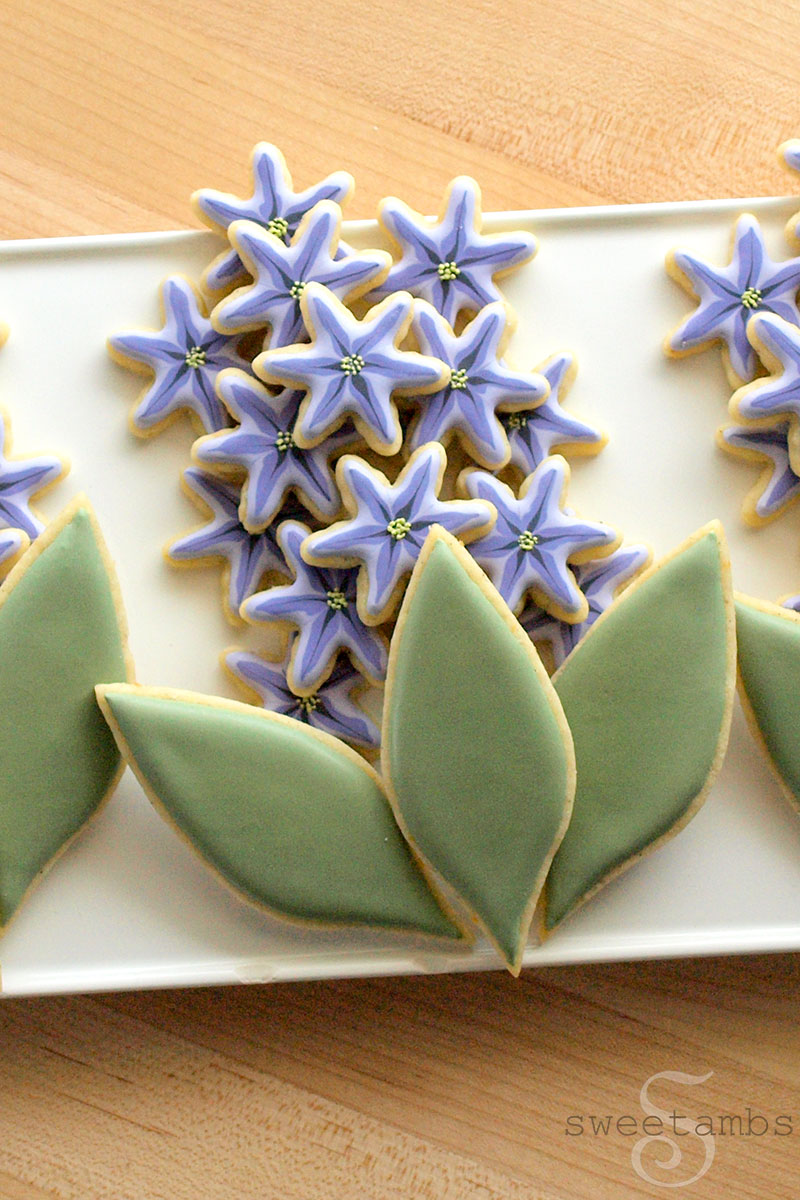 --
To make the flowers, I used a mini snowflake cutter. This one measures about 1-½" across. For the leaves, I used the stargazer lily cutter from the Wilton gum paste set. It's about 4" by 1-½".
--
To make the flowers, I used a mini snowflake cutter. This one measures about 1-½" across. For the leaves, I used the stargazer lily cutter from the Wilton gum paste set. It's about 4" by 1-½".
 --
You'll need 48 flowers and 9 leaves to make 3 separate hyacinth plants for the platter, but make a few extra just in case. I used my Orange Vanilla Spice cookie recipe, which is available in my tutorial shop.
--
You'll need 48 flowers and 9 leaves to make 3 separate hyacinth plants for the platter, but make a few extra just in case. I used my Orange Vanilla Spice cookie recipe, which is available in my tutorial shop.
 --
After cutting out the flowers, I pinched the edges to elongate and smooth the petals to make it more like a flower and less like a snowflake.
--
After cutting out the flowers, I pinched the edges to elongate and smooth the petals to make it more like a flower and less like a snowflake.
 --
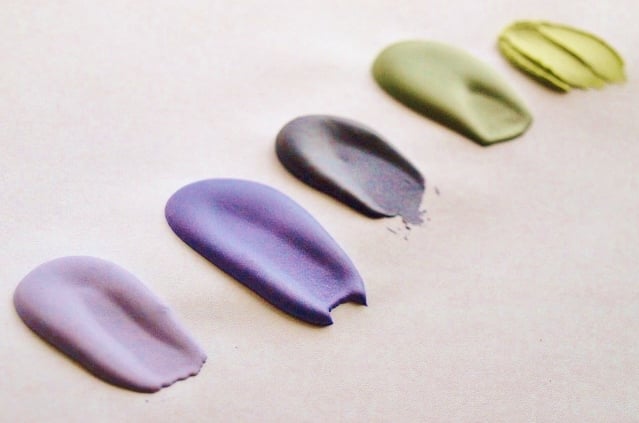
Here's my color palette. The purples are made with Wilton's violet plus a little bit of black. I used a light, medium and dark purple for this project. The greens are a combination of Wilton's juniper green (from the garden tone set) and lemon yellow. You will need a medium green for the leaves and a light green for the flower centers.
--
Here's my color palette. The purples are made with Wilton's violet plus a little bit of black. I used a light, medium and dark purple for this project. The greens are a combination of Wilton's juniper green (from the garden tone set) and lemon yellow. You will need a medium green for the leaves and a light green for the flower centers.
 --
Outline the flowers with flood consistency royal icing using the light purple and a tip 2.
--
Outline the flowers with flood consistency royal icing using the light purple and a tip 2.
 --
Fill in the petals with the medium shade of purple icing using a tip 2, but leave a space in the center.
--
Fill in the petals with the medium shade of purple icing using a tip 2, but leave a space in the center.
 --
Fill in the center with the darkest shade of purple and a tip 2.
--
Fill in the center with the darkest shade of purple and a tip 2.
 --
Immediately after piping all three colors, use a scribe tool to drag the icing from the center outward to the edge of the petals.
--
Immediately after piping all three colors, use a scribe tool to drag the icing from the center outward to the edge of the petals.
 --
Drag the icing inward from in between each petal to the center.
--
Drag the icing inward from in between each petal to the center.

 --
Outline and fill in the leaf with flood consistency green icing and a tip 2. This is the darker of the two greens used in this project.
--
Outline and fill in the leaf with flood consistency green icing and a tip 2. This is the darker of the two greens used in this project.


 --
After the icing has dried overnight, Pipe the flower centers by making tiny little dots using stiff consistency light green icing and a tip 1.
--
After the icing has dried overnight, Pipe the flower centers by making tiny little dots using stiff consistency light green icing and a tip 1.
 --
Allow the icing to dry for another 30 minutes or so.
--
Allow the icing to dry for another 30 minutes or so.
 --
Arrange the flowers on a platter. The first layer contains 9 flowers. You can use a dab of icing under each cookie to keep them in place.
--
Arrange the flowers on a platter. The first layer contains 9 flowers. You can use a dab of icing under each cookie to keep them in place.
 --
Add 4 more flowers for the second layer.
--
Add 4 more flowers for the second layer.
 --
Place two flowers on top to complete the bunch.
--
Place two flowers on top to complete the bunch.
 --
Arrange three leaves over the flowers.
--
Arrange three leaves over the flowers.
 --
--
Be sure to check out the rest of the contributors to Haniela's "Let's Smell The Flowers" virtual cookie party!
--
--
Be sure to check out the rest of the contributors to Haniela's "Let's Smell The Flowers" virtual cookie party!
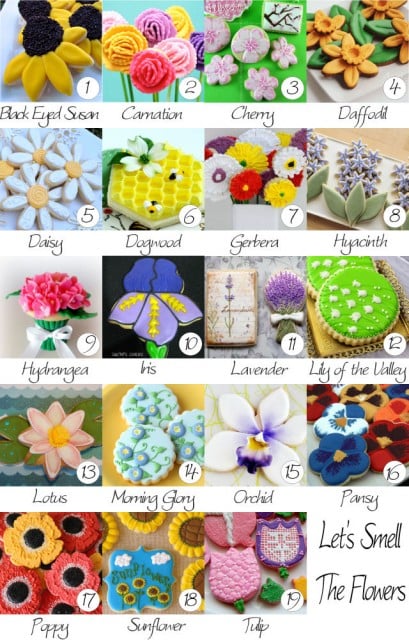 --
It's an honor to be involved in a project featuring such talented cookie artists:
1. Black Eye Susan by Lisa, The Bearfoot Baker
2. Carnation by Meaghan, The Decorated Cookie
3. Cherry Tree Flower by Pam, Cookie Crazie
4. Daffodil by Georganne, LilaLoa
5. Daisy by Stephanie, Ellies Bites
6. Dogwood by Marian, Sweetopia
7. Gerbera by Paula, Vanilla Bean Baker
8. Hyacinth by Amber, SweetAmbs
9. Hydrangea by Kim, The Partiologist
10. Iris by Cristin, Cristin's Cookies
11. Lavender by Liz, Arty McGoo
12. Lily of The Valley by Hani, Haniela's
13. Lotus by Marlyn, Montreal Confections
14. Morning Glory by Glory, Glorious Treats
15. Orchid by Ali, Ali Bee's Bake Shop
16. Pansy Nicole, Life's A Batch
17. Poppy by Callye, SweetSugarBelle
18. Sunflower by Bea, Cancun Cookies
19. Tulip by Lorriane, LorrainesCookies
-
T
--
--
It's an honor to be involved in a project featuring such talented cookie artists:
1. Black Eye Susan by Lisa, The Bearfoot Baker
2. Carnation by Meaghan, The Decorated Cookie
3. Cherry Tree Flower by Pam, Cookie Crazie
4. Daffodil by Georganne, LilaLoa
5. Daisy by Stephanie, Ellies Bites
6. Dogwood by Marian, Sweetopia
7. Gerbera by Paula, Vanilla Bean Baker
8. Hyacinth by Amber, SweetAmbs
9. Hydrangea by Kim, The Partiologist
10. Iris by Cristin, Cristin's Cookies
11. Lavender by Liz, Arty McGoo
12. Lily of The Valley by Hani, Haniela's
13. Lotus by Marlyn, Montreal Confections
14. Morning Glory by Glory, Glorious Treats
15. Orchid by Ali, Ali Bee's Bake Shop
16. Pansy Nicole, Life's A Batch
17. Poppy by Callye, SweetSugarBelle
18. Sunflower by Bea, Cancun Cookies
19. Tulip by Lorriane, LorrainesCookies
-
T
--
--
To make the flowers, I used a mini snowflake cutter. This one measures about 1-½" across. For the leaves, I used the stargazer lily cutter from the Wilton gum paste set. It's about 4" by 1-½".
--
You'll need 48 flowers and 9 leaves to make 3 separate hyacinth plants for the platter, but make a few extra just in case. I used my Orange Vanilla Spice cookie recipe, which is available in my tutorial shop.
--
After cutting out the flowers, I pinched the edges to elongate and smooth the petals to make it more like a flower and less like a snowflake.
--
Here's my color palette. The purples are made with Wilton's violet plus a little bit of black. I used a light, medium and dark purple for this project. The greens are a combination of Wilton's juniper green (from the garden tone set) and lemon yellow. You will need a medium green for the leaves and a light green for the flower centers.
--
Outline the flowers with flood consistency royal icing using the light purple and a tip 2.
--
Fill in the petals with the medium shade of purple icing using a tip 2, but leave a space in the center.
--
Fill in the center with the darkest shade of purple and a tip 2.
--
Immediately after piping all three colors, use a scribe tool to drag the icing from the center outward to the edge of the petals.
--
Drag the icing inward from in between each petal to the center.
--
Outline and fill in the leaf with flood consistency green icing and a tip 2. This is the darker of the two greens used in this project.
--
After the icing has dried overnight, Pipe the flower centers by making tiny little dots using stiff consistency light green icing and a tip 1.
--
Allow the icing to dry for another 30 minutes or so.
--
Arrange the flowers on a platter. The first layer contains 9 flowers. You can use a dab of icing under each cookie to keep them in place.
--
Add 4 more flowers for the second layer.
--
Place two flowers on top to complete the bunch.
--
Arrange three leaves over the flowers.
--
--
Be sure to check out the rest of the contributors to Haniela's "Let's Smell The Flowers" virtual cookie party!
--
It's an honor to be involved in a project featuring such talented cookie artists:
1. Black Eye Susan by Lisa, The Bearfoot Baker
2. Carnation by Meaghan, The Decorated Cookie
3. Cherry Tree Flower by Pam, Cookie Crazie
4. Daffodil by Georganne, LilaLoa
5. Daisy by Stephanie, Ellies Bites
6. Dogwood by Marian, Sweetopia
7. Gerbera by Paula, Vanilla Bean Baker
8. Hyacinth by Amber, SweetAmbs
9. Hydrangea by Kim, The Partiologist
10. Iris by Cristin, Cristin's Cookies
11. Lavender by Liz, Arty McGoo
12. Lily of The Valley by Hani, Haniela's
13. Lotus by Marlyn, Montreal Confections
14. Morning Glory by Glory, Glorious Treats
15. Orchid by Ali, Ali Bee's Bake Shop
16. Pansy Nicole, Life's A Batch
17. Poppy by Callye, SweetSugarBelle
18. Sunflower by Bea, Cancun Cookies
19. Tulip by Lorriane, LorrainesCookies
-
T
--
This post was originally published on April 2, 2012
--

Works of art.
So, do guests eat the little flower parts separately, or is each complete hyacinth a serving?
If you stick the flowers together with a bit of icing on the back, they can be served together as one hyacinth. Or, you can just arrange them on the plate and have the guests eat the little flowers individually. It's up to you!
I have to say, you never cease to absolutely amaze me. Your artistry
Goes to another level unmatched by anyone !!!!
Thank you, Julie!
I love your work.
Thanks!
I simply love your works and the colors in the page...you're such a creative tutor...
Amazing !!
Love your flowers. The hyacinth looks so cute. I would like to know if you have a printable version of the how to on this cookie? If you do pleae let me know with a e-mail response. Thanks. You are so talented and I love your work.
I love your site, and watch your tutorials quite a bit. You are truly an artist. You have posted a couple of recipes, but may I ask what your basic cookie recipe is? I see it has orange and cardamom. Thank you.
Thank you very much! I haven't yet posted the cookie recipe, but it will be available on my website very soon! Thanks for your comment.