Vintage Inspired Cookies
These cookies were inspired by the drawer pulls on the computer desk in my bakeshop, which I recently picked up at a used furniture store. I was immediately drawn to it because it reminded me of something out of my childhood bedroom! 
 The inspiration

 The color palette

 Green: Wilton Kelly green + lemon yellow Blue: Wilton teal Red: Americolor tulip red + a touch of black Rose: Wilton pink + Americolor brown Ivory: Wilton brown + golden yellow These cookies were made using my Orange Vanilla Spice recipe, which is available in my tutorial shop. I cut the dough into 2-1/2″ squares by hand with a ruler and a paring knife. Use an edible ink marker to draw the outline of the shape. I like to use FooDoodler brand.

 Fill in the shape with flood consistency royal icing and a tip 3. Read this post to learn about the three different royal icing consistencies that I use most often when decorating cookies.
 Use a scribe tool to help form the shape and to evenly distribute the icing.
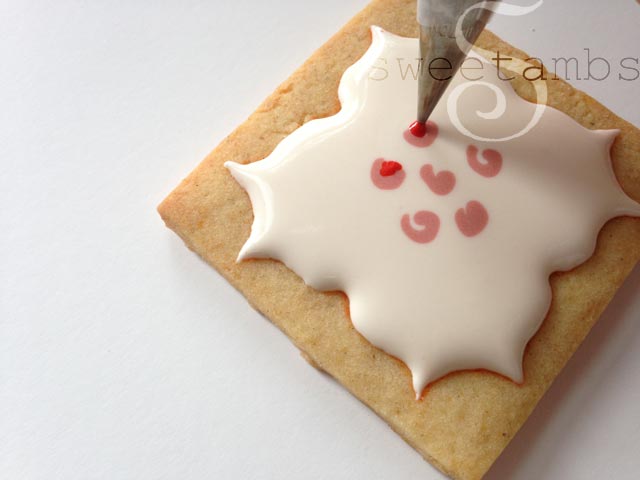
 The flowers were made using the wet-on-wet technique. Start out by piping a little of the rose color with a tip 1 and then add a dot of red.
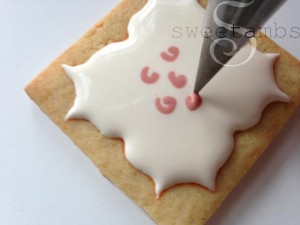


 Swirl the colors around with the scribe tool.
 Add a few tiny blue flowers.
 Then pipe leaves using light green and a dot of dark green.


 Use the scribe tool to pull the icing into a leaf shape.
 Let the icing dry 8-12 hours. I also made some small round cookies and put the flowers on the edge as a border.
 Once the icing is completely dry, dust the edges with bronze pearl dust.
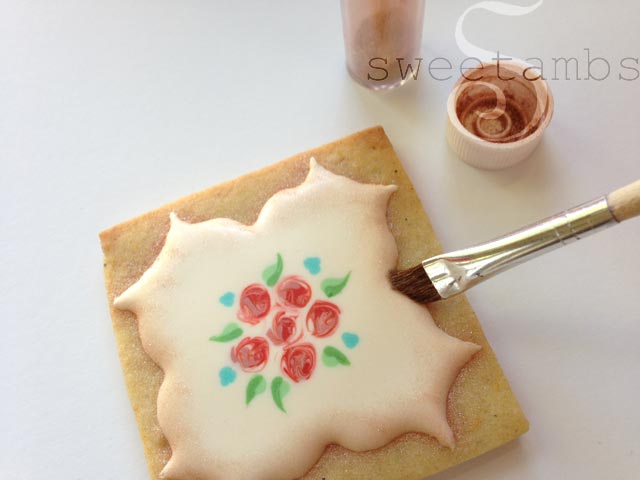
 Pipe a border with medium consistency icing and a tip 1. The icing is brown because it will be painted gold later.


 If you’d like to pipe a monogram, you can use the scribe tool to draw the letter first as a guide.
 If you don’t feel comfortable making a letter freehand, you can try using the tissue paper method (if you don’t have KopyKake, which I do not).
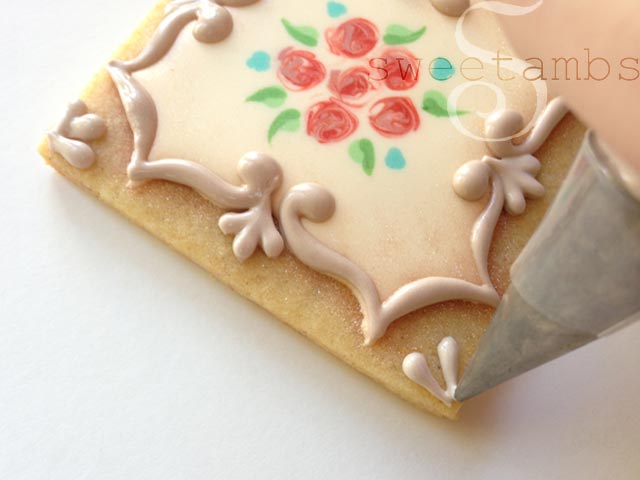
 I usually make a bead border with stiff consistency icing, but here I used the same medium consistency that I had on hand. There is a video with full instructions on piping a bead border available in my tutorial shop.
 Allow the icing to dry for about an hour before painting it. Add a few drops of alcohol or flavored extract to some gold pearl dust and apply it to the icing with a small brush. Read this post for full instructions on painting with pearl dust.
 Allow the icing to dry another 4 hours or so before packaging the cookies.
 Click on the images below for more cookie decorating tutorials:


The inspiration The color palette Green: Wilton Kelly green + lemon yellow Blue: Wilton teal Red: Americolor tulip red + a touch of black Rose: Wilton pink + Americolor brown Ivory: Wilton brown + golden yellow These cookies were made using my Orange Vanilla Spice recipe, which is available in my tutorial shop. I cut the dough into 2-1/2″ squares by hand with a ruler and a paring knife. Use an edible ink marker to draw the outline of the shape. I like to use FooDoodler brand. Fill in the shape with flood consistency royal icing and a tip 3. Read this post to learn about the three different royal icing consistencies that I use most often when decorating cookies. Use a scribe tool to help form the shape and to evenly distribute the icing. The flowers were made using the wet-on-wet technique. Start out by piping a little of the rose color with a tip 1 and then add a dot of red. 
 Swirl the colors around with the scribe tool. Add a few tiny blue flowers. Then pipe leaves using light green and a dot of dark green.
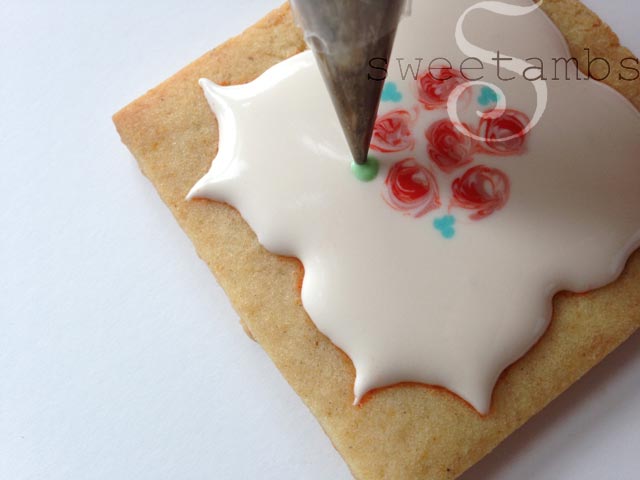
 Use the scribe tool to pull the icing into a leaf shape. Let the icing dry 8-12 hours. I also made some small round cookies and put the flowers on the edge as a border. Once the icing is completely dry, dust the edges with bronze pearl dust. Pipe a border with medium consistency icing and a tip 1. The icing is brown because it will be painted gold later.
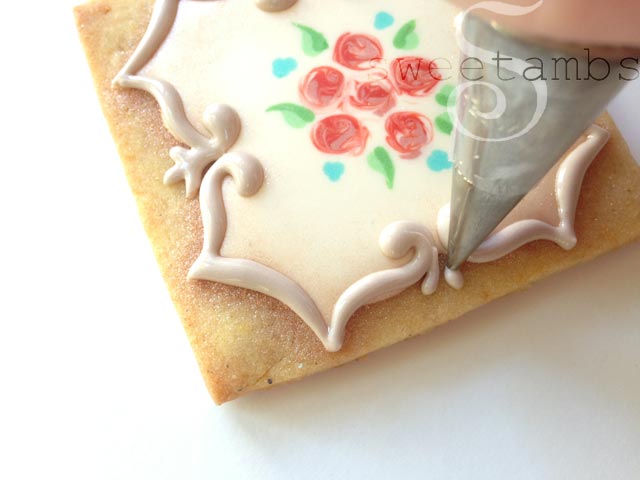
 If you’d like to pipe a monogram, you can use the scribe tool to draw the letter first as a guide. If you don’t feel comfortable making a letter freehand, you can try using the tissue paper method (if you don’t have KopyKake, which I do not). I usually make a bead border with stiff consistency icing, but here I used the same medium consistency that I had on hand. There is a video with full instructions on piping a bead border available in my tutorial shop. Allow the icing to dry for about an hour before painting it. Add a few drops of alcohol or flavored extract to some gold pearl dust and apply it to the icing with a small brush. Read this post for full instructions on painting with pearl dust. Allow the icing to dry another 4 hours or so before packaging the cookies. Click on the images below for more cookie decorating tutorials:
Subscribe
Login
0 Comments
Subscribe
0 Comments