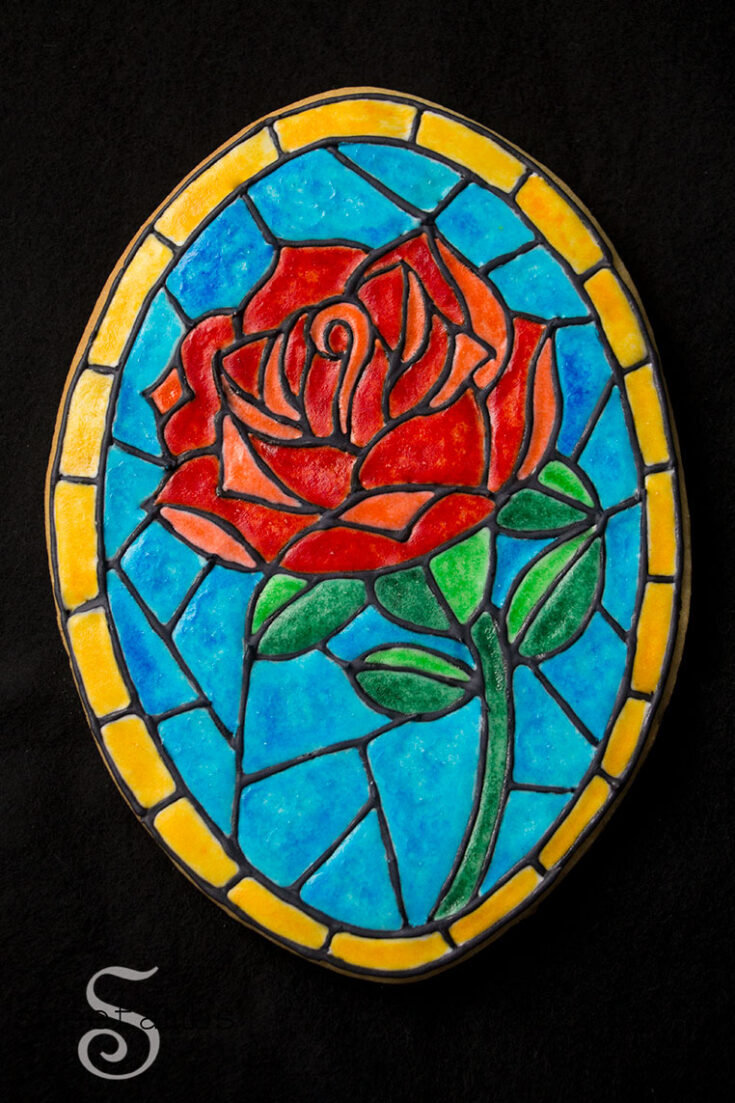
How To Make A Stained Glass Cookie (Cookie Art Club Premium Tutorial)


I didn’t set out to make the rose from Beauty and the Beast when creating this stained glass cookie, but it certainly has that feel, doesn’t it?
Get the full supply list, instructions, templates, recipes, and video tutorial by joining my Cookie Art Club
Get access to exclusive cookie decorating tutorials, my cookie and royal icing recipes, and individualized cookie decorating advice by joining my Cookie Art Club!


This post contains affiliate links. Read my affiliate disclosure here.
To create this large oval cookie, I drew a template and cut my cookie dough around it.
Once the cookie was baked and completely cool, I used the Tissue Paper Method to transfer the design onto the cookie (you can see this method in the video tutorial).
After painting the cookies, I applied a layer of edible adhesive. This gives the icing a nice shine and it dries without any stickiness!
You do have to be careful with the edible adhesive because it tends to remove the paint and make it look blotchy, but that effect works on a stained glass cookie.
Here’s what you’ll need to make these Stained Glass Rose Cookies
Get these supplies in my Amazon Store unless otherwise noted.
- Chilled sheet of cookie dough
- Stained glass cookie template
- Chefmaster food coloring – Tulip Red, Georgia Peach, Golden Yellow, Leaf Green Forest Green, and Sky Blue
- Flood consistency royal icing white
- Medium consistency royal icing in black
- Decorating bags
- Decorating tip 2
- Bag ties
- Edible ink marker
- Tissue paper
- Scribe tool
- Edible Adhesive
- Decorator brushes (I used the brushes from the Wilton 5 piece set)
See my Ultimate Guide To Royal Icing to learn all about flood and medium consistency icing.


See this post for my tips on painting on royal icing with food coloring.
Print it or pin it!
Stained Glass Cookie

I didn't set out to make the rose from Beauty and the Beast when creating this stained glass cookie, but it certainly has that feel, doesn't it? Get these supplies in my Amazon Store unless otherwise noted.
Materials
- Chilled sheet of cookie doughStained Glass Rose Template
- Chefmaster food coloring – Tulip Red, Georgia Peach, Golden Yellow, Leaf Green Forest Green, and Sky Blue
- Flood consistency royal icing white
- Medium consistency royal icing in black
- Decorating bags
- Decorating tip 2
- Bag ties
- Edible ink marker
- Tissue paper
- Scribe tool
- Edible Adhesive
- Decorator brushes (I used the brushes from the Wilton 5 piece set)
Instructions
- Trace the rose template on a piece of tissue paper using an edible ink marker.
- Place the tissue paper over an oval cookie and trace it again with the edible ink marker.
- Lift a corner of the tissue paper to check that the design has transferred before removing it from the cookie.
- Fill in the spots where the design didn’t transfer.
- Pipe over the design with black medium consistency royal icing and a decorating tip 2. Allow the icing to dry for about an hour.
- Fill in the sections with white flood consistency royal icing and a decorating tip 2.
- Use a scribe tool to push the icing into small spaces. Allow the icing to dry completely (overnight is best).
- Mix food coloring with vodka or any flavor extract, such as vanilla, lemon, or almond.
- Use a thin brush to paint the icing.
- Apply a layer of edible adhesive to add shine with a round brush.
- Stipple the edible adhesive to create texture.
Notes
Make sure to trace the design with enough pressure that the edible ink bleeds through the tissue paper onto the cookie.
More cookie tutorials below!