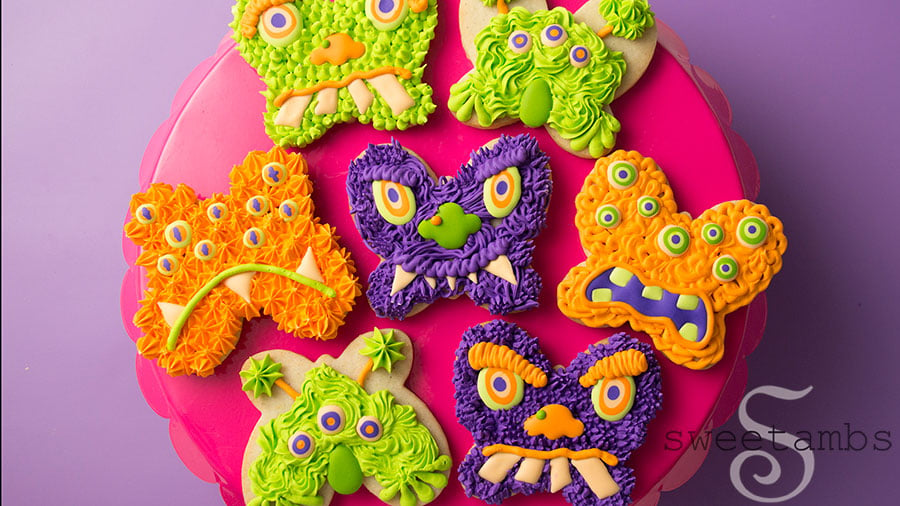
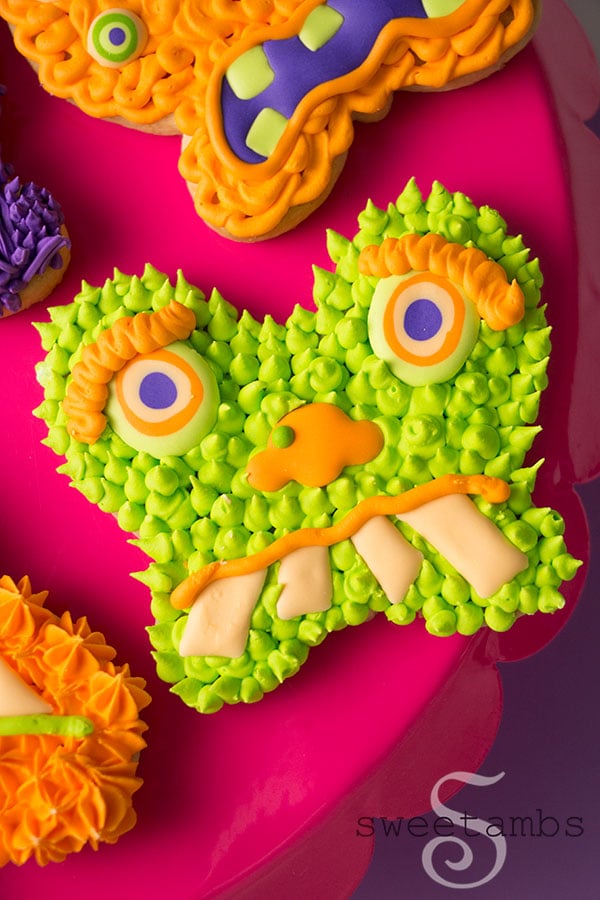
These Monster Cookies for Halloween are my entry for a Halloween cookie cutter challenge between me, Marlyn of Montreal Confections, and Hani of Haniela's.
The rules were that we had to use whatever cookie cutter Olive (my 3-year-old daughter) chose (she picked a butterfly!) and we could only use 3 colors: green, purple, and orange. Marlyn and Hani will be posting their videos on YouTube later today!
Get the supply list and instructions to make these monster cookies for Halloween below!
Get access to exclusive cookie decorating tutorials, my cookie and royal icing recipes, and individualized cookie decorating advice by joining my Cookie Art Club!
This post contains affiliate links. Read my affiliate disclosure here.
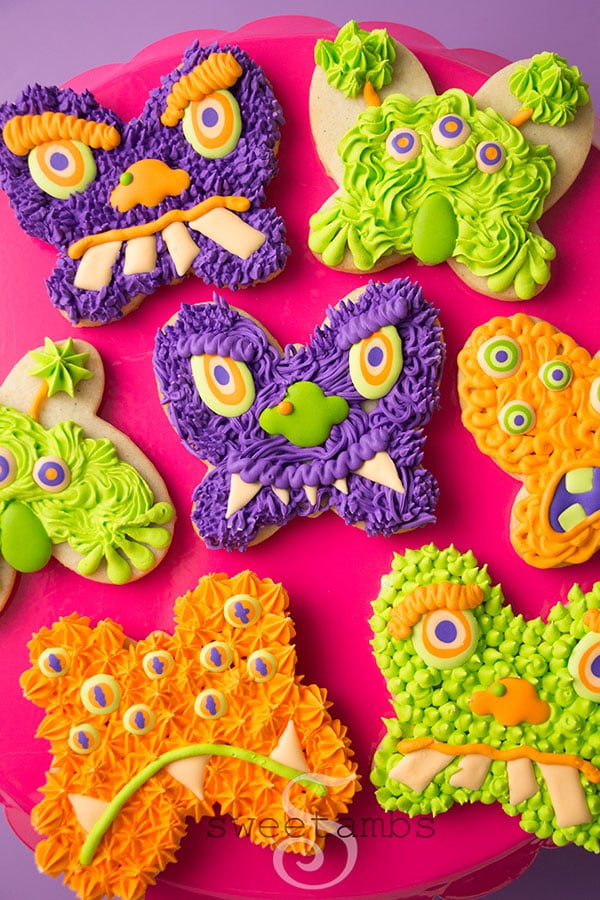
Here's what you'll need to make these Monster Cookies for Halloween
These supplies are available in my shop unless otherwise noted.
- Chilled sheet of cookie dough (use my cookie mix or get my recipe by becoming a subscriber)
- Butterfly cookie cutter
- Monster face template (available to my Patreon subscribers)
- Flat board or baking sheet wrapped with parchment or wax paper
- Flood consistency royal icing in orange, light orange, green, light green, and purple (see color combinations below)
- Stiff consistency royal icing in orange, green, and purple
- Decorating bags
- Decorating tips 1, 2, 3, 233 (aka grass tip), and 21
- Couplers
- Bag ties
- Scribe tool
- Decorator brush
Read my Ultimate Guide To Royal Icing to learn all about royal icing consistencies.
Color Combinations (I used Chefmaster. These colors are available in my shop.)
- Orange and light orange: Neon Brite Orange
- Green and light green: Neon Brite Green
- Purple: 1 part Sky Blue + 2 parts Rose Pink

Instructions
Begin by wrapping a flat, plastic board or the underside of a baking sheet with parchment paper and slide the monster face template underneath.
Fill in the faces with flood consistency royal icing and a decorating tip 2. Use a scribe tool to help shape the icing.
Add pupils with flood consistency royal icing and a decorating tip 1.
Allow the icing to dry for about an hour.
Add details with flood consistency royal icing.
Allow the icing to dry completely (overnight is best).
Cut the butterfly cookies from a chilled sheet of cookie dough. Bake the cookies according to the recipe instructions and allow them to cool completely before decorating.
Carefully remove the royal icing transfers from the parchment paper.
Ice a butterfly cookie with purple stiff consistency royal icing and a decorating tip 233 (aka grass tip).
Place the royal icing transfers onto the cookie and use the scribe tool to gently push them down.
Switch the decorating tip to a number 3 and add eyebrows.
Cover a cookie with stars using orange stiff consistency royal icing and a decorating tip 21. Attach the transfers.
Pipe a mouth with green stiff consistency royal icing and a decorating tip 3. Use a brush to help shape the icing.
Ice a cookie with green stiff consistency royal icing and a decorating tip 3. Attach the transfers.
Ice a cookie with purple stiff consistency royal icing and the grass decorating tip. Attach the face pieces and gently push them down with the scribe tool.
Pipe eyebrows and a mouth with orange stiff consistency royal icing and a decorating tip 3.
Pipe antennae with orange stiff consistency royal icing and a decorating tip 3.
Ice the cookie with green stiff consistency royal icing and a decorating tip 21.
Pipe stars on the antennae with the same decorating tip.
Attach the transfers.
Switch the tip on the green icing to a number 3 and pipe feet.
Ice a cookie with orange stiff consistency royal icing and a decorating tip 3. Attach the transfers.