
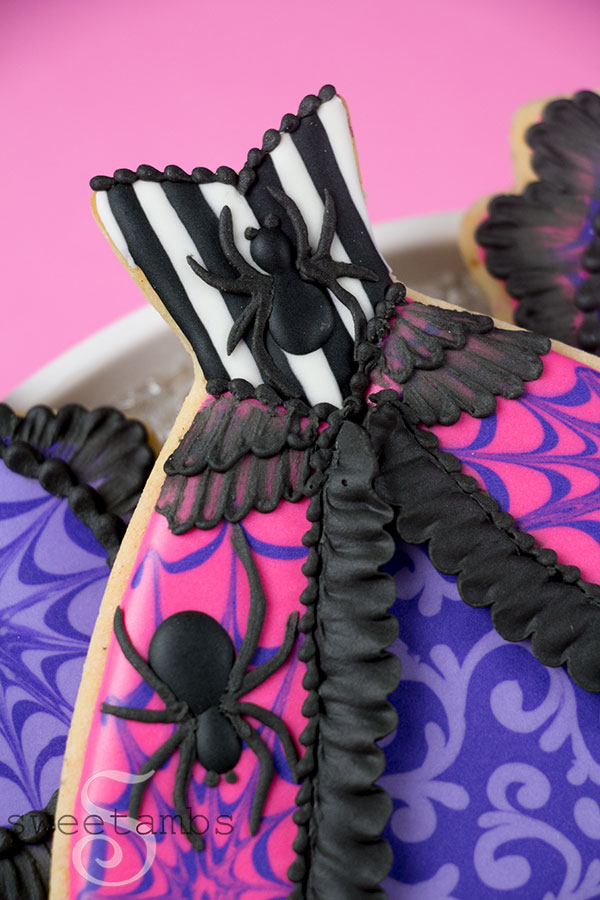
My 3-year-old is obsessed with all things Halloween and she's so excited that the season is finally here! I was inspired to create this Spider Queen Halloween Cookie when I saw Aunt Pine's Spider Queen costume in the Halloween episode of Tumble Leaf over the summer (my daughter always has to watch the Halloween episode of every show!).
Watch the video and get the supply list below to recreate this design!
Get access to exclusive cookie decorating tutorials, my cookie and royal icing recipes, and individualized cookie decorating advice by joining my Cookie Art Club!
This post contains affiliate links. Read my affiliate disclosure here.
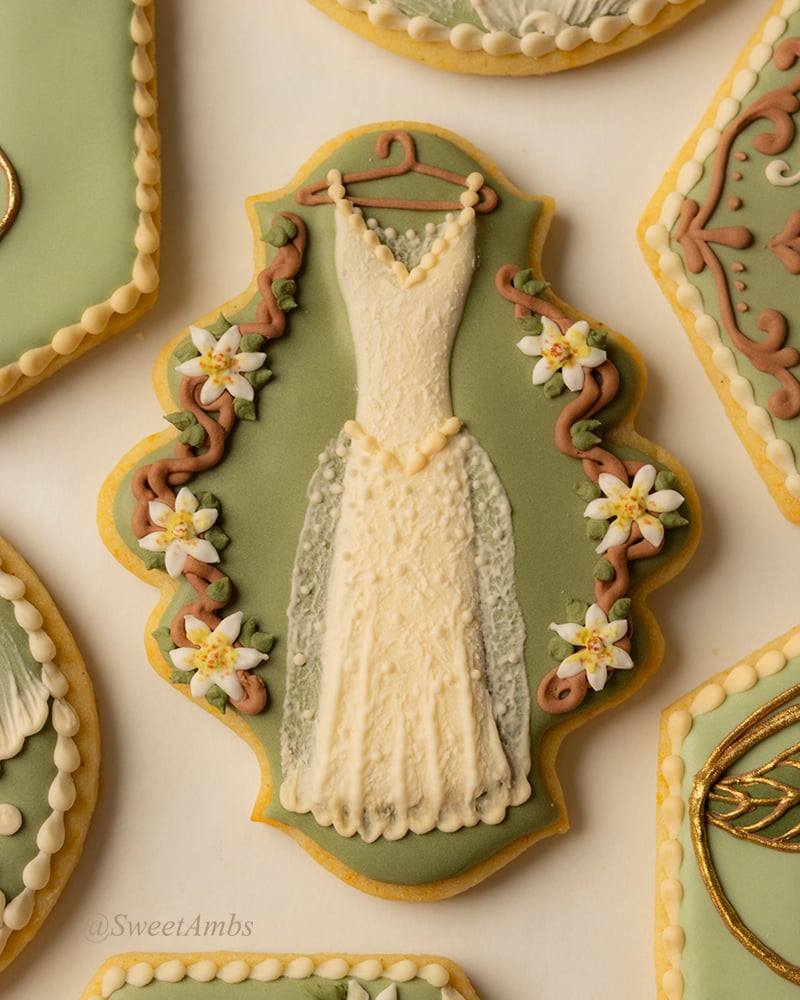
This gown shape was made with the gown cookie cutter from Ann Clark Cookie Cutters. The small plaque shape is the Small Ornate Square Plaque. I'll share the tutorial for the plaque cookies next week.
Here's what you'll need to make this Spider Queen Halloween Cookie
Supplies
- Chilled sheet of cookie dough (use my cookie mix or become a subscriber for access to my cookie and icing recipe)
- Ann Clark Cookie Cutters Gown cookie cutter
- Flood consistency royal icing in white, black, dark purple, light purple, and pink (see color combinations below)
- Stiff consistency royal icing in black
- 6 decorating bags
- 6 couplers
- 6 bag ties
- Decorating tip 3
- Decorating tip 2
- Decorating tip 1
- Decorating tip 101
- Scribe tool
- Round decorator brush
- Thin artist brush
Read my Ultimate Guide To Royal Icing to learn all about royal icing consistencies.
Color Combinations (I used Chefmaster)
- Black = Black Diamond
- Pink = Neon Brite Pink
- Light and Dark Purple = 1 part Neon Brite Pink + 1 part Sky Blue
See my tips on how to make black royal icing.
Instructions
Begin by drawing the sections of the gown with an edible ink marker.
Fill in every other stripe in the bodice with white flood consistency royal icing and a decorating tip 1. Use a scribe tool to help shape the icing.
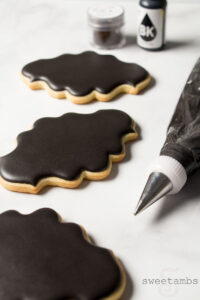
Immediately fill in the rest of the stripes with black flood consistency royal icing and a decorating tip 1.
Fill in the bottom layer of the skirt with dark purple flood consistency royal icing and a decorating tip 3. Use the scribe tool to help shape the icing.
Pipe a filigree design with light purple flood consistency royal icing and a decorating tip 1 while the base layer is still wet. This is known as the wet-on-wet royal icing technique.
Allow the icing to dry for about an hour.
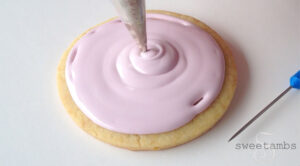
Fill in the top layer of the skirt with pink flood consistency royal icing and a decorating tip 3. Use the scribe tool to help shape the icing.
Switch the tip on the dark purple icing to a number 1 and pipe concentric circles in the pink icing.
Drag the scribe tool through the icing to create a spider web.
Repeat the process on the other side of the skirt.
Allow the icing to dry completely (overnight is best).
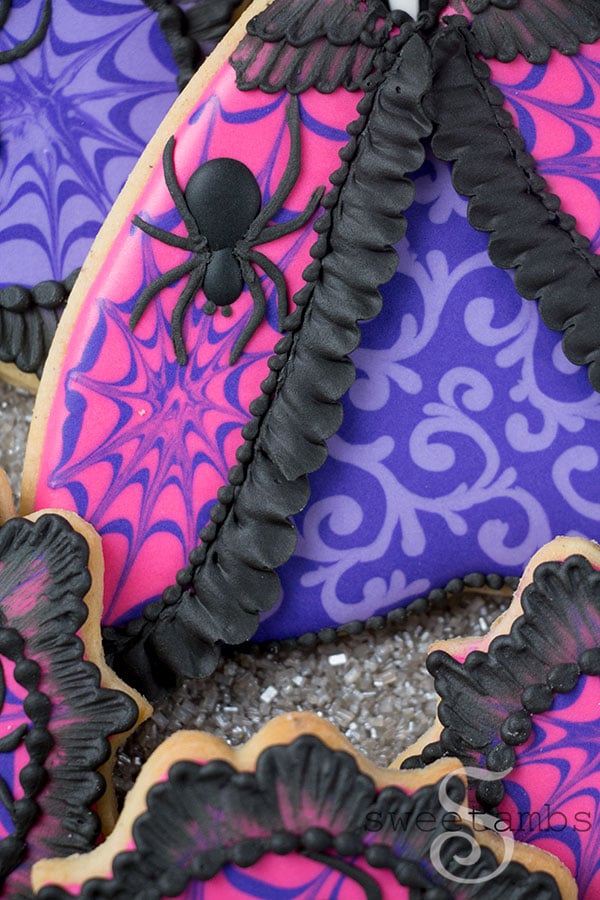
Pipe a ruffle along the edge of the top layer of the skirt with black stiff consistency royal icing and a decorating tip 101.
Use a dry brush to smooth the edge of the ruffle.
Pipe the bodies of the spiders on the skirt and bodice of the dress with black flood consistency royal icing and a decorating tip 1. Use the scribe tool to help shape the icing.
Allow the icing to dry for about 20 minutes.
Pipe the heads of the spiders and use the scribe tool to help shape the icing.
Switch the tip on the black stiff consistency icing from number 101 to 1.
Pipe the legs of the spiders with black stiff consistency icing and a tip 1.
Use the black stiff consistency icing and tip 1 to pipe a bead border along the top and bottom of the bodice.
Pipe a border along the edge of the ruffle and along the bottom of the skirt with the black stiff consistency icing and tip 1.
Create layers of brush embroidered icing on the skirt with the stiff black icing and a slightly damp brush.
I hope you enjoyed this Spider Queen Halloween cookie decorating tutorial!
Love these black ruffles!
Thanks, Sarah!