Spooky Jack O’Lantern Cookie for Halloween
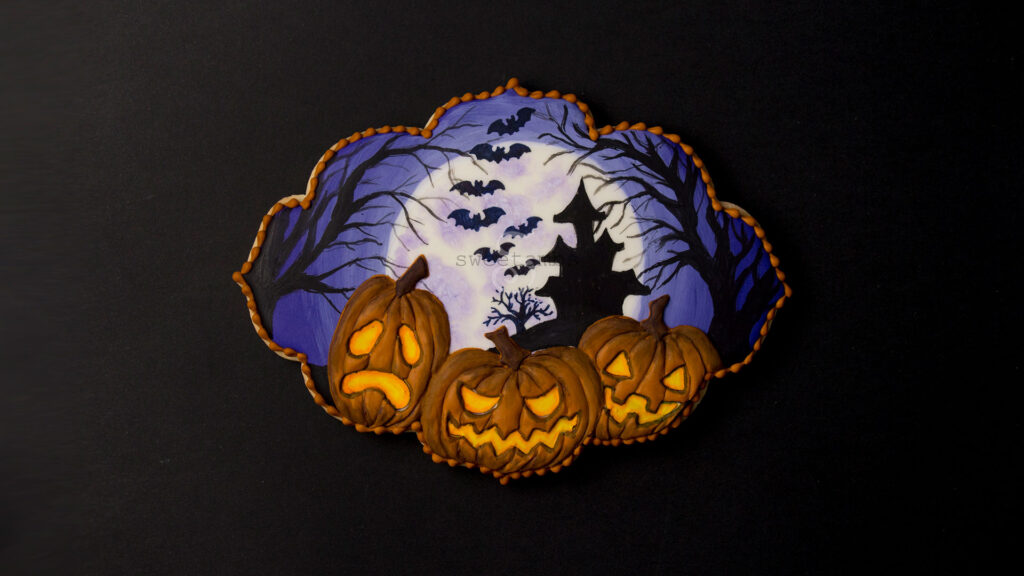

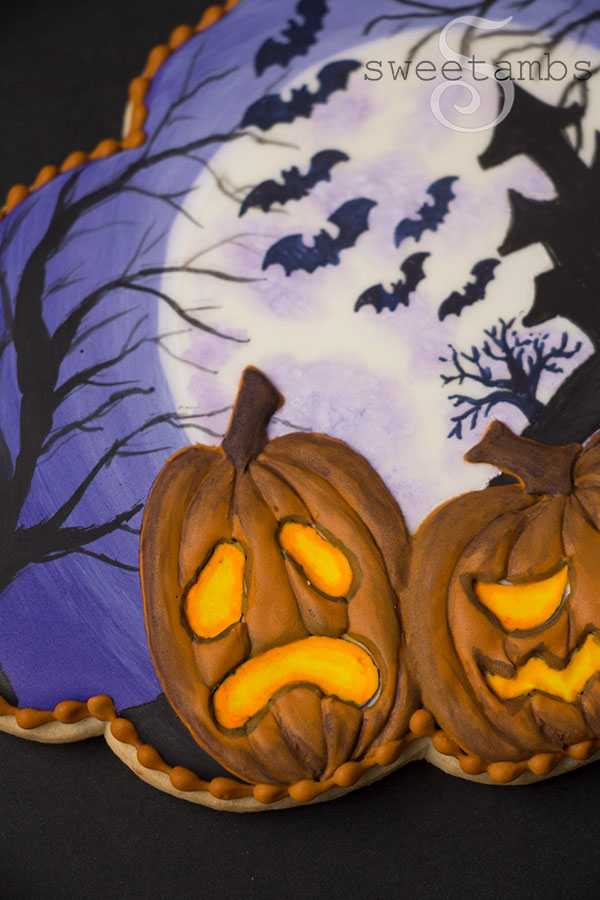
This Spooky Jack O’Lantern Cookie for Halloween might look somewhat familiar to you – remember this Halloween Night Silhouette Cookie from last year? I used the same plaque template and the same technique to create the glowing full moon. See the supply list, instructions, and video tutorial below!
Get access to exclusive cookie decorating tutorials, my cookie and royal icing recipes, and individualized cookie decorating advice by joining my Cookie Art Club!
This post contains affiliate links. Read my affiliate disclosure here.
I made this plaque-shaped cookie by using a template that I created last year for my Halloween Night Silhouette Cookie. The template is available to my Patreon Subscribers. To use the template, lay it on a chilled sheet of cookie dough and cut around it with a knife.
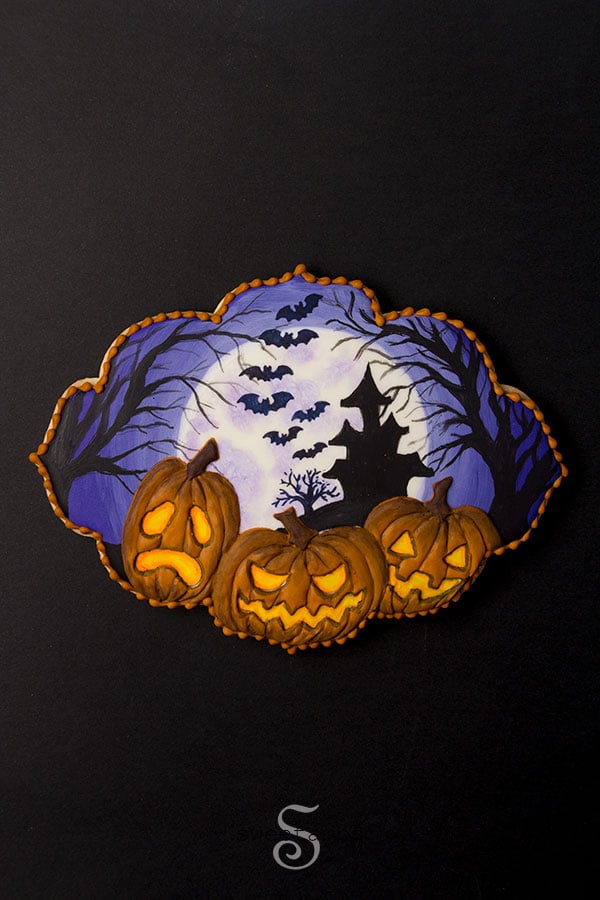

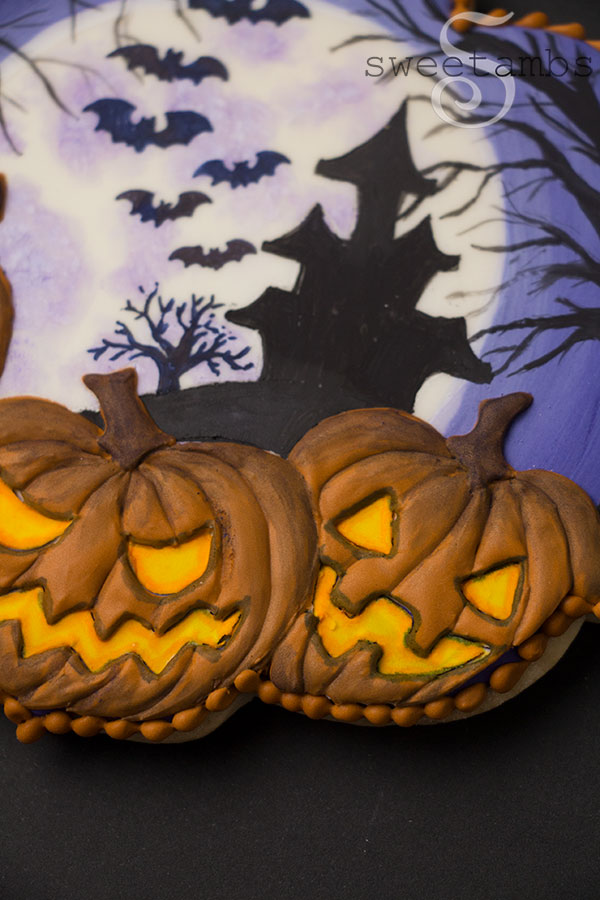
Most of this design is hand-painted, but I piped the jack o’lanterns to give the cookie some more dimension.
Read this post to learn more about painting with food coloring on royal icing.

Here’s what you’ll need to make this Spooky Jack O’Lantern Cookie for Halloween!
These supplies are available in my shop unless otherwise noted
- Chilled sheet of cookie dough (use my cookie mix or make it from scratch)
- Plaque template (available to my Patreon Subscribers)
- Knife to cut the cookie
- 2-¾” round cookie cutter for the moon
- Flood consistency royal icing in purple and white (see color combinations below)
- Stiff consistency royal icing in white
- Medium consistency royal icing in orange
- 3 – 12” Decorating bags
- Bag ties
- Couplers
- 2 – Decorating tip 3
- Decorating tip 1
- Scribe tool
- White powdered food coloring (I used Crystal Colors dust in Snowflake)
- Black powdered food coloring (also from Crystal Colors)
- Black food decorating pen (available on Amazon)
- Round decorator brush (I used the round brush from the Wilton 5 piece set)
- Thin decorator brush (I used an artist brush from the craft store)
- Paint palette
- Vodka or grain alcohol for painting
- Chefmaster Violet, Lemon Yellow, and Sunset Orange food coloring for painting
Color combinations (I used Chefmaster)
- Purple = Violet
- Orange = 4 parts Sunset Orange + 1 part Violet

Instructions
Place the template on a chilled sheet of cookie dough and cut around it with a knife. Bake the cookie according to the recipe instructions and allow it to cool completely before decorating.
Trace a round cookie cookie cutter on the plaque-shaped cookie with a scribe tool.
Ice the area outside of the circle with dark purple flood consistency royal icing and a decorating tip 3. Use the scribe tool to help shape the icing.
Fill in the circle with white flood consistency royal icing and a decorating tip 3. Use the scribe tool to help shape the icing.
Allow the icing to dry completely (overnight is best).
Mix white powdered food coloring and purple gel food coloring with vodka or grain alcohol.
Paint a glow around the moon with the white powdered food coloring.
Mix some of the purple food coloring with the white powdered food coloring to paint craters on the moon.
Mix black powdered food coloring with vodka or grain alcohol.
Trace the pumpkins from the template with the scribe tool (trace the entire scene first, then cut the pieces of the template to trace each section separately).
Use a thin brush to paint the trees with black powdered food coloring.
Paint the hill and haunted house in the background, making sure to follow the guide created with the template.
Use a black edible ink marker to draw the trees and bats.
Use a spatula to spread a thin layer of white stiff consistency royal icing over the jack-o-lanterns.
Use the scribe tool to draw the faces of the jack-o-lanterns in the icing.
Ice every other section of the jack-o-lanterns with orange medium consistency royal icing and a decorating tip 1. Use the scribe tool to help shape the icing.
Allow the icing to dry for about 30 minutes.
Fill in the remaining sections and the stems of the jack-o-lanterns.
Allow the icing to dry for about 2 hours.
Mix yellow and orange food coloring with vodka or grain alcohol.
Paint the faces of the jack-o-lanterns with the yellow food coloring.
To give the jack-o-lanterns a glowing effect, paint an outline in each of the face cut-outs with the orange food coloring mixture.
Color the stems and add shading to the jack-o-lanterns with the purple food coloring mixture.
Pipe a border around the cookie with orange medium consistency icing and a decorating tip 1. This is the same icing that was used to pipe the jack-o-lanterns.