Strawberry and Lace Cookies
This post contains affiliate links. Read my affiliate disclosure here.
Whenever someone asks me where I find inspiration for my cookie designs, my answer is that it can come from anywhere! Take these strawberry and lace cookies, for example. (made with my Ornate Square and Small Fanciful Plaque cookie cutters that I developed with Ann Clark Cookie Cutters!).
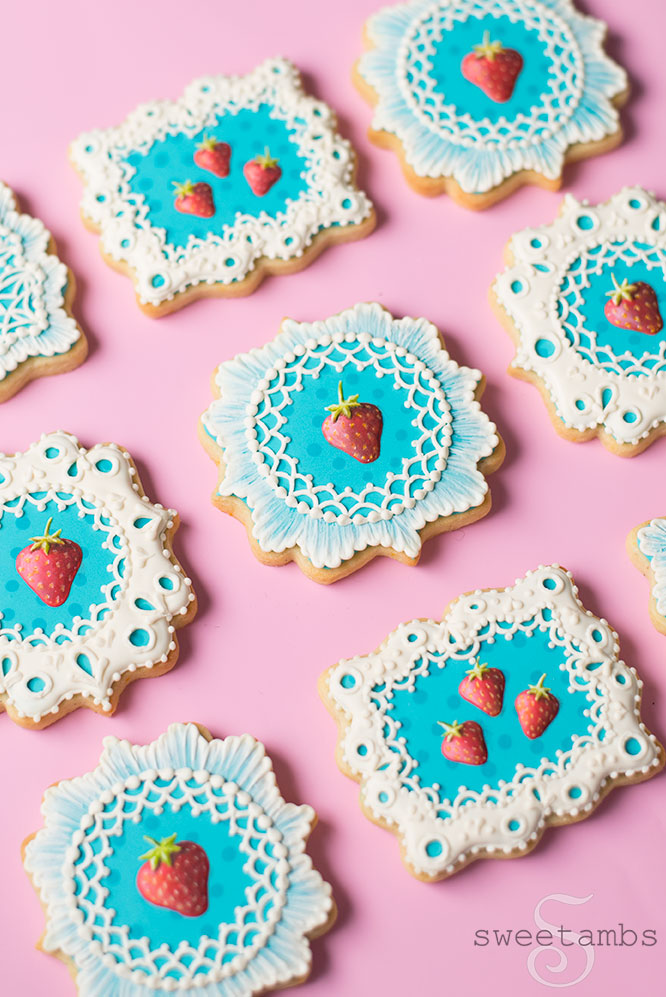

We’re in the thick of potty training our daughter and I bought her a pack of a million puffy stickers (okay 1200 but still, a ton) to put on her potty chart. It came with all kinds of designs like fish, dinosaurs, cats, hearts, stars, and my favorite of all, strawberries and eyelet lace. I’ve only found 2 or 3 in the whole pack, but as soon as I saw it I knew I had to turn it into a cookie!

It’s almost strawberry season here in the northeastern U.S. and these cookies are a perfect way to celebrate – along with Haniela’s Strawberry Mousse Icebox Cake! Doesn’t this look delicious?!


Here’s what you’ll need to make my strawberry and lace cookies:
These supplies are available in my Amazon Store.
- Roll out cookie dough (use your favorite or get mine in the Cookie Art Club)
- Ornate Square and Small Fanciful Plaque Cookie Cutters
- Flood consistency royal icing
- Slightly thinned stiff consistency royal icing
- Decorating bags
- Decorating tips: Wilton 1 and 2 and PME 1.5
- Couplers
- Bag ties
- Edible ink marker
- Round cookie cutter to trace as a guide in the center of the cookies
- Wilton Color Right:
- Teal: Blue & Yellow
- Ivory: a touch of Brown & a touch of Yellow
- Red: Red & a touch of Black
- Green: Yellow & Blue
- Sugarpaste Crystal Colors in Charcoal and Snowflake for shadows and highlights (available at Sugarpaste.com)
- Round decorator brush
- Fine tip brush
- Alcohol or any flavor extract – Alcohol or flavored extracts are used for painting on royal icing because they evaporate very quickly, which means that the liquid won’t dissolve the icing as you are applying the paint.
- Small dish or paint palette for mixing paint
—
—
Instructions:
- Begin by icing a plaque-shaped cookie with teal flood consistency royal icing and a decorating tip 3. Use a scribe tool to help shape the icing.
- Pipe dots using a darker shade of teal flood consistency icing and a decorating tip 1. Allow the icing to dry completely.
- Trace a round cookie cutter with an edible ink marker.
- Pipe a ruffled edge on the border with slightly thinned ivory stiff consistency royal icing and a decorating tip 2.
- Brush the icing toward the center of the cookie, making sure not to go beyond the round guide.
- Pipe scallops inside of the guide with a decorating tip 1.5
- Add dots to the scallops.
- Pipe a border on the round guide with a decorating tip 2.
- Use a decorating tip 1.5 to pipe decorative corners on the rectangular plaque cookie.
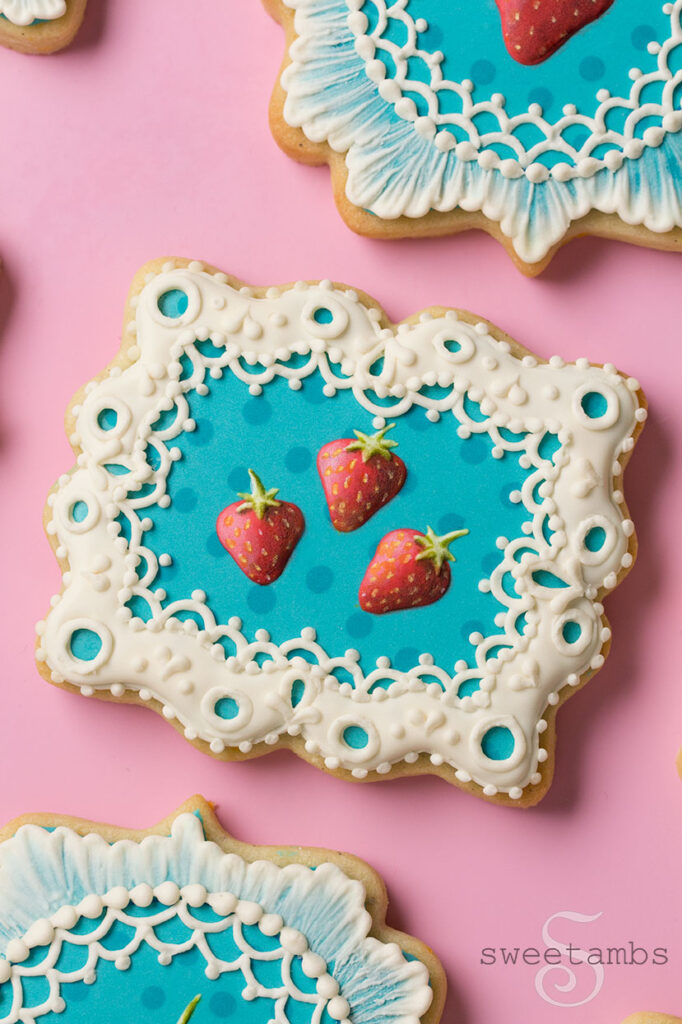
- To make an eyelet lace design, outline the cookie with a tip 1.5.
- Pipe a pattern of eyelets around the edges.
- Pipe scallops inside of the guide.
- Add dots to the scallops. Allow the icing to dry for about 15 minutes.
- Fill the space around the eyelets with ivory flood consistency icing. Allow the icing to dry completely.
- Outline all of the eyelets and add details with slightly thinned ivory stiff consistency royal icing and a decorating tip 1.5.
- Pipe a strawberry with red flood consistency royal icing and a decorating tip 1.
- Use the scribe tool to help shape the icing. Allow the icing to dry about 20 minutes.
- Pipe leaves with green flood consistency icing and a tip 1.
- Use the scribe tool to help shape the leaves and stem. Allow the icing to dry completely.
- Add shading and details to the strawberry with a mixture of food coloring and vodka or any flavor extract, such as vanilla, lemon, or almond.


—
Don’t forget to visit Haniela’s to learn how to make this beautiful and delicious Strawberry Mousse Icebox Cake!
Pin this project for later!


—
