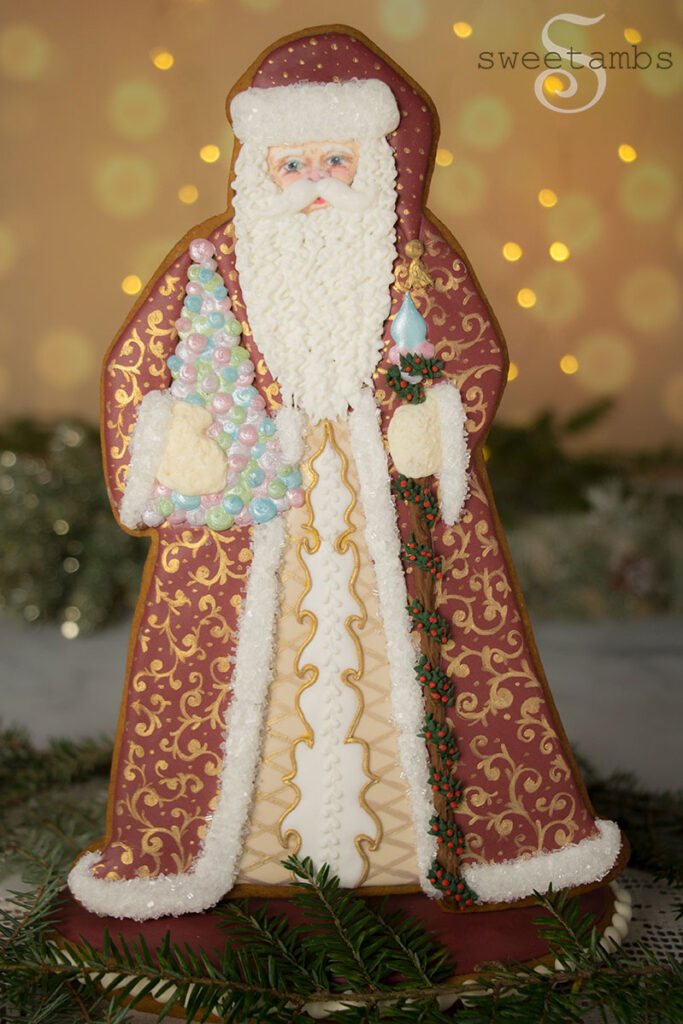
Santa Claus Gingerbread Cookie
This Santa Claus gingerbread cookie is entirely edible but I don’t have the heart to eat him! He did a good job of watching over the dessert table at Thanksgiving and is now on display in the showroom at my dad’s toy block company Wee Saw. Watch my time-lapse video to see how I made this gingerbread centerpiece!
—
This post contains affiliate links. Read my affiliate disclosure here.

—
I didn’t write instructions for this video because I was just making it up as I went along and there were way too many steps to keep track! But I did create a template if you would like to make your own gingerbread Santa Claus. My gingerbread recipe is available in my Cookie Art Club.

—
You’ll see in the video that I cut the template into pieces and traced each piece with an edible ink marker to make sure I got the placement right.
—
Here’s what I used to make this Santa Claus Gingerbread Cookie
These products can be found in my Amazon Store unless otherwise noted.
- Gingerbread cookie doug
- Edible ink marker
- Flood consistency royal icing in light peach, white, burgundy, ivory,
- Slightly-thinned stiff consistency royal icing in brown
- Medium consistency royal icing in dark brown, white, ivory, golden brown
- Stiff consistency royal icing in white, dark green, and red
- Couplers
- Decorating Bags
- Bag ties
- Decorating tip 3 for flooding
- Decorating tip 2 for flooding small areas and larger details
- Decorating tip 1 for details
- PME Decorating tip 1.5 for fine details
- Decorating tip 8 for bead border around base
- Scribe tool
- Wilton Color Right food coloring
- Burgundy = crimson + brown
- Light Peach = pink + a touch of yellow + a touch of brown
- Ivory = a touch of brown + a touch of yellow
- Brown
- Golden brown = brown + yellow
- Dark green = blue + yellow + brown
- Crystal Colors Antique Gold
- Wilton Pearl Dust in pink, purple, green, and blue
- Edible matte dust in brown, black, white, and pink
- Alcohol or any flavor extract – Alcohol or flavored extracts are used for painting on royal icing because they evaporate very quickly, which means that the liquid won’t dissolve the icing as you are applying the paint.
- Fine tip brush
- Paint palette or small dish
- Sparkling sugar
—


—


Pin this project for later!


—
—
