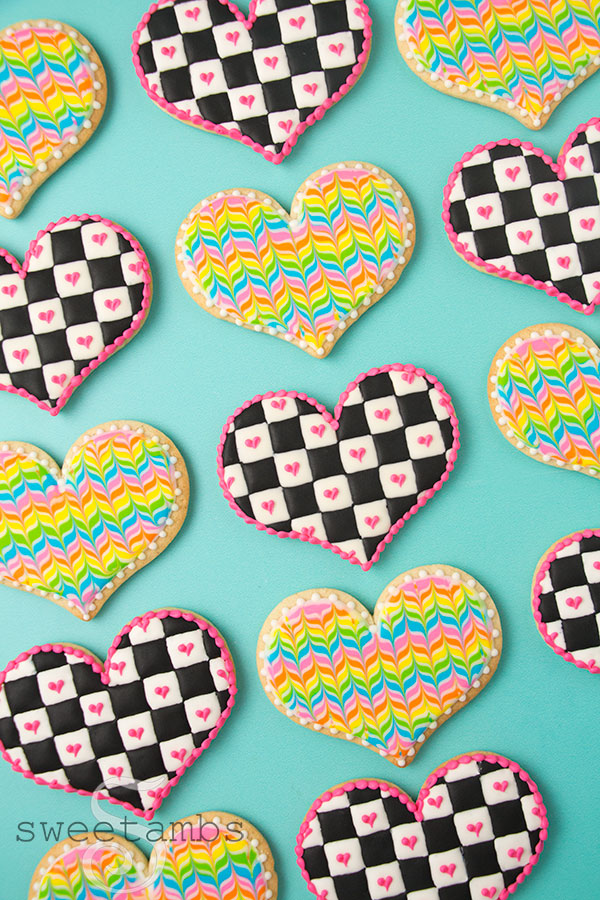
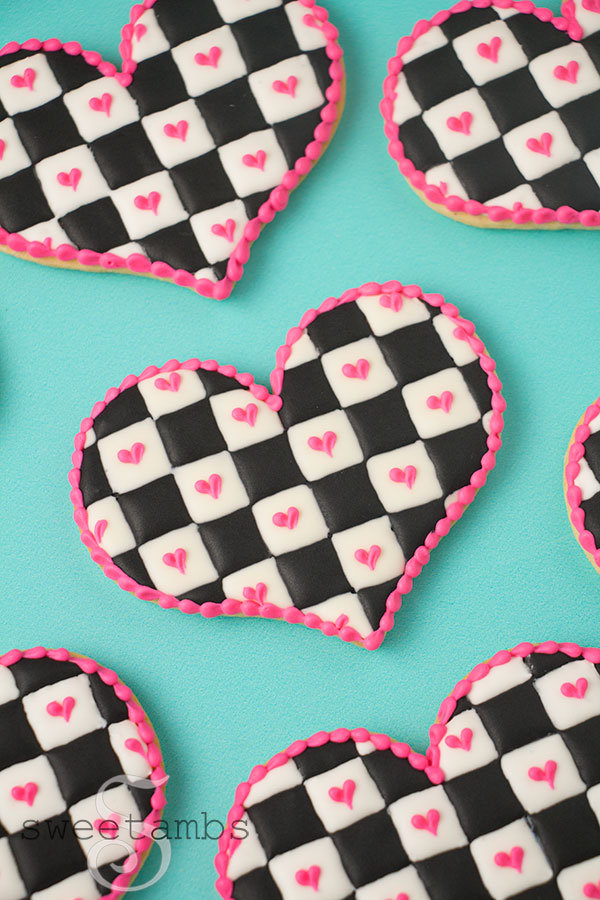
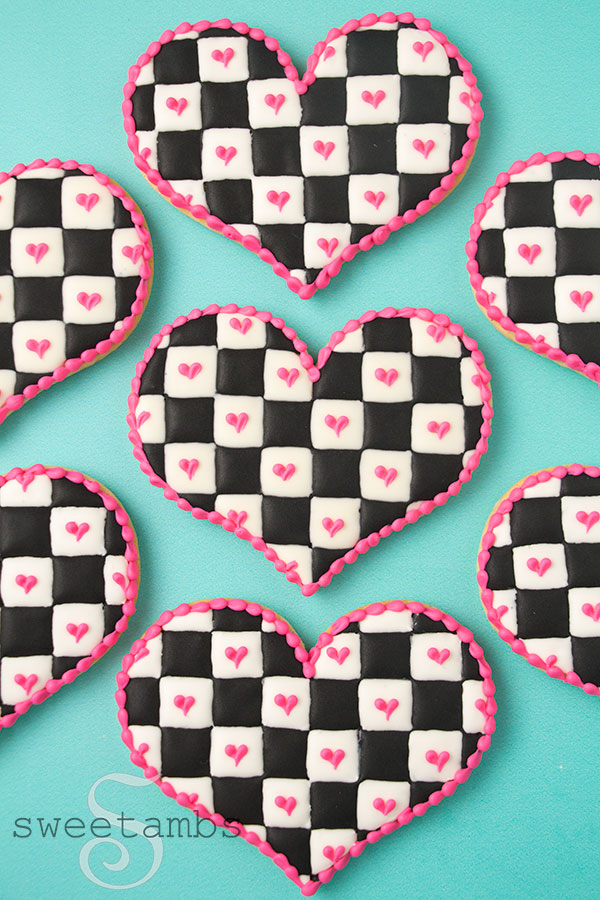
Checkerboard Icing Cookies for Valentine’s Day
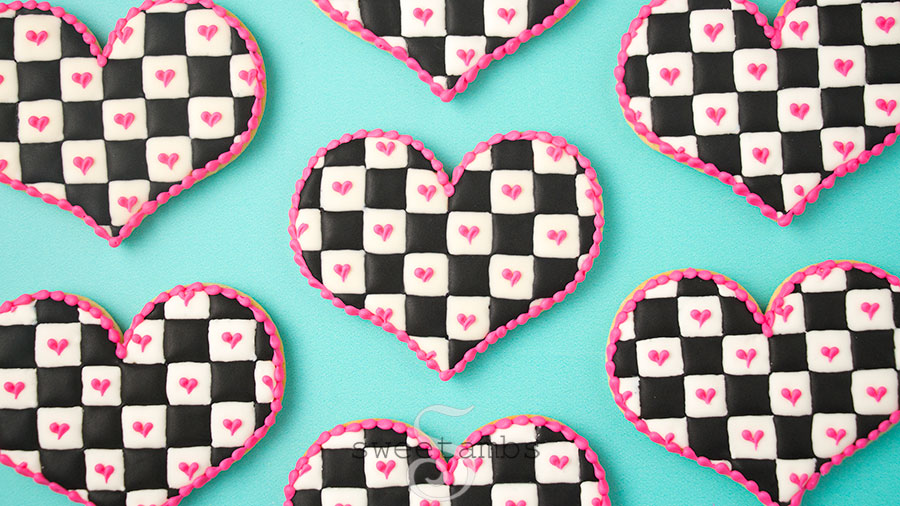

These checkerboard icing cookies were inspired by a pair of my daughter’s sneakers – the tiniest pair of Vans I ever saw! 🥰 See the video tutorial and supply list to make these checkered icing heart cookies for Valentine’s Day below.
Get access to exclusive cookie decorating tutorials, my cookie and royal icing recipes, and individualized cookie decorating advice by joining my Cookie Art Club!
This post contains affiliate links. Read my affiliate disclosure here.

The cookie cutter that I used for this project is part of Sweet Sugarbelle’s Shape Shifter set. If you don’t want to purchase the whole set, Ann Clark offers a similar cookie cutter here.


How To Prevent Color Bleed
When making these checkerboard icing cookies, you’ll have to take some steps to prevent the black icing from bleeding into the white. These tips are from my post on how to make black icing.
Tip 1 – Don’t over-mix the icing
In order to be able to create black royal icing or any dark color, your icing has to start out at the right consistency. If it’s over-mixed, the icing will have too many air bubbles, which will make your icing susceptible to color bleed and fragility. Make sure to mix your icing on medium-low speed for no more than 5 minutes. My Ultimate Guide to Royal Icing has more info about making sure your icing is the correct consistency.
Tip 2 – Don’t make your icing too thin
When making black flood consistency icing, start out with icing that’s on the thicker side (around 20 second count). Just like over-mixing, adding too much water to your icing will make it susceptible to color bleed and fragility. Adding color to icing that’s too thin icing will only exacerbate the issues.
Tip 3 – Combine leftover icing
When you have icing left over from a previous project, mix all of those colors together. This will give you a good base to start with when making black icing. It’s completely okay to skip this one when you don’t have leftover icing and need to start with a white base.
Tip 4 – Add the color several hours ahead of time
This is a tip that I picked up from Sweet Sugarbelle way back when. I realize this is another one that’s not always possible because sometimes we need to get the cookies out TODAY, but when you can, add the color to the icing several hours or even a day in advance. When I make black icing, I don’t try to get to black right away. I create a dark shade of gray and let the icing sit for a while to allow the color to darken on its own. Then I’ll add a little more color if it needs it. This ensures that I’m not putting too much food coloring in the icing.
Tip 4 – Use concentrated food coloring (that doesn’t taste bad!)
Certain types of black and red food coloring can have a strange taste that will ruin your icing. If you open a bottle or jar of food coloring and it smells like a permanent marker, don’t use it!
See my tips on how to make black royal icing.

Here’s what you’ll need to make these checkerboard icing cookies
- Chilled sheet of cookie dough
- Heart cookie cutter (I’m using the one from Sweet Sugarbelle’s Shape Shifter Set: https://amzn.to/390DmAY Find a similar cutter here: https://amzn.to/3pWCg05)
- Edible ink marker: https://amzn.to/3hMNMZf
- Ruler
- Royal icing (make it from scratch using my recipe in the Cookie Art Club)
- Scribe tool
- Decorating tip 1
- Decorating tip 2
- 3 Decorating bags
- 3 Bag Ties
- 3 Couplers
- Chefmaster Coal Black Food Coloring
- Chefmaster Deep Pink Food Coloring
Read my Ultimate Guide To Royal Icing to learn all about royal icing consistencies.
Instructions
- Cut the cookies from a chilled sheet of cookie dough.
- Draw a ½” grid using an edible ink marker and a ruler.
- Make a batch of royal icing from scratch or use a royal icing mix.
- Sift the royal icing mix.
- Place the mix into a bowl of a stand mixer with the paddle attachment.
- Turn the mixer on low speed and add ⅓ cup of water.
- Stop and scrape the bowl.
- Mix the icing on medium low speed for 3 to 5 minutes.
- The icing should be thick and hold a stiff peak.
- Set about ½ cup of stiff consistency icing aside.
- Add a teaspoon of water at a time to the rest of the royal icing to thin it to flood consistency.
- To test the consistency, take a spoonful of icing out of the bowl and drop it back in. It should take 15 to 20 seconds to be completely smooth.
- Split the icing in half. Leave one half white and color the other half with black food coloring.
- Fill in every other square with black flood consistency icing and a decorating tip 1.
- Use a scribe tool to help shape the icing.
- Allow the icing to dry for about an hour.
- Fill in the rest of the squares with white flood consistency icing and a tip 1.
- Use the scribe tool to help shape the icing.
- Allow the icing to dry completely (overnight is best).
- Add a few drops of water to the remaining stiff consistency royal icing and color it with pink food coloring.
- Pipe hearts with the pink icing and a decorating tip 1.
- Switch the tip on the pink icing from a 1 to a 2.
- Pipe a border with the pink icing.
I also used Sweet Sugarbelle’s heart cookie cutter to make these rainbow herringbone pattern cookies. You can see the full tutorial on Sarah Ferguson’s YouTube Channel!