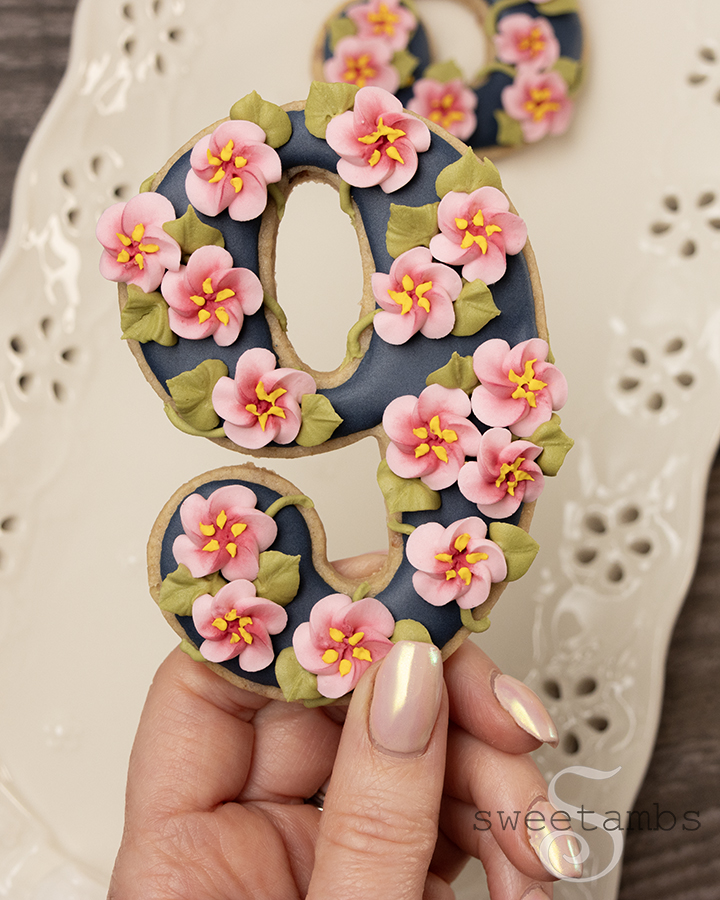
Beautiful Cherry Blossom Cookies Decorated With Royal Icing
There’s a new tutorial in the Cookie Art Club! Learn how to make these beautiful cherry blossom birthday cookies decorated with royal icing.
I created these birthday cookies for my grandmother who recently celebrated her 93rd birthday during cherry blossom season!


You can watch this members-only video tutorial (without ads!) when you join my Cookie Art Club!
Get access to exclusive cookie decorating tutorials, my cookie and royal icing recipes, and individualized cookie decorating advice by joining my Cookie Art Club!
This post contains affiliate links. Read my affiliate disclosure here.
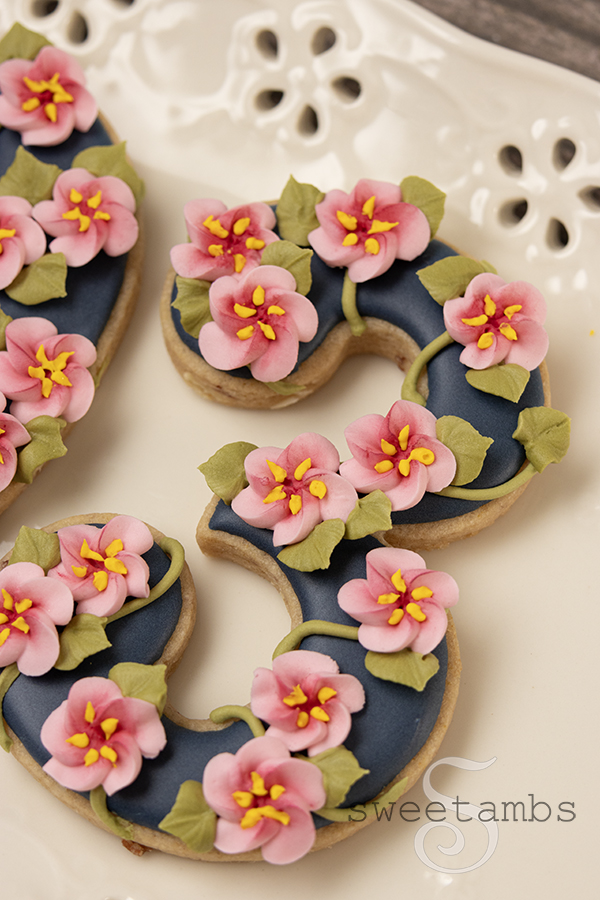

I used the Disco Numbers 2 set from Cakes By Ximena for this project, which is one of my favorite cookie cutter sets! You might recognize these shapes from the Minnie Mouse inspired birthday cookies that I made for my daughter’s 3rd birthday.
The royal icing cherry blossoms can be made ahead of time and stored indefinitely at room temperature in an airtight container. I made a whole bunch and I’ll save them for a future project.

Here’s what you’ll need to make these cherry blossom cookies decorated with royal icing
These supplies are available in my Amazon store unless otherwise noted
- Chilled sheet of cookie dough (I used my cherry almond cut-out cookie recipe)
- Number cookie cutters (I used Disco Numbers 2 from Cakes by Ximena)
- Royal icing
- Royal Blue, Coal Black, Leaf Green, Rose Pink, and Lemon Yellow food coloring (I used Chefmaster brand food coloring)
- Scribe tool
- 4 12” Decorating bags
- Wilton decorating tips 1, 2, 3, drop flower tip 224, and leaf tip 350 or 352
- Couplers & Bag ties (I used Wilton brand)
- Wax paper covered board
- Bright pink edible powdered color (I used Sweet Sticks Magnolia Paint Powder)
- Decorator brush (I used Wilton)
Want to make these cookies yourself? The video tutorial and recipes to recreate these cookies are available to Cookie Art Club members and you can try it free for 7 days.
