My Wedding Cookies!
The big day has come and gone! We had such a nice time celebrating with our family and friends. It was an amazing day and we couldn’t have asked for a better wedding.
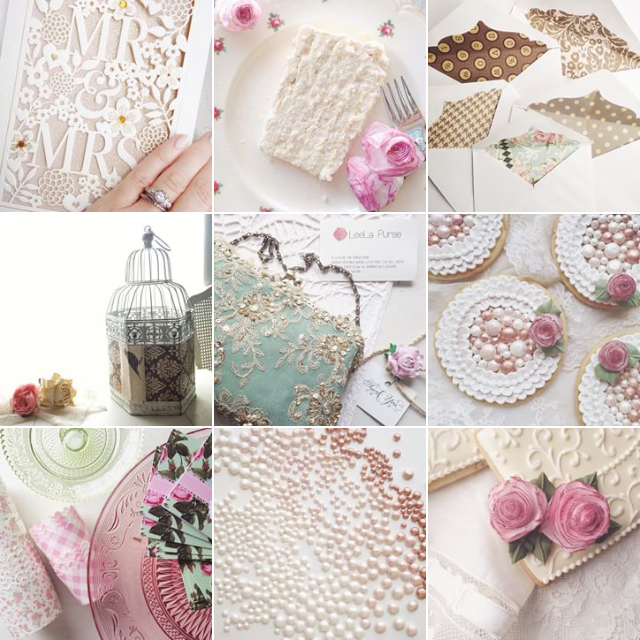
And now I can finally share my wedding cookies with you! Yay!! We haven’t yet received our professional photos from the photographer, but of course I took pictures of the cookies myself before I brought them to the venue 🙂
You can watch this members-only video tutorial (without ads!) when you join my Cookie Art Club!
Get access to exclusive cookie decorating tutorials, my cookie and royal icing recipes, and individualized cookie decorating advice by joining my Cookie Art Club!

Here’s one small portion of the 130 cookies ready to be wrapped up! Read this post to learn how I handle making large quantities of cookies without getting completely overwhelmed. In addition to the tips in that post, it doesn’t hurt to enlist the help of a friend or two (thanks, Tara Latorre!)
This post contains affiliate links. Read my affiliate disclosure here.
Here’s what you’ll need to make these wedding monogram cookies:
- Plaque template (below)
- Wax paper
- Roll-out cookie dough (use your favorite cookie recipe or get mine in the tutorial shop)
- Ann Clark Long Fancy Plaque cookie cutter
- Flood consistency royal icing in brown and blue
- Medium consistency royal icing in white
- 12″ decorating bags
- Decorating tip 1
- Decorating tip 2
- Decorating tip 3
- Scribe tool
- White pearl dust
- Bronze pearl dust
- Gold pearl dust
- Brushes
- Edible wafer paper
- Corner punch
- Alcohol or flavored extract for painting with pearl dust (why? read this)
- Paint palette or small dishes
- Optional: Piped roses and leaves: stiff consistency royal icing, petal tip 101 and leaf tip 352 (you can learn how to make piped roses in my online class)
Colors: The Wilton Color Right color system was used to create all of the icing colors in this set of cookies
- Blue = blue + black
- Brown = brown + black
–