How To Make Christmas Cookie Ornaments

Christmas cookie ornaments are a great way to decorate the tree! You don’t even have to do anything special to preserve these cookies for the holidays. Watch the video tutorial below!
Get access to exclusive cookie decorating tutorials, my cookie and royal icing recipes, and individualized cookie decorating advice by joining my Cookie Art Club!
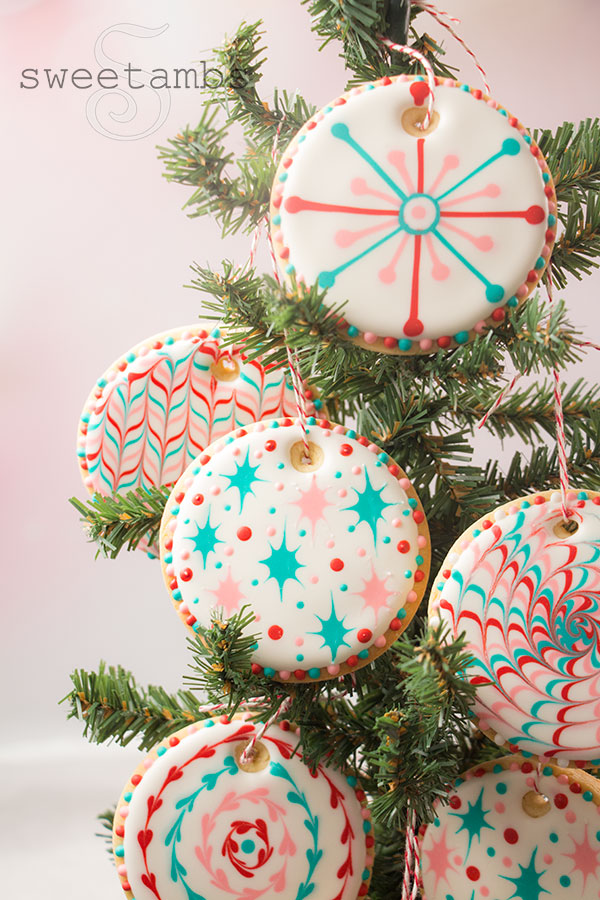

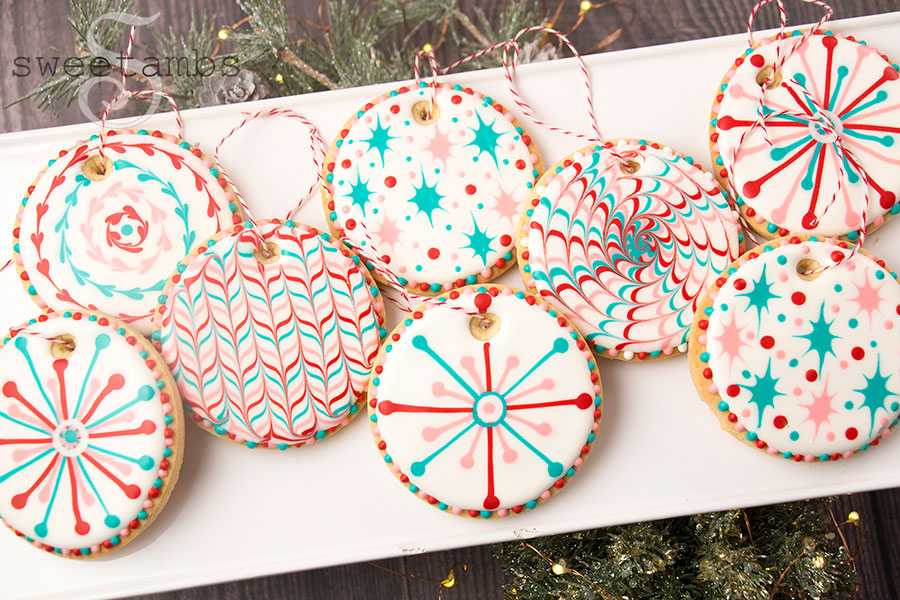
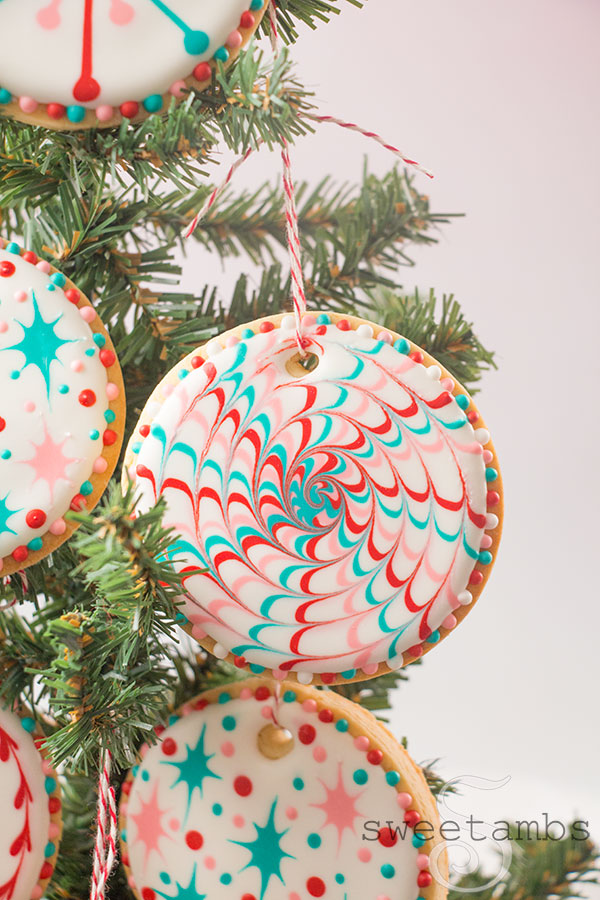
The patterns and colors in the royal icing on these edible Christmas ornaments have a 1960s feel. I was inspired to make them after we moved into a mid-century ranch home last month!
Once the royal icing is dry, these cookies can stay on your tree for the whole season. Sugar is a great preservative, so you don’t need to do anything special to preserve these cookies.
Here’s what you’ll need to make Christmas Cookie Ornaments
- Chilled sheet of cookie dough (recipe available in my Cookie Art Club)
- Flood consistency royal icing
- 3” round cookie cutter
- Tipless Decorating Bags
- Scribe tool
- Chefmaster food coloring
- Super Red (use this to make red and pink icing)
- Teal
- String to hang the ornaments
Read my Ultimate Guide To Royal Icing to learn all about royal icing consistencies.

Instructions
- Cut 3” round cookies from a chilled sheet of cookie dough. Use a scribe tool to make a hole at the top of the cookies before baking them.
- Bake the cookies at 350˚ Fahrenheit for 10-12 minutes.
- To decorate the cookies, start with 1-½ cups of stiff consistency royal icing.
- Add 1 tablespoon and 2 teaspoons of water to thin the icing to flood consistency.
- To test the consistency, take a spoonful of icing out of the bowl and drop it back in. It should take 15 to 20 seconds to be completely smooth.
- Color 2 tablespoons of flood consistency icing with 3 drops of teal food coloring.
- Color 2 tablespoons of flood consistency icing with 8 drops of red food coloring.
- Color 2 tablespoons of flood consistency icing with a little bit of the red icing to make pink.
- Fill tipless decorating bags with each color of icing.
- Cut a small opening in the tip of each bag.
- Ice a cookie with white icing. Use the scribe tool to help shape the icing.
- Immediately pipe the design while the base layer is still wet.
- Flood the next cookie and make a new design.
- To make the stars, drag the scribe tool through the dots of icing to create points.
- Wipe the scribe tool on a damp paper towel after making each point of the star.
- Allow the icing to dry for about 30 minutes.
- Pipe a dot border around the edge of the cookies.
- Allow the icing to dry completely (overnight is best).
- Cut a piece of string and thread it through the hole in the cookie.
- Tie a knot at the top.
This post was originally published on December 10, 2020
