Halloween Night Silhouette Cookie
My 3-year-old daughter Olive is very into Halloween this year. She’s been watching kids’ Halloween videos since the summer and is constantly asking, “is it Halloween yet?”. Now that it’s October, I tell her that it’s a little bit Halloween and she seems satisfied with that answer!
You can watch this members-only video tutorial (without ads!) when you join my Cookie Art Club!
Get access to exclusive cookie decorating tutorials, my cookie and royal icing recipes, and individualized cookie decorating advice by joining my Cookie Art Club!
—
This post contains affiliate links. Read my affiliate disclosure here.


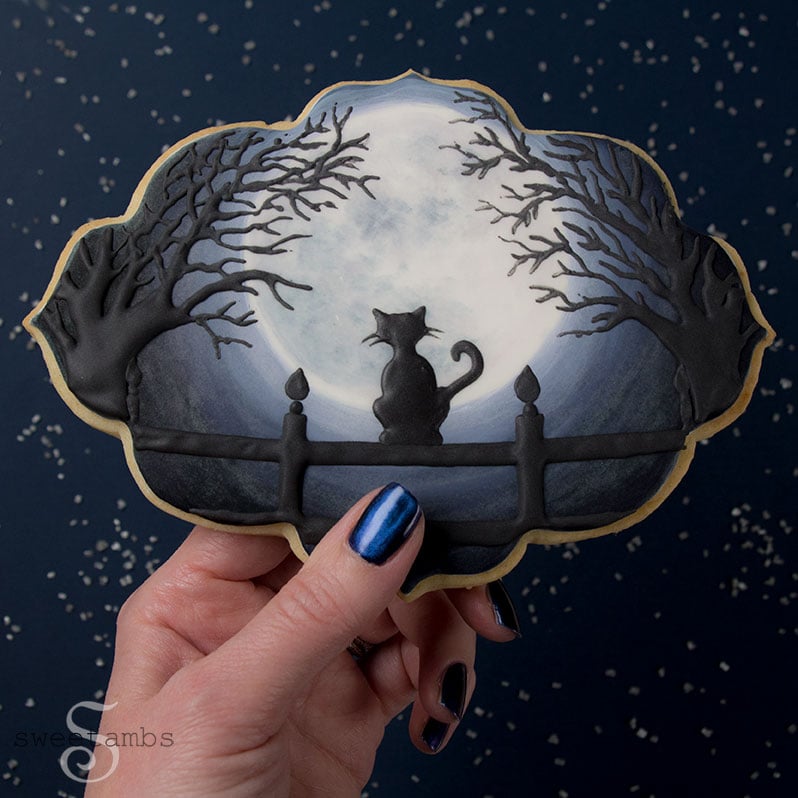
I had my daughter in mind when creating this Halloween Night silhouette cookie. When I showed it to her she said, “Halloween! Spooookyyyyy” and waved her little fingers in the air. That’s the best reaction I could ask for 😂


I used a combination of painting and piping for this cookie. The glowing effect around the moon is achieved by painting white edible dust on top of the black food coloring.


This is a very large cookie – about 6.5 x 4.5″ – and I knew I’d only be making one, so I cut it by hand rather than searching for a giant cookie cutter or having one custom made. This template is available to my Cookie Art Club members . If you want to be able to reuse the template, I recommend wrapping the whole thing in packing tape to protect it from getting greasy and falling apart.
This cookie took me a few hours to make, not including the time it took for the white icing to dry. You’ll need to let the base layer dry for at least 8 hours so that the icing doesn’t dissolve when you paint it.
Read this post to learn more about painting with food coloring on royal icing.


I always like to ice my cookies one day, let them dry overnight, and then finish the details the following day to ensure that the icing is completely dry. Read this post on Royal Icing for more tips.
Read my Ultimate Guide To Royal Icing to learn all about royal icing consistencies.


The black food coloring in the Wilton Color Right set tends to show up as navy blue when it’s used for paint, but that’s exactly the color I wanted for the night sky on this spooky Halloween cookie. When I need to paint a true black, I’ll use edible dust from Crystal Colors in Charcoal. I also add the dust to my black icing to help deepen it without needing to use a whole bottle of food coloring.
Supply List
Most of these supplies can be found in my Amazon Store unless otherwise noted.
- Cookie dough (use your favorite or get my recipe in the Cookie Art Club)
- Plaque template (available to my Cookie Art Club Members)
- Flood consistency royal icing in black and white
- 12″ decorating bags
- Bag ties
- Couplers
- Decorating tips 1 and 3
- Scribe Tool
- Round brush
- White edible dust (I used Crystal Colors Snow Flake – look for it in my Amazon Store)
- Black food coloring
- Alcohol or any flavor extract – Alcohol or flavored extracts are used for painting on royal icing because they evaporate very quickly, which means that the liquid won’t dissolve the icing as you are applying the paint.
- Palette or small dishes for mixing paint


Instructions
- Place the template onto a chilled sheet of cookie dough. Cut around the template with a knife. Bake the cookie according to the recipe and allow it to dry completely.
- Begin by icing a plaque-shaped cookie with white flood consistency royal icing and a decorating tip 3.
- Use a scribe tool to help shape the icing. Allow the icing to dry completely.
- Mix black food coloring with vodka or any flavor extract, such as vanilla, lemon, or almond.
- Trace a round cookie cutter with the scribe tool to make a guide for the moon.
- Paint the icing with the black food coloring.
- Mix edible white dust with vodka or any flavor extract.
- Paint around the edges of the moon to create a glowing effect.
- Use the black food coloring to paint the details on the moon.
- Pipe the trees, fence, and cat silhouette with black flood consistency royal icing and a decorating tip 1.
- Use the scribe tool to help shape the icing.
Happy Halloween!
Pin this project for later!

—
—
