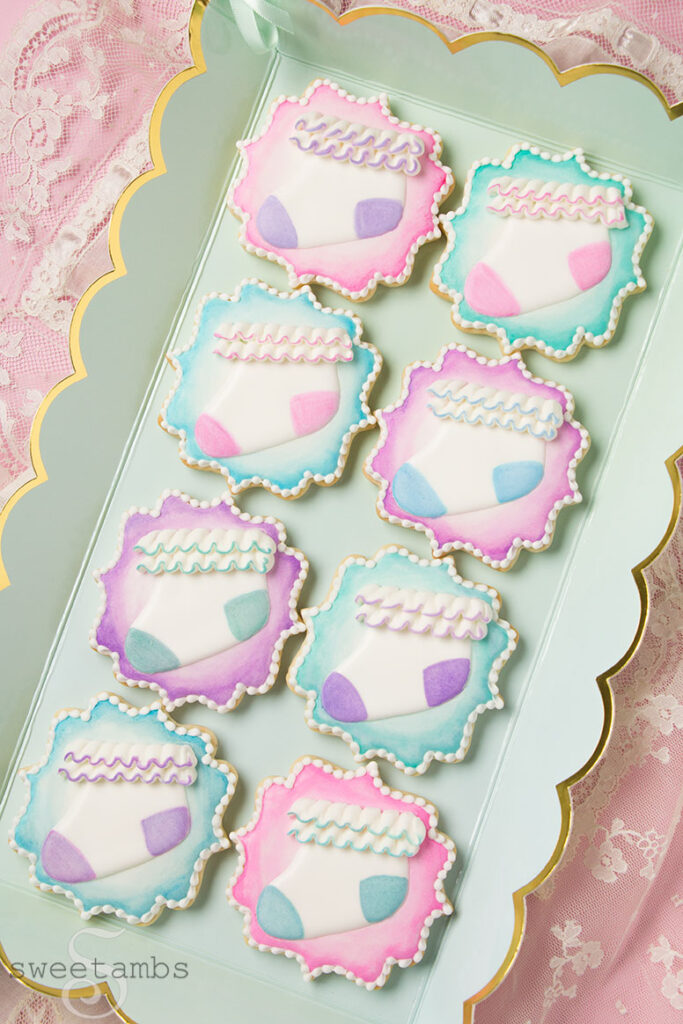
Baby Bootie Cookies!
My brother and my sister-in-law recently welcomed their new baby. I’m thrilled to be an aunt! It’s great to have our kids so close in age (my youngest, Sidney, is only 4 months old).
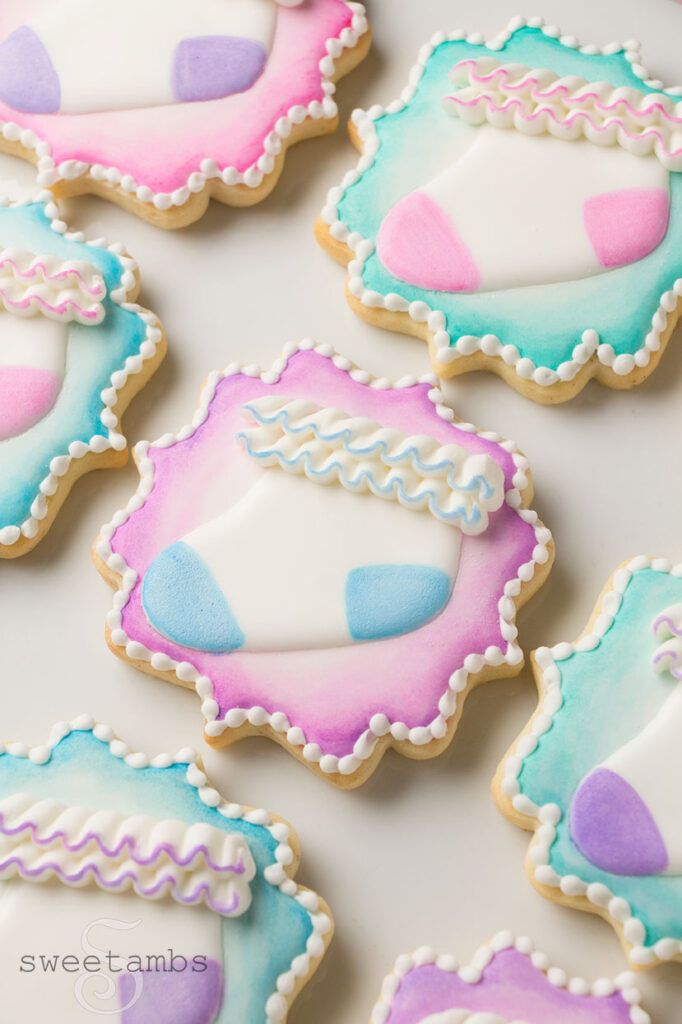
My new niece has been getting all of Sidney’s clothes that she’s quickly growing out of, including baby booties! I have a drawer full of them with ruffles in all different colors just like the ones on these adorable baby bootie cookies 🙂
Get access to exclusive cookie decorating tutorials, my cookie and royal icing recipes, and individualized cookie decorating advice by joining my Cookie Art Club!
—
This post contains affiliate links. Read my affiliate disclosure here.

Painting on royal icing is so much faster and easier for me than coloring the icing in separate containers and filling all those bags. I used a mixture of Wilton Color Right food coloring with strong vodka (Devil’s Springs 151 proof is my current favorite, but Everclear works great, too!). Read my blog post about making gold icing to learn why it’s best to use alcohol when painting on royal icing.
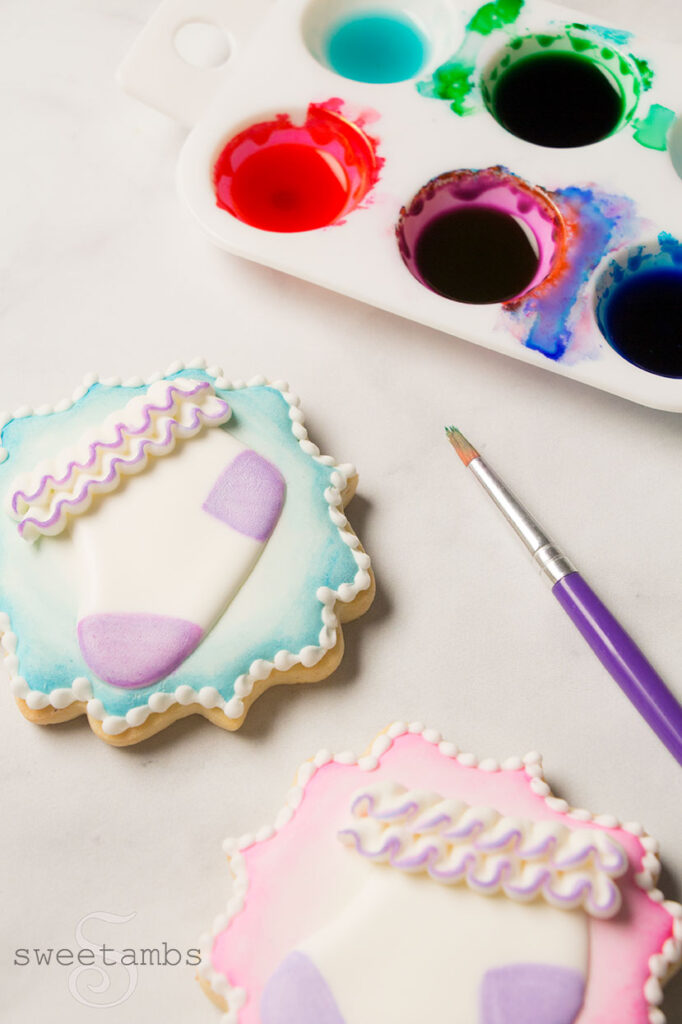

It can be difficult to control the saturation of the color with this method, so I apply a layer of edible white dust over the color to lighten it. The white dust also creates a little bit of texture, which adds to the soft and cuddly look of the baby bootie cookies 🙂
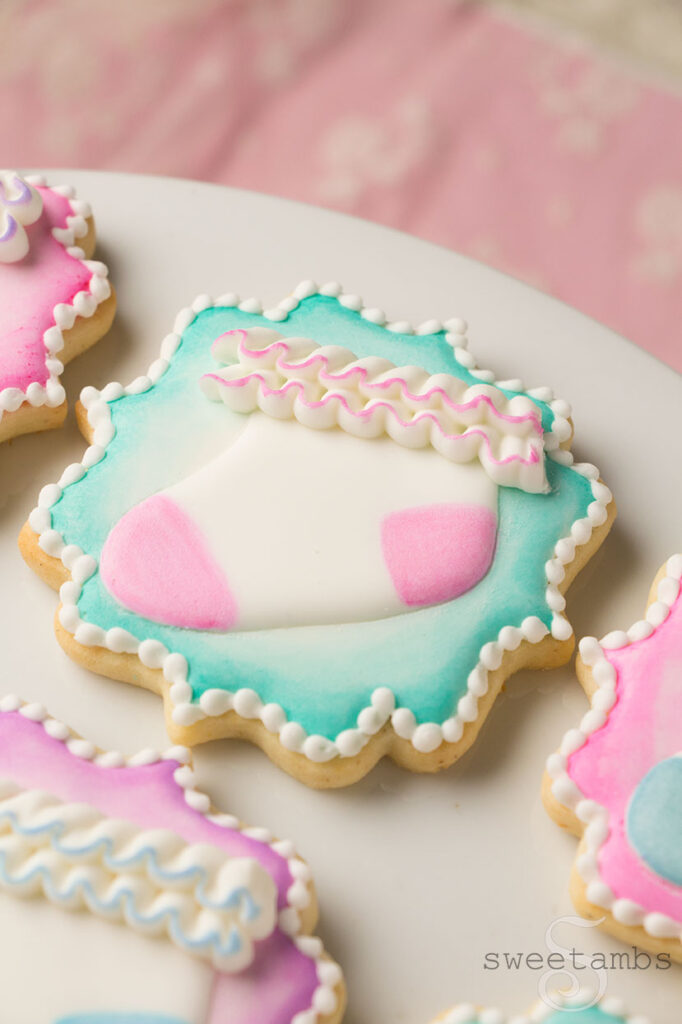

Another shortcut I like to take is using a plaque-shaped cookie rather than hand-cutting a specific shape or waiting for a custom cutter to arrive in the mail. This pretty plaque shape is my Small Ornate Square cutter that I created with Ann Clark Cookie Cutters.
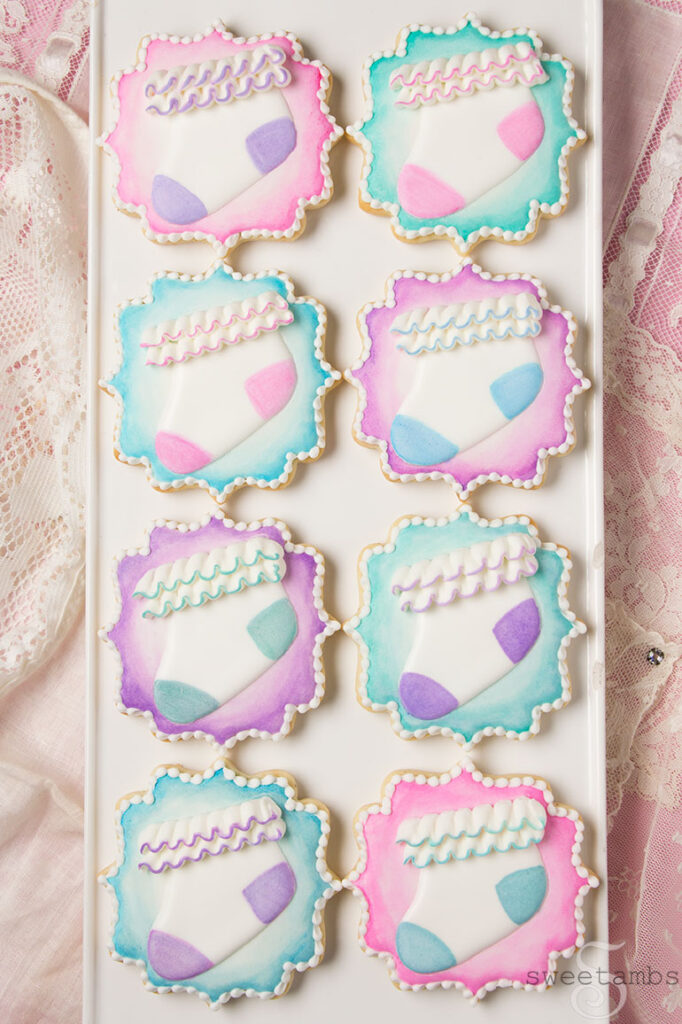

The icing on the cake (cookies) are the ruffles along the cuff of the baby booties. I piped them with a petal tip 101.
Here’s what you’ll need to make these Baby Bootie Cookies
These products can be found in my Amazon Store unless otherwise noted.
- Cookie dough (Get my recipe in the tutorial shop or use my new cookie dough mix!)
- Small Ornate Square Plaque cookie cutter
- Baby bootie template (below)
- Flood consistency royal icing
- Medium consistency royal icing
- Stiff consistency royal icing
- Decorating Bags
- Bag ties
- Decorating tip 2 & 3 for flooding and bead border
- Decorating tip 101 for ruffles
- Decorator brush for painting
- Scribe tool
- Wilton Color Right food coloring
- Edible white dust (I used Snow Flake from Crystal Colors – find it in my Amazon Store)
- Alcohol or any flavor extract – Alcohol or flavored extracts are used for painting on royal icing because they evaporate very quickly, which means that the liquid won’t dissolve the icing as you are applying the paint.
- Paint palette or small dish

Pin this project for later!


—
