Art Deco Cookies


My friends at World’s End Comics in Kingston, New York recently introduced me to Monstress, a comic written by Marjorie Liu and illustrated by Sana Takeda. The cover art of Volume 1 inspired me to create these Art Deco cookies.
–B
Become a subscriber to get this tutorial ad-free along with other members-only benefits!


—
This post contains affiliate links. Read my affiliate disclosure here.
—
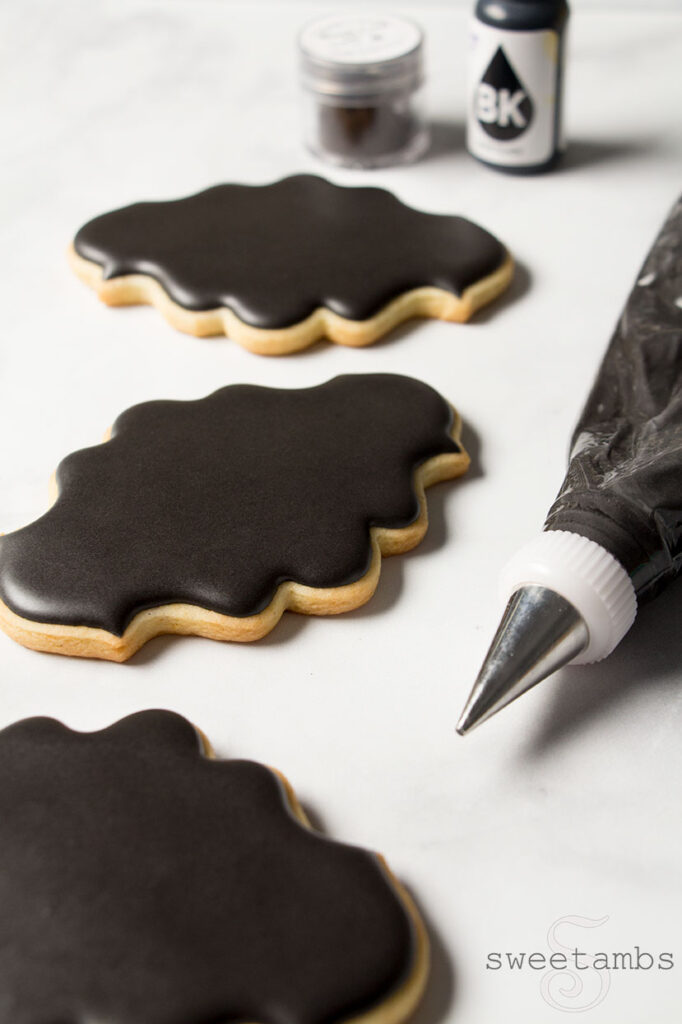
I used the 4″ Oval Plaque from Ann Clark Cookie Cutters to cut the cookies and I iced them in black flood consistency royal icing. Making black royal icing can be a pain, but I have a few tips to make it a little easier. Take a look at my post on how to make black royal icing.

—
Once the base layer was completely dry (I let mine dry overnight), I piped the details with icing that was slightly-thinner than stiff consistency with a PME tip 1.5. I prefer to use this tip when piping lines because it gives me more control over the icing. The brush embroidered flower was piped using the same consistency of icing with a Wilton tip 1. The gold paint is a mixture of Crystal Colors Antique Gold luster dust and Devil’s Spring vodka (151 proof – the stronger the alcohol, the better!). Read this post to learn about painting on royal icing and why it’s important to use alcohol for this process.


—
Watch the video tutorial and get the printable supply list with instructions below.


—


—
Print it or Pin it:
Art Deco Cookies


The cover art of Monstress Volume 1 inspired me to create these Art Deco cookies. The supplies are available in my Amazon Store unless otherwise noted.
Materials
- Chilled sheet of cookie dough
- Ann Clark Oval Plaque Cookie Cutter
- Flood consistency royal icing in black (see my last post for tips on how to make black royal icing)
- Decorating bags
- Couplers
- Bag Ties
- Decorating tips 1, 1.5, and 3
- Scribe tool
- Round brush (I use the one from the Wilton 5 piece set)
- Thin artist brush
- Gold luster dust (I use Crystal Colors Antique Gold)
- Alcohol or any flavor extract for painting (I use Devil's Spring 151 proof vodka)
- Paint palette or small dish for mixing luster dust
Instructions
- Cut plaque cookies from a chilled sheet of cookie dough. Bake the cookies according to the recipe and allow them to cool completely before decorating.
- Ice a plaque cookie with black flood consistency royal icing and a decorating tip 3. Use a scribe tool to help shape the icing. Allow the icing to dry completely (overnight is best)
- Trace a round cookie cutter with the scribe tool to create a guide.
- Pipe the design with brown slightly thinned stiff consistency icing and a decorating tip 1.5.
- Use a dry brush to help shape the lines.
- Pipe an outline with the brown icing. Allow the icing to dry for about 30 minutes.
- To make a brush embroidered flower, use a scribe tool to outline the petals.
- Pipe over the outlines with black slightly thinned stiff consistency royal icing and a decorating tip 1.5.
- Brush the icing toward the center of the flower with a thin brush. Continue layering the petals. Allow the icing to dry for about 30 minutes.
- Paint the icing with a mixture of gold luster dust and vodka or any flavor extract, such as vanilla, lemon, or almond.
—
—
Click on the images below for more cookie projects!


—


Subscribe
Login
0 Comments
Subscribe
0 Comments