Ultimate Guide To Royal Icing (with Meringue Powder)

This guide covers everything you ever wanted to know about royal icing, including tips on how to make royal icing from scratch, how to make the perfect icing for cookies, and more!
You can watch this members-only video tutorial (without ads!) when you join my Cookie Art Club!
Get access to exclusive cookie decorating tutorials, my cookie and royal icing recipes, and individualized cookie decorating advice by joining my Cookie Art Club!
What is Royal Icing?
Royal icing is made from confectioners sugar, water, egg white, and flavorings. This is the only icing that I use to decorate my cookies. The egg white is what allows it to dry hard, which is what makes royal icing so versatile.
I make my royal icing with meringue powder, which consists of dry powdered egg white and stabilizers (you can read more on the different forms of egg white below).
I use 1/2 cup plus 2 tablespoons of meringue powder per 2 pounds of confectioners sugar (yes, some would say that’s a lot of meringue powder. More on that later in this post).
How To Make Royal Icing From Scratch
To make royal icing from scratch, you’ll need confectioners sugar, meringue powder, a little salt, water, and vanilla extract (or any flavor you like!).
My complete royal icing recipe along with a video on how to make it are available in my Cookie Art Club.
Make sure you’re using the paddle attachment of a stand mixer to make your royal icing and not the whisk attachment. Using the paddle attachment will ensure that you are mixing your royal icing just enough without incorporating too much air, which can cause annoying air bubbles later on when you ice your cookies.
When you mix the royal icing, keep your mixer on medium-low speed (I use speed 2 on my stand mixer) and mix the icing for no more than 5 minutes.
The icing should hold a stiff peak and have a thick and creamy consistency. It looks a lot like softened cream cheese.
How To Make Icing For Cookies
To make icing for cookies, you will thin the icing with water. It should be thin enough that it smooths out easily, but not so thin that it runs off the edges of the cookies.
To check the consistency of the icing, take out a spoonful and drop it back into the bowl. It should take between 15 to 20 seconds for the icing to be completely smooth. This is called Flood Consistency Icing and it’s the perfect icing for cookies
Royal Icing Consistencies
There are three different consistencies of royal icing that I use most often when decorating cookies: Stiff consistency, medium consistency, and flood consistency.
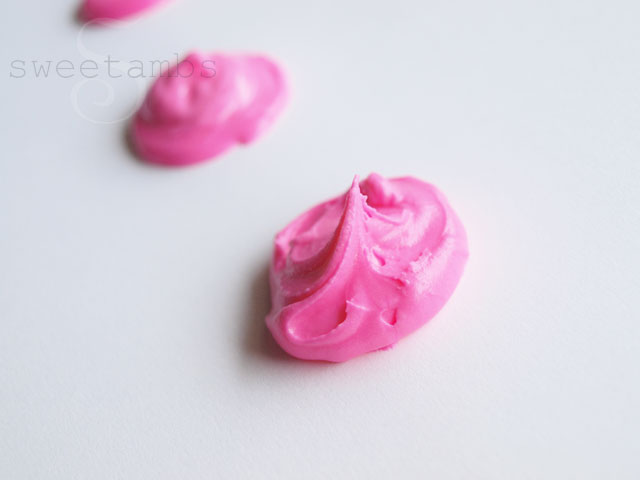
Stiff consistency
This is the consistency I refer to when the icing comes off of the mixer. It is spreadable but able to hold a peak. It’s sort of like cream cheese.
How to achieve stiff consistency icing
I mix my icing on medium-low speed (speed 2 on a stand mixer) with the paddle attachment so as not to incorporate too much air.
While the icing will increase in volume and lighten in color as it is mixing, it should be thick and dense rather than very fluffy. Fluffy icing has too much air, leading to problems with air bubbles later on (more on that below).
What if I’ve added too much water to my stiff consistency icing?
If you’ve added too much water to your royal icing, it will not be stiff enough and you won’t be able to create certain designs like piped roses or brush embroidery.
To solve this problem, mix up a batch of just the dry ingredients from the royal icing recipe. Then, sprinkle in a little bit of the dry mixture and mix on low speed until your icing holds a stiff peak.
Stiff consistency royal icing is used for: Brush embroidery, borders, roses, ruffles, basket weave (video tutorials on these methods are available in my Cookie Art Club)

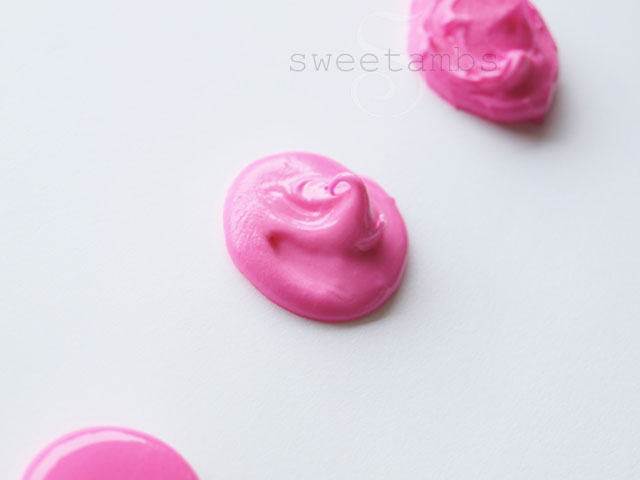
Medium Consistency
The best way to describe this consistency is that it is similar to soft-serve ice cream that’s on the verge of melting. It holds a very soft peak and doesn’t spread on its own. It can, however, be smoothed out with a scribe tool.
How to achieve medium consistency icing
To achieve medium consistency, start with stiff icing and add a few drops of water at a time. It doesn’t take much water to get there, so be careful to not add too much at once.
Medium consistency icing is thin enough to flow smoothly out of a small tip, but is not so thin that it spreads and loses the shape of the design you are piping, which is why it’s great for piping lettering and filigree.
Medium consistency royal icing is used for: Tufting (or quilting), royal icing transfers, filigree, lettering.

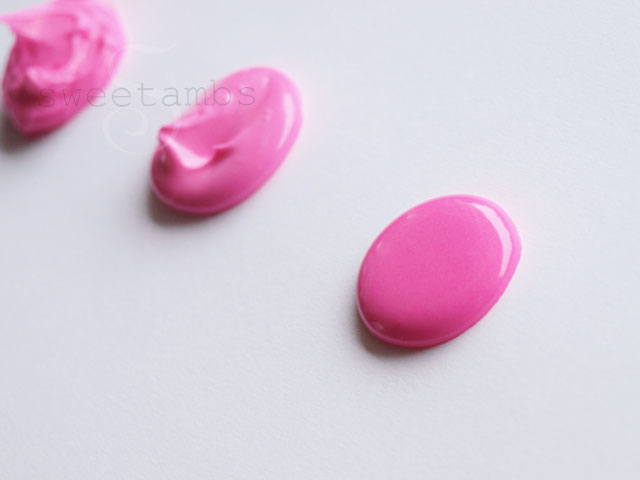
Flood Consistency
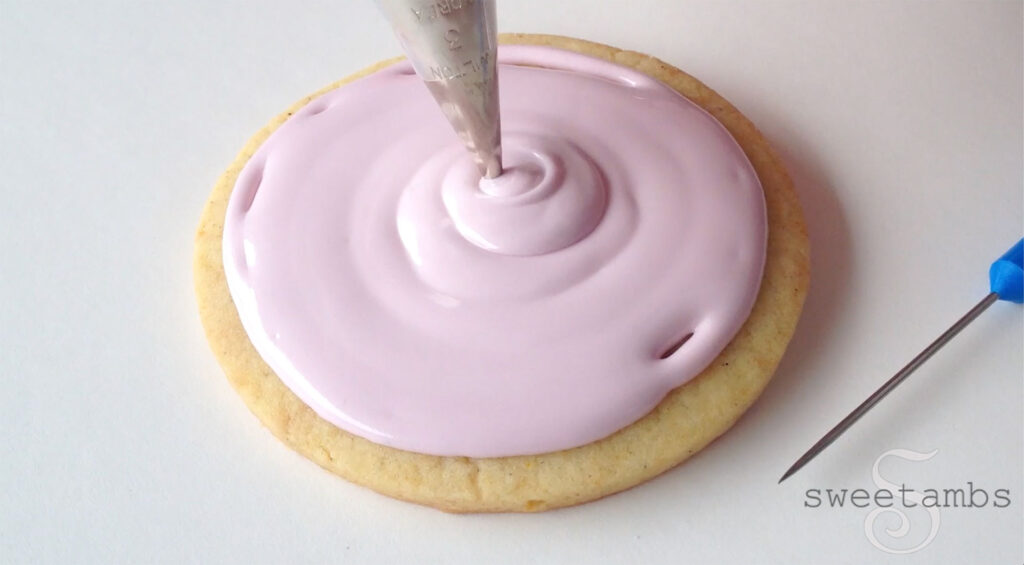
I use flood consistency icing for creating a super smooth layer of icing on a cookie. The icing should be thin enough that it smooths out on its own within 15-20 seconds, but not so thin that it runs off the edge of the cookie.
I use flood icing to outline and fill in my cookies, so it’s important that the consistency is just right. It will take some practice, so don’t get frustrated if you don’t get it right the first time (or the second time, or the third time).
How to achieve flood consistency icing
To achieve flood consistency, start with stiff icing and add a couple of tablespoons of water at a time. To test it, take a spoonful of icing and drop it back into the bowl. It should take between 15-20 seconds for the icing to smooth itself out. This is known as 15 or 20-second count royal icing.
Depending on how much icing you apply to your cookie or the pressure that you put on your piping bag, the consistency of your icing may need to be adjusted. I find that somewhere between 15-20 works best for me. Trial and error is the best way to learn what will work for you.
You can see the process of making flood consistency icing in my flooding with royal icing video, which is available in my Cookie Art Club.
What if I’ve added too much water to my flood consistency icing?
If you’ve added too much water, do NOT add more powdered sugar. Instead, add a spoonful of stiff icing to thicken it back up. Keep a batch of stiff icing on hand for this purpose.
Flood consistency royal icing is used for: Flooding, wet-on-wet technique, wet-on-wet filigree, tiny details (such as the reindeer on this cookie).

Meringue Powder, Dried Egg Whites or Fresh Egg Whites?
The form of egg white you use to make your royal icing is really a matter of personal preference. These days I prefer to use meringue powder, but during culinary school when I first learned about royal icing, we only used fresh egg whites.
From a food safety standpoint, I feel more comfortable using meringue powder. If you can’t find meringue powder where you live, you can replace it with dried powdered egg white in the same amount. However, in my experience, royal icing made with meringue powder is more stable and has a better consistency for decorating cookies than when it’s made with fresh egg white or dried powdered egg white.
Why do you use so much meringue powder the royal icing recipe?
Like I mentioned in the beginning of this post, I use 1/2 cup plus 2 tablespoons of meringue powder per 2 pounds of confectioners sugar in my royal icing.
This is about double what a lot of recipes call for, but I prefer it this way because it helps with the consistency and also gives a few more minutes to work with the icing before it starts to crust over. I’m able to spend 10 minutes (or more depending on the weather) on a wet-on wet design using my royal icing recipe!
How To Store Royal Icing
It’s better to have too much icing than not enough, so I almost always have royal icing left over after finishing a project. Even when I’m going to be using the same icing the next day to finish up a set of cookies, I never store the icing in the bags overnight – I always empty the bags into an airtight container, place a piece of plastic wrap directly on the surface, close the lid, and put the icing into the refrigerator.
When I was in culinary school, we would put a damp paper towel over the icing inside the container so that it wouldn’t form a crust. I don’t do this now because the moisture from the paper towel changes the consistency of the icing. As long as you clean the inside edges of the container before closing it up tightly, it will be fine.
My icing is separating after a few hours! Is this normal?
Separation is completely normal. Royal icing will separate after sitting for a while, so you’ll need to give it a good stir before using it again. If you won’t be using the icing within 10 days, you can store it in the freezer for up to 3 months. Don’t forget to put a layer of plastic wrap directly on the surface before storing it.
How long does it take for the icing to dry?
It takes at least 6 hours for flood consistency royal icing to dry completely, but I always allow the base layer of icing to dry overnight to be on the safe side. The cookies need to be left out in the open to dry properly, so make sure to let them breathe – don’t cover them up! In order to get a smooth, shiny finish on your cookies, make sure to dry them in front of a fan for at least the first hour. The faster the icing dries, the smoother the surface will be.
Medium or stiff consistency icing is usually used for small details, which only take an hour or so to dry. If you’re using medium consistency icing to make royal icing transfers, you’ll still want to let those dry overnight with the fan for the first hour in order to reduce the risk of breakage.
Dehydrators can help speed up the drying process. If you’re in a big hurry, you can certainly use one. However, I don’t recommend using a dehydrator unless it’s absolutely necessary because the heat can cause the butter in the cookie to melt, which will stain the icing. This is known as “butter bleed” (see more on this below).
Royal Icing Troubleshooting
Most of the problems I’ve encountered with royal icing can be solved by making sure the icing is not over-mixed. The icing should be thick and creamy when it comes off the mixer rather than light and fluffy. I mix my royal icing on medium-low speed for no longer than 5 minutes.
Dull Icing
As I mentioned before, in order to get a smooth, shiny finish on your flooded cookies, make sure to dry them in front of a fan. The faster the icing dries, the smoother the surface will be. Humidity will cause the icing to dry slowly, which will make it become porous, dull, fragile, and sometimes leave you with an uneven surface.
Dull icing can also be caused by icing that is over-mixed, so make sure to mix your icing for no more than 5 minutes on medium-low speed. Another issue could be that the icing is too watery, so try a slightly thicker consistency if you’re having trouble with dull icing.
Wavy Icing
If you’ve left your cookies to dry and you return to see that your royal icing is wavy, it’s probably because there wasn’t enough air flow as the icing was drying. This happens when you stack the trays on top of each other. Try to give the cookies space to “breathe” and put a fan in front of them to help the icing dry with a smooth finish.
Air Bubbles and Color Bleed
Icing that is too thin can also lead to air bubbles, uneven texture, fragility (a big problem with royal icing transfers) and even color bleed. It helps to keep the icing on the thick side so that you don’t encounter these problems.
When making flood consistency icing, try making it a day ahead of time so that the air bubbles can rise to the surface. Then, when you’re ready to use the icing, stir it by hand to get rid of the bubbles.
When making dark colors, try to use as little color as possible in order to get the shade you want. Too much food coloring in the icing will lead to color bleed. Make the icing several hours ahead of time so that the color can darken on its own.
See this post for my tips on making black royal icing.
Icing Dissolving When Painted
When you’re trying to paint on royal icing with luster dust or food coloring, there’s nothing more frustrating than icing that pits or completely dissolves when it comes in contact with the brush. This is most likely caused by over-mixed icing. Make sure that you mix your royal icing on medium-low speed for no longer than 5 minutes. When you’re finished mixing, the icing should be thick like a paste, not fluffy.
See this post for more tips on painting on royal icing.
See also, “Dull or Bumpy Icing” and “Air Bubbles and Color Bleed” above.
Clogged Tips
The smallest tip I use is a Wilton #1, which has a larger opening than a PME tip 1. I’ve never used those super small tips, such as a double 0, so I rarely have issues with clogging. However, If you are having issues with clogged tips, try sifting the powdered sugar. If that doesn’t solve the problem, you can strain your icing through a nylon stocking while filling your piping bag to filter out any little clumps.
Icing Curling As You Pipe
If your icing curls as it comes out of the decorating tip, it’s probably because of one of these:
1)There is a piece of dry royal icing or a clump of powdered sugar or meringue powder creating a blockage (see above for clogged tips)
or
2) There is a defect in the decorating tip. Some decorating tips have seams that are not completely smooth, which can get in the way of the icing coming out, causing the icing to bend and curl as you pipe.
or
3) You’re squeezing the bag too hard as you pipe. Try easing up on the pressure and see if it helps.
Butter Bleed (blotchy icing)
When the weather is too warm, butter bleed can become a big problem. This is when the butter from the cookie melts just enough to seep into the royal icing and make it look blotchy or yellow.
Unfortunately, once this happens, there’s nothing much you can do. There are creative ways of covering it up, such as adding luster dust or hand painting some designs over the stained areas. If that’s not an option, you can wait and hope that the butter bleed covers the entire cookie so that at least it’s not blotchy.
It’s best just to keep the cookies as cool and dry as possible to prevent butter bleed in the first place. The same rules for preventing color bleed apply here. Thin, porous icing can exacerbate the problem, so make sure that your icing is not too thin when flooding and also make sure to dry your cookies quickly in front of a fan (no heat guns!).
You can also make tweaks to the cookie recipe, like adding more flour, for example. The outcome of any recipe depends on lots of different factors, so it might take some trial and error to make it work for you.
See my favorite cookie decorating products in my Amazon Store
Read this post for tips on making cookie dough and storing cookies.


This post was originally published in June 2013.
