Antique Brooch Cookie Decorating Tutorial
When I was at CookieCon in Indianapolis last September, I was chatting with the nice folks at the TruColor booth (makers of natural food coloring). I’ve used their food coloring in the past but they had a new product at their booth that caught my eye – Liquid Shine! This was what sparked my idea for this antique brooch cookie tutorial. Scroll down for the video, supply list, and instructions!

This post contains affiliate links. Read my affiliate disclosure here.
TruColor Liquid Shine
Liquid Shine comes in several different colors. The generous makers of TruColor gave me a sample of the blue shine at CookieCon and as soon as I got home I bought gold, pink, purple, and silver online.
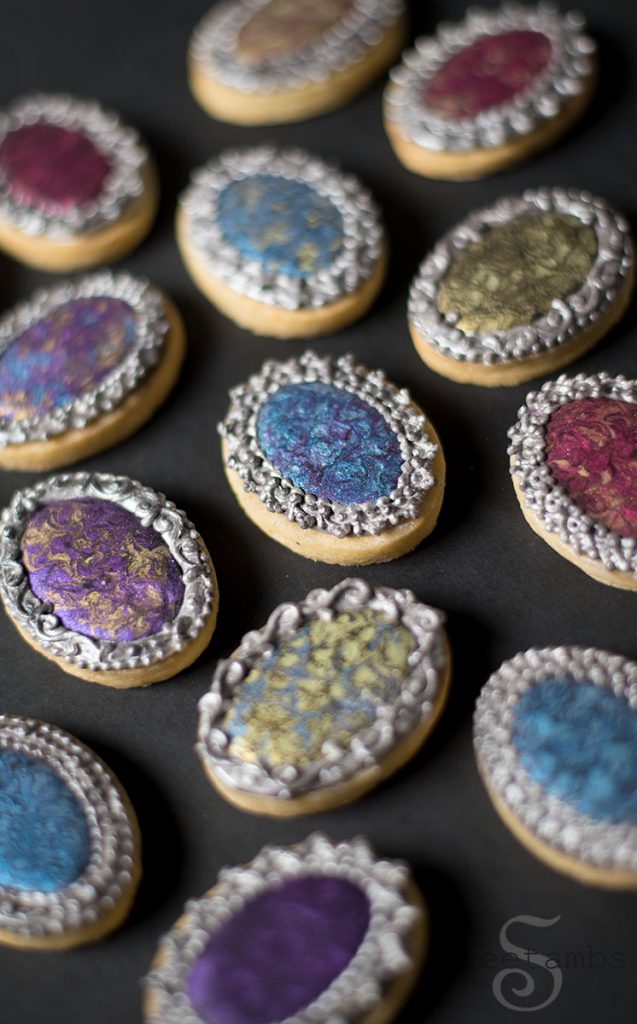
These colors show up best on dark shades of icing. I tried painting the blue on white icing, and it gave it an iridescent effect, which was very cool, but you get that rich blue color when you apply it to black icing.
For these cookies, I applied the Liquid Shine to the black icing while it was still wet and swirled it all together with a scribe tool. The full written instructions are at the bottom of this post.


The silver Liquid Shine was almost too silver for me, so I had to tone it down a bit by dusting the border with matte black dust. This helped to enhance the antique look of the cookies.
It is possible to use luster dust for this technique instead of Liquid Shine. If you are using luster dust, you’ll have to mix it with strong alcohol (I prefer Everclear) to create a liquid. Read this post for more information on painting with luster dust.


Here’s what you’ll need to create these antique brooch cookies.
You can find these in my Amazon Store unless otherwise noted.
- Roll Out Cookie Dough
- Oval cookie cutter (I used the second smallest oval in Sweet Sugarbelle’s oval cookie cutter set)
- Flood consistency royal icing in black
- Slightly thinned medium consistency royal icing in gray
- Medium consistency royal icing in gray
- Decorating bags
- Decorating tips Wilton 2 and PME 1.5
- Decorator brushes
- Scribe tool
- TruColor LLC Liquid Shine in blue, purple, pink, gold, and silver.
- Black from the Wilton Color Right set
- Crystal Colors dust in Charcoal – This is the matte black dust I used to tone down the silver on the border.


Instructions:
- Fill a palette or small dish with Liquid Shine in blue, pink, purple, and gold. If using luster dust, mix it with strong alcohol.
- Ice a small oval cookie with black flood consistency royal icing and a decorating tip 2. Leave space around the edge for a border.
- Use a scribe tool to help shape the icing.
- Dot the surface of the wet icing with the Liquid Shine or luster dust.
- Use the scribe tool to swirl the colors. Allow the icing to dry completely (at least 6 hours).
- Fill the space around the edge with gray royal icing and a decorating tip 2. The consistency should be between medium and flood.
- Use the scribe tool to help shape and smooth the icing.
- Allow the icing to dry completely (about 30 minutes).
- Pipe details with gray medium consistency icing and a decorating tip 1 or 1.5. Allow the icing to dry completely (about 30 minutes).
- Paint the icing with silver Liquid Shine or edible luster dust mixed with alcohol.
- Create an antique look by dusting the silver border with matte black.
When you’re finished using the Liquid Shine, leave it in the palette and allow the alcohol to evaporate. When it’s completely dry, you can brush the dust back into the container, or leave it in the palette and reconstitute it with alcohol when you’re ready to use it again.


Let me know if you try Liquid Shine! Tag me on Facebook or Instagram to show me what you make with it.
Pin this project for later.


