Wet-On-Wet Royal Icing Christmas Cookies With Natural Food Coloring
In this week’s tutorial, I’ll show you how to make these wet-on-wet royal icing Christmas cookies with natural food coloring from The Sugar Art. This is my first time using these colors and I’m so pleased with how they turned out!
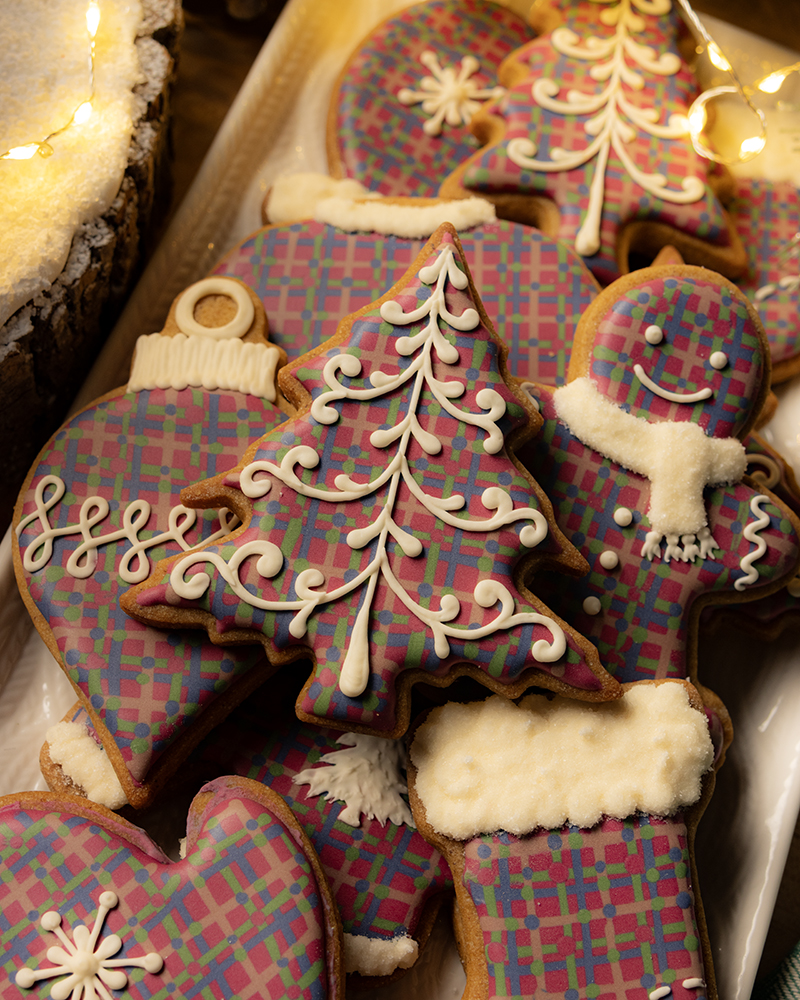
The video tutorial, instructions, and recipes to make these plaid Christmas cookies are in the Cookie Art Club!


You can watch this members-only video tutorial (without ads!) when you join my Cookie Art Club!
Get access to exclusive cookie decorating tutorials, my cookie and royal icing recipes, and individualized cookie decorating advice by joining my Cookie Art Club!


This post contains affiliate links. Read my affiliate disclosure here.
I used a variety of cookie cutter shapes to make these gingerbread cookies. The tree is from NY Cake and the sweater is from Ann Clark Cookie Cutters. I’m not sure where the other shapes came from as I’ve collected them over the years, but in my opinion, any cookie cutter shape can be a Christmas cookie!
To make this wet-on-wet royal icing plaid design, you have to move quickly so that you can pipe all of the details before the icing crusts over. With my royal icing recipe (available in the Cookie Art Club), I get up to 10 minutes to work with the icing, which was just about what I needed to make one of these cookies. Each one took me anywhere from 7 to 9 minutes.


When using natural food coloring, you’ll have to use more than what you would use when working with artificial food coloring. In the tutorial in the Cookie Art club, I show how I mixed these colors and I share the quantities of icing and natural food coloring that you’ll need to make each of these beautiful shades.
Here’s what you’ll need to make these wet-on-wet royal icing Christmas cookies
These supplies are available in my Amazon store unless otherwise noted
- Chilled sheet of cookie dough (I used my gingerbread cookie recipe)
- Assorted Christmas cookie cutters
- Royal icing
- The Sugar Art natural food coloring in Ruby, Garden Sage, Slate, Ivory, and Driftwood
- 5 12” decorating bags
- Couplers and bag ties
- Decorating tips 1 and 3
- Scribe tool
- Granulated sugar for texture
- Decorator brush (I used Sweet Sticks brand) or empty squeeze bottle
Relevant tutorials: Royal Icing 101 (available in the Cookie Art Club!)


Want to make these Christmas cookies yourself? The video tutorial and recipes to recreate them are available to Cookie Art Club members and you can try it free for 7 days.
Let me know if you make them and share your photos with me in the Cookie Art Club!