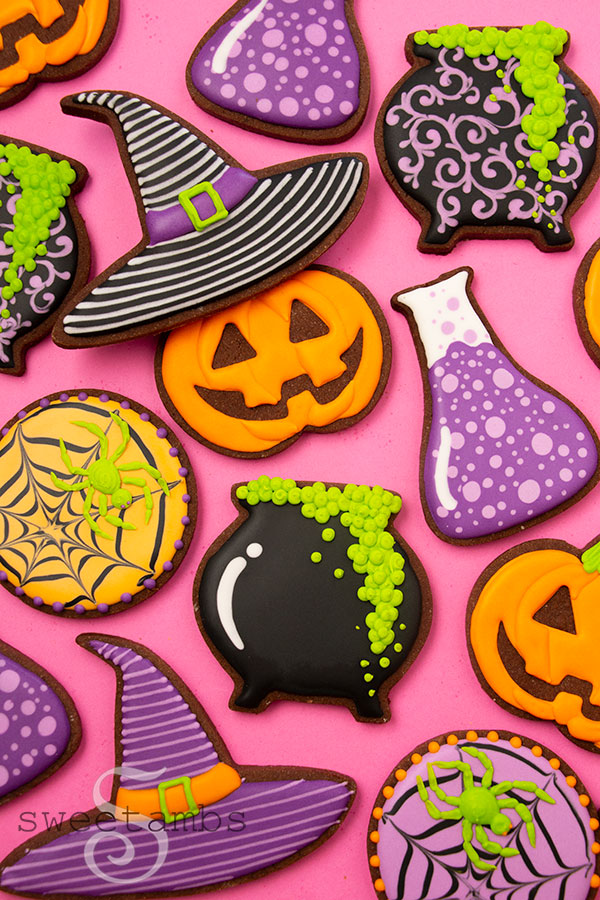
Colorful and Cute Halloween Cookie Ideas
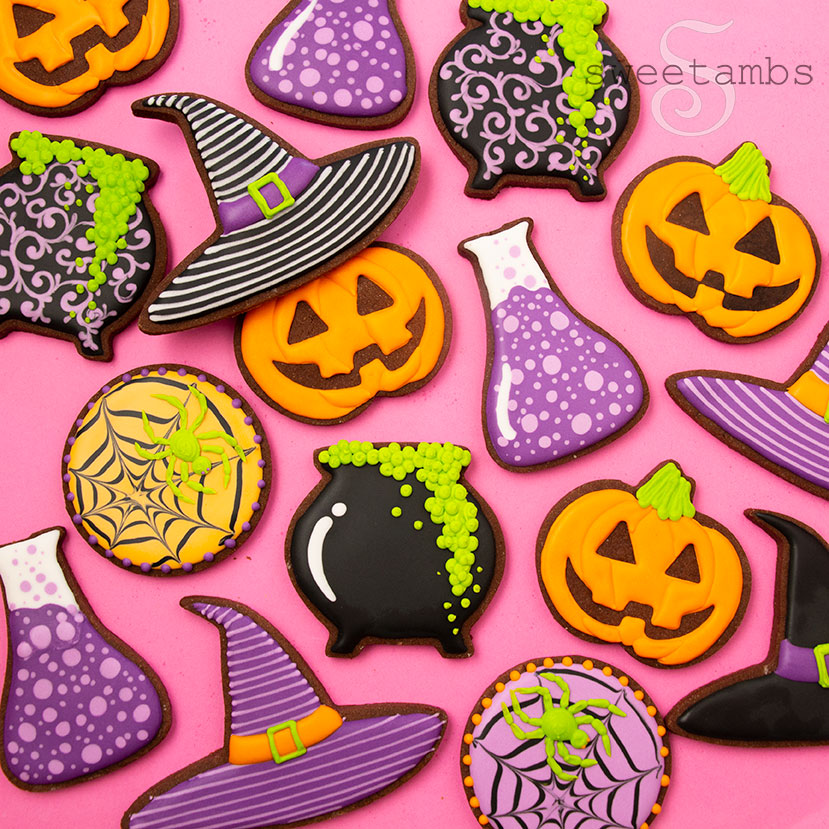

These colorful and cute Halloween cookie ideas are perfect for beginner cookie decorators! I used Chefmaster colors and flood consistency royal icing with a few details in stiff consistency icing for added dimension.
Watch the video tutorial and get the supply list below!
Get access to exclusive cookie decorating tutorials, my cookie and royal icing recipes, and individualized cookie decorating advice by joining my Cookie Art Club!
This post contains affiliate links. Read my affiliate disclosure here.
What supplies do you need to make Halloween cookies?
The fun shapes in this set of decorated Halloween cookies are made with cookie cutters from Wilton and Ann Clark (the full supply list is below!).
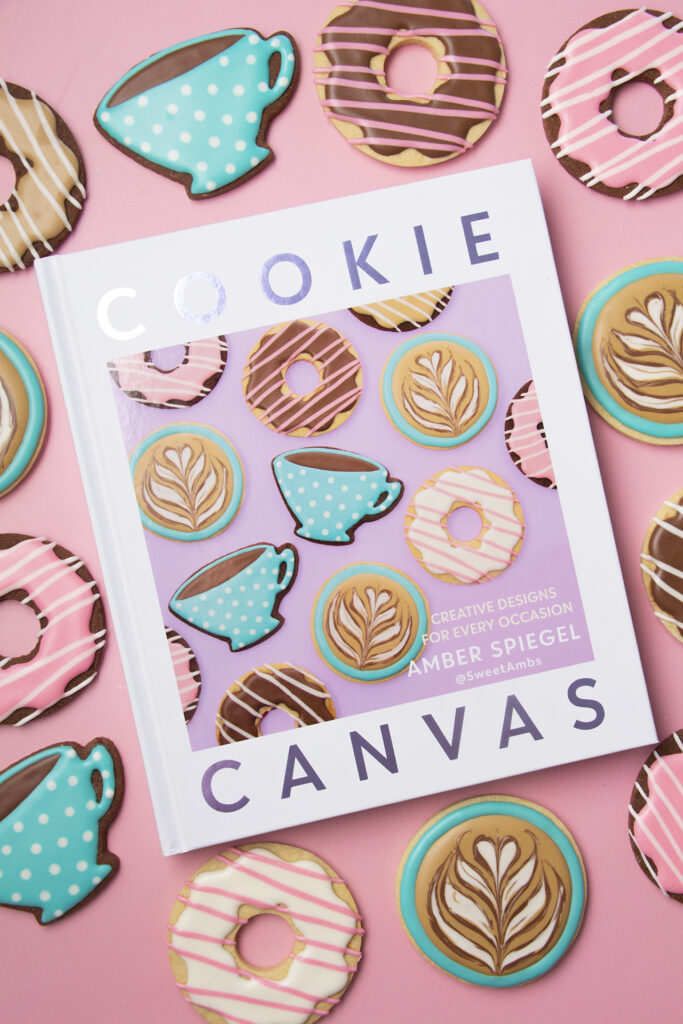
I baked them using my delicious chocolate cut-out cookie recipe that will be available in my new book, Cookie Canvas. You can pre-order it here! These cookies are a little crispy on the edges and chewy in the middle. So good!!

Find all of my favorite supplies for making halloween cookies (or cookies for any time of year!) here.
If your cut-out cookies don’t keep their shape while baking, take a look at my tips in this post on how to bake perfect cookies.


Tools for making colorful and cute Halloween cookies
- Chilled sheet of chocolate cookie dough (recipes are in my book and in the Cookie Art Club)
- Halloween Cookie Cutters
- Baking sheets and perforated baking mats
- Royal Icing (recipes are in my book and in the Cookie Art Club)
- Two-in-one tool
- 7 Tipless decorating bags
- Bag ties or rubber bands
Read my Ultimate Guide To Royal Icing to learn all about royal icing consistencies.
Colors (I used Chefmaster food coloring)
- Coal Black
- Sunset Orange
- Violet
- Neon Brite Purple
- Neon Brite Green

How to make cute Halloween cookies
Bake the cookies and make the icing
- Cut the cookies from a chilled sheet of cookie dough.
- Bake the cookies at 350˚F for 10-12 minutes. Allow the cookies to cool completely before baking.
- Make the royal icing according to the instructions. The icing should hold a stiff peak. Cover the icing tightly until you’re ready to fill the decorating bags.
- Color ¾ cups of stiff consistency icing neon green with 4-5 drops of Neon Brite Green food coloring. Add a few drops of water to thin it slightly.
- Thin the rest of the icing to flood consistency. Place ¼ cup of white icing into a container with a lid and set it aside until you’re ready to decorate. Split the rest of the icing equally into 5 bowls and color the icing as follows:
- Orange = 4-5 drops of Sunset Orange food coloring
- Light orange = white icing plus a small scoop of the orange icing
- Purple = 4-5 drops of Violet plus 1 drop of Neon Brite Purple
- Light purple = white icing plus a small scoop of purple icing
- Black = 7-8 drops of Coal Black food coloring
Decorate the cookies
- Fill 6 tipless decorating bags with white, orange, light orange, purple, light purple, and black flood consistency icing. Secure the top of the bag with a bag tie or rubber band to keep the icing from spilling out as you decorate. Cut a small hole in the tip of each bag.
- Once the cookies are flooded, fill another tipless decorating bag with the neon green stiff consistency icing.


- Cauldron
- Ice the cookie with black flood consistency icing. Use the two-in-one tool to help shape the icing.
- Pipe a reflection on the side of the cauldron with the white icing. Allow the icing to dry for about an hour.
- Pipe bubbles coming out over the edge of the cauldron with the neon green icing.


- Beaker
- Ice the beaker with purple flood consistency icing, leaving about 1-1/2” of space at the top. Use the two-in-one tool to help shape the icing.
- Fill in the space at the top with white flood consistency icing.
- Pipe bubbles with the light purple icing while the base layer is still wet.
- Pipe a reflection on the side of the beaker with the white icing.


- Jack-O’Lantern
- Outline the face with orange flood consistency icing.
- Pipe 5 pumpkin sections and fill in every other section. Use the two-in-one tool to help shape the icing. Allow the icing to dry for about 20-30 minutes.
- Fill in the remaining sections with the orange icing.
- Pipe a stem with the neon green icing.


- Spider web
- Ice a round cookie with light orange or light purple icing. Use the two-in-one tool to help shape the icing
- Pipe concentric circles with the black icing while the base layer is still wet.
- Drag the two-in-one tool through the icing starting from the middle and moving out toward the edges to create a spider web design. Allow the icing to dry for about an hour.
- Pipe a spider with the neon green icing.
- Pipe a dot border with any color of flood consistency icing.
- Witch Hat
- Ice the cookie with purple or black flood consistency icing.
- Pipe stripes with light purple or white icing while the base layer is still wet. Allow the icing to dry for about an hour.
- Pipe a band around the hat with orange icing. Allow the icing to dry for another 20-30 minutes.
- Pipe a buckle with neon green icing.
