
Halloween Cookie Gown – Candy Corn Cookie Cutter Shape Shift


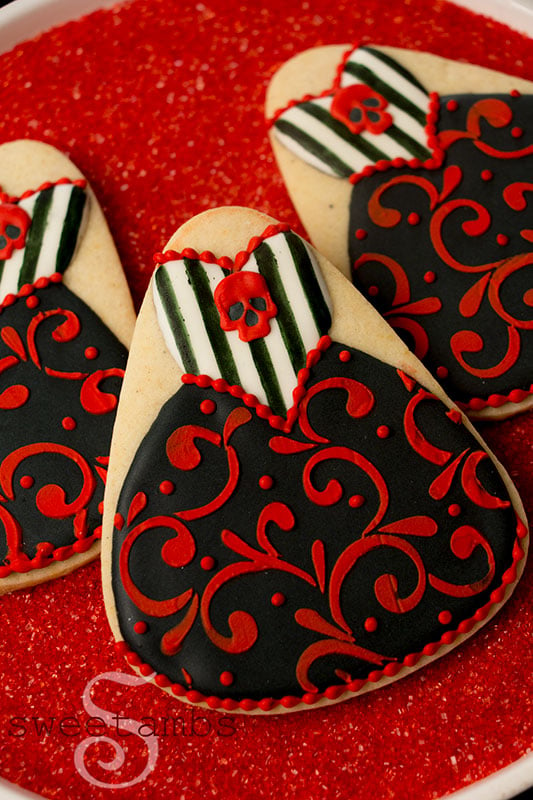
Here’s another cookie design that I made using Sweet Sugarbelle’s candy corn cookie cutter from her Shape Shifter set. I decorated this Halloween Cookie Gown design with my filigree and stripe stencils and skull royal icing transfers. Watch the video tutorial below!
Get access to exclusive cookie decorating tutorials, my cookie and royal icing recipes, and individualized cookie decorating advice by joining my Cookie Art Club!
This post contains affiliate links. Read my affiliate disclosure here.
Over the summer Marlyn of Montreal Confections got me into cutting my own stencils on a Silhouette Portrait. I used this machine to cut the filigree and stripe stencils for this project.
Here’s what you’ll need to make these Halloween Gown Cookies
- Chilled sheet of cookie dough (available in the Cookie Art Club)
- Candy corn cookie cutter
- Gown template
- Edible ink markers
- Decorating bags
- Flood consistency royal icing in white and black
- Scribe tool
- Skull template
- Wax paper or parchment paper
- Red medium consistency royal icing
- Black flood consistency royal icing
- Decorating tip 1 and a coupler
- Stripes stencil
- Stencil holder (optional)
- Airbrush or edible ink marker
- Filigree stencil
- Icing spreader
- Silhouette Portrait to cut stencils (optional)
Colors (I used Chefmaster)
- Coal Black
- Super Red

Instructions
- Trace a dress template with an edible ink marker.
- Ice the dress with white and black flood consistency royal icing. Use a scribe tool to help shape the icing.
- Place the skull template under a piece of parchment or wax paper.
- Ice the skull with red 30 second count royal icing and a decorating tip 1, avoiding the eyes and nose. Use a scribe tool to help shape the icing. Allow the cookies to dry for about 20 minutes.
- Fill in the eyes and nose with flood consistency royal icing. Allow the cookies and royal icing transfers to dry overnight.
- Place the dress cookie into a stencil holder or hold it by hand. Trace the stripe template with a black edible ink marker. You can airbrush the stripes, if you like.
- Place the filigree template over the cookie. Spread a thin layer of red medium consistency royal icing over the stencil.
- Remove the stencil and clean up the edges with the scribe tool.
- Pipe beaded trim on the dress with red medium consistency icing and a tip 1.
- Remove the royal icing transfers from the parchment paper.
- Use a little bit of royal icing to attach them to the dress cookies.

Subscribe
Login
0 Comments
Subscribe
0 Comments