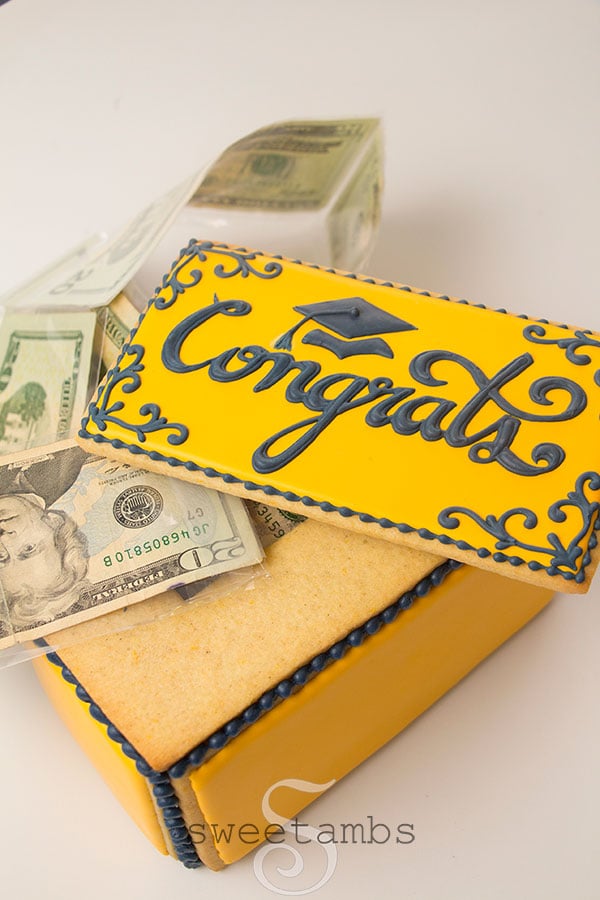
Money Surprise Cookie Box – Graduation Gift Idea


This money surprise cookie box would make a great graduation gift! My friend Hani of Haniela’s suggested that I make a money-dispensing box for a recent live demo and I took on the challenge of building the whole thing out of cookies.
Watch the tutorial and get the supply list below to build your own money surprise cookie box!
Get access to exclusive cookie decorating tutorials, my cookie and royal icing recipes, and individualized cookie decorating advice by joining my Cookie Art Club!
This post contains affiliate links. Read my affiliate disclosure here.

All of the recipes and templates for this project are in the Cookie Art Club.
You can change the colors and switch the graduation cap with another image to make this money surprise cookie box for nearly any occasion.
Here’s what you’ll need to make this Money Surprise Cookie Box
- Chilled sheet of cookie dough
- Cookie box templates & graduation templates
- Stiff consistency royal icing plus water for thinning
- Decorating tip 3
- Decorating tip 1.5
- Decorating tip 5
- Couplers
- Bag ties
- Tipless decorating bags
- Chefmaster food coloring in Royal Blue, Coal Black, and Golden Yellow
- Scribe tool
- Edible ink marker
- Cello bags
- Heat sealer (optional)
- Stencil cutter (optional)
Instructions
Cut the box pieces from a chilled sheet of cookie dough and bake them at 350 degrees Fahrenheit for 10 to 12 minutes. Allow the cookies to cool completely before decorating them.


Ice all 4 sides and the lid with golden yellow flood consistency royal icing and a decorating tip 3. Use the scribe tool to help shape and smooth the icing. Allow the icing to dry overnight.
Read my Ultimate Guide To Royal Icing to learn all about royal icing consistencies.


Assemble the cookie box using slightly thinned stiff consistency icing to hold the pieces together. Fill in the outside of the corners with more icing and then use a brush to help smooth it out and get rid of any excess icing. Set the box aside.


Trace the stencils onto the lid with an edible ink marker. You can also spread icing over the stencil if you want to do it that way instead.


Fill in the outlined areas with thick flood consistency royal icing (30 to 40 second count) and a decorating tip 1.5.


Allow the icing to dry for a few minutes before piping a tassel on the cap. You can add other decorations like filigree and a bead border. Allow the icing to dry for about an hour.


Package the bills in the cello bags. Trim off the excess plastic from the bag and save one piece for later. Tape all of the bills together and then tape that extra piece of plastic to the last bill.


Roll them up so that the tab is on the outside.


To assemble the lid, slide the tab through the opening on the bottom part of the lid. Then place the smaller part of the lid over the tab and fold the tab over the cookie.
Apply icing over the plastic. This is the same icing that was used to assemble the box. Place the decorated part of the lid on top of the icing.
Let the lid dry for about an hour before you place it on the box.


Put the roll of money inside the box and place the lid on top. You can add bordersto the corners with stiff consistency icing and a decorating tip 5.


Once everything is decorated and assembled, let the whole thing dry overnight.


If you make this money surprise cookie box or any of the designs from my tutorials, share them with me by using #sweetambscookies on social media. I love seeing your cookie creations!
