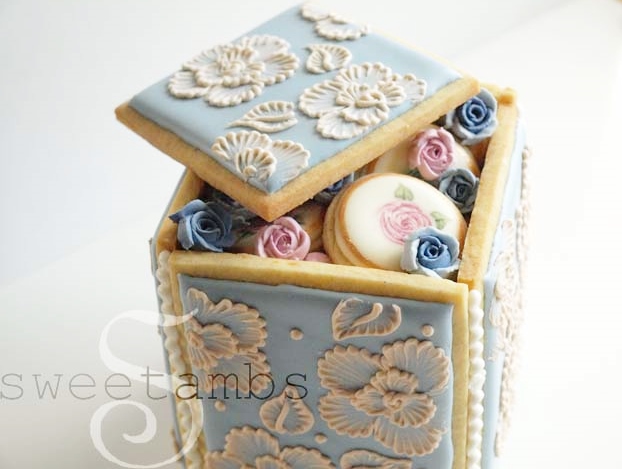
Brush Embroidery – Cookie Box Tutorial
The Brush Embroidery Technique is one of my favorites. I used it here to decorate this beautiful cookie box. It would make a nice presentation for Mother’s Day or a special birthday gift. See the step-by-step tutorial below!

This post contains affiliate links. Read my affiliate disclosure here.
Here’s what you’ll need for this brush embroidery cookie box
These supplies are available in my Amazon Store unless otherwise noted.
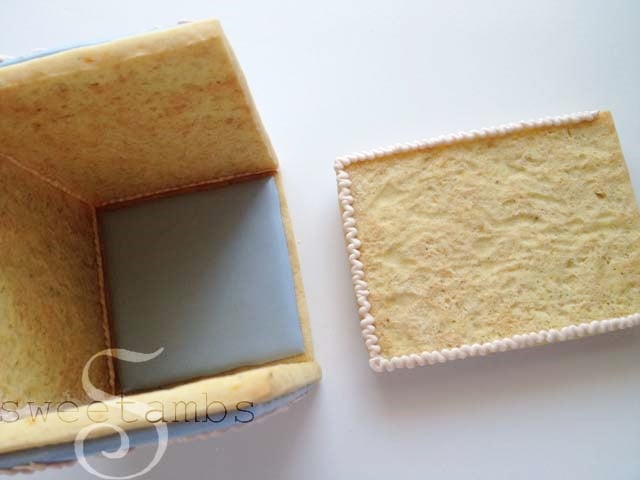
- 4 rectangle cookies that measure 3×4″ for the sides (my cookie recipe is available in the tutorial shop)
- 2 square cookies that measure 3×3″ for the top and bottom
- Flood consistency royal icing in Wilton Delphinium Blue from the Garden Tone set
- Stiff consistency royal icing in ivory (I used Wilton Brown and a touch of Juniper Green from the Garden Tone Set)
- 2 Decorating bags
- Couplers
- Decorating tip 3 for flooding and 2 for brush embroidery
- Bag ties
- Scribe tool
- Square tip brush
- Small dish of water
- Dry paper towel
Instructions
Step 1
Bake and cool the cookies according to the recipe instructions.
Step 2
Ice the cookies with flood consistency royal icing and a decorating tip 3. Use the scribe tool to help shape the icing.
Allow the icing to dry completely (overnight is best).
Visit my tutorial shop for a detailed video on how to flood a cookie.
Step 3
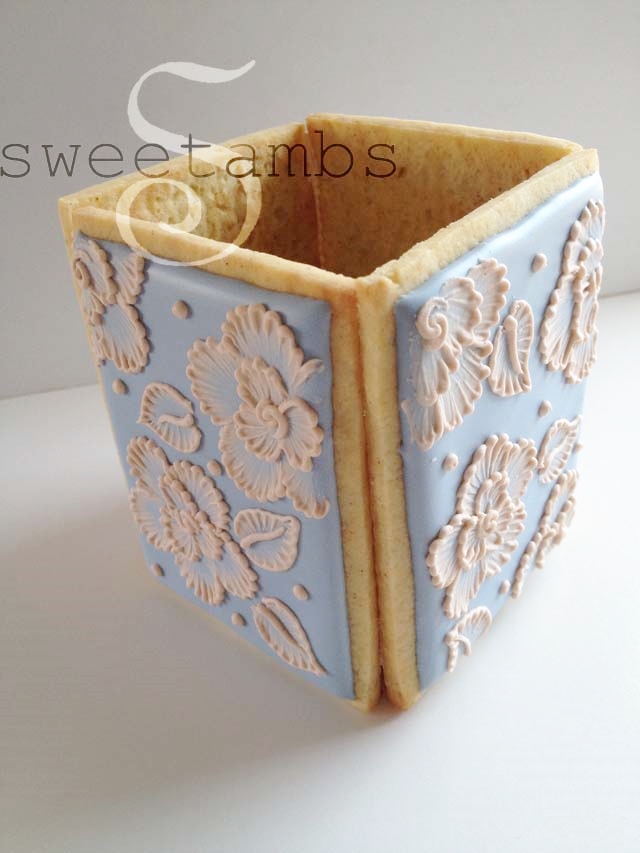
To make the brush embroidered flowers, pipe a ruffled edge using the stiff consistency icing and a decorating tip 2.
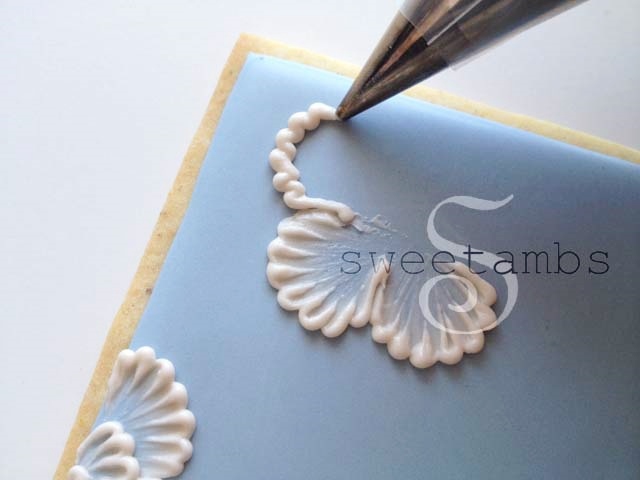

Read my Ultimate Guide To Royal Icing to learn all about icing consistencies
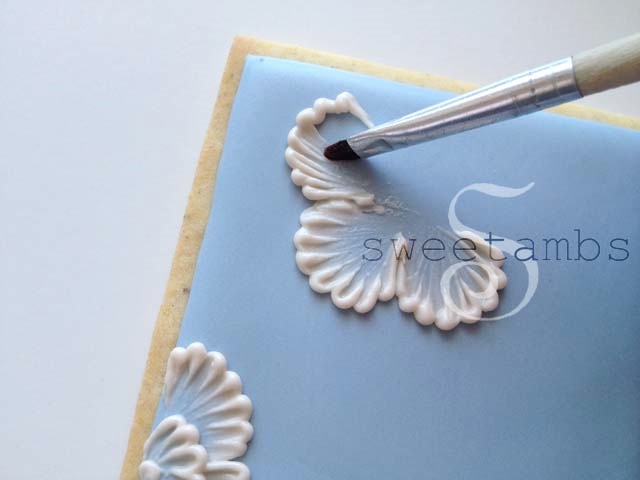
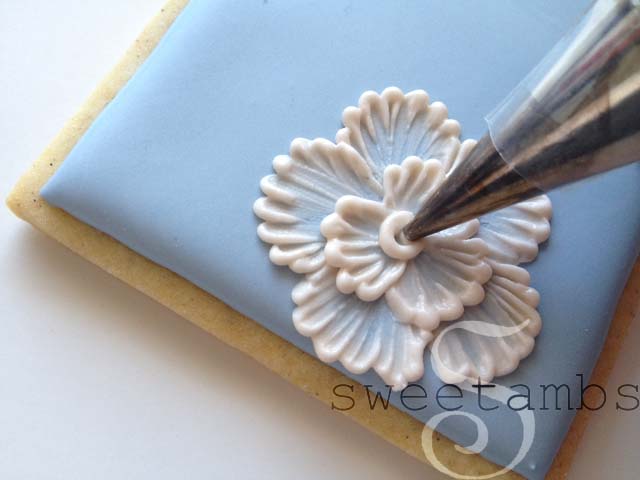
Step 4
Dip the brush into the water and blot it on the dry paper towel. Drag the icing toward the bottom of the petal.

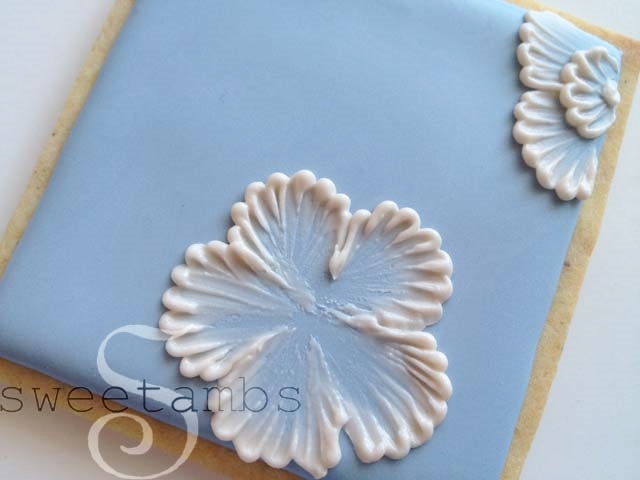

Step 5
Repeat this process on the inner petals. There’s no need to allow the icing to dry between layers of petals.
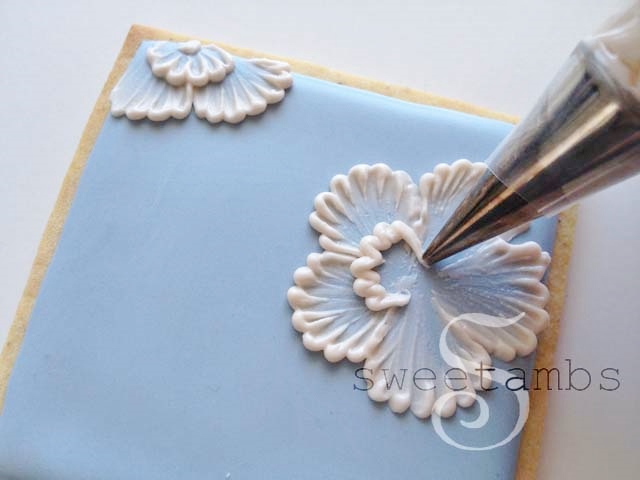


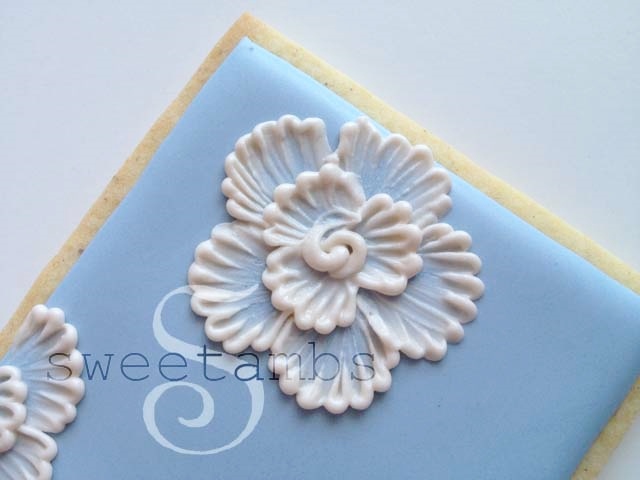
Step 6
Pipe the flower center.


To see brush embroidery in action with full instructions, download my complete video series from the tutorial shop.
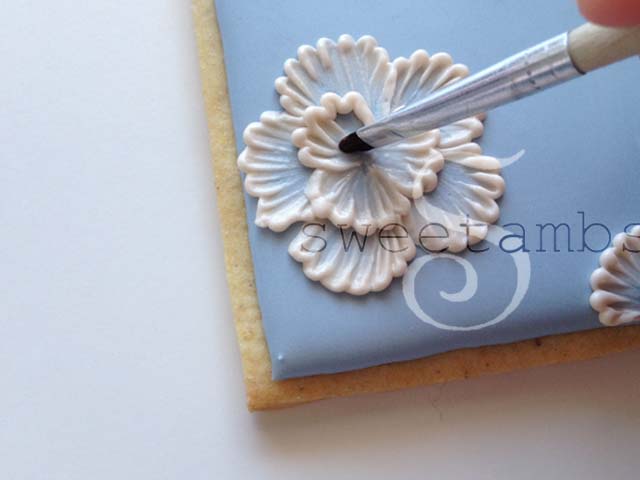
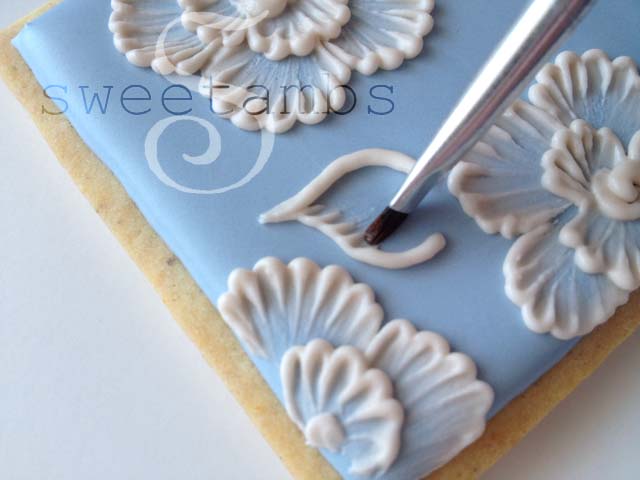
Step 7
Pipe a leaf shape between the flowers leaving the bottom of the leaf open.
Use the brush to drag the icing toward the center of the leaf.

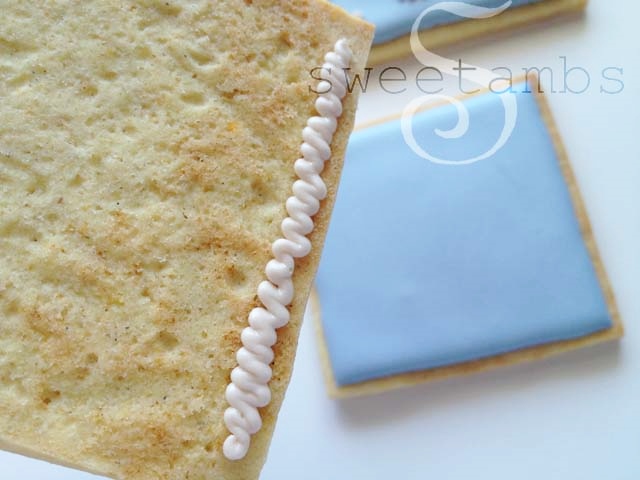
Allow the icing to dry for at least an hour before assembling the box.
To Assemble The Box
Step 1
Apply some slightly thinned stiff consistency icing to the back of a rectangle on one of the shorter sides.

Step 2
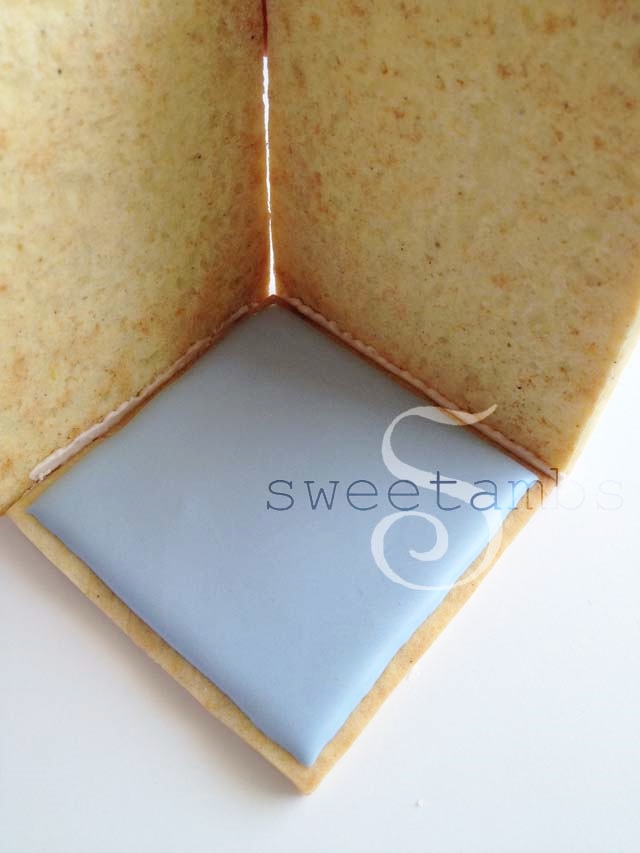
Gently press the cookie against the 3″ square cookie, which will be the bottom of the box. Hold it for at least 15 seconds. Place something behind it to prop it up while you move onto the next step.
Step 3
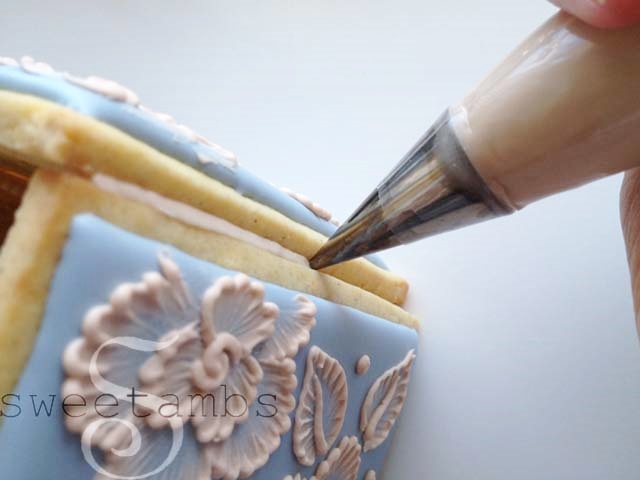
Apply icing to the short side of another rectangle and press it against the bottom piece, adjacent to the one you just attached.

Step 4
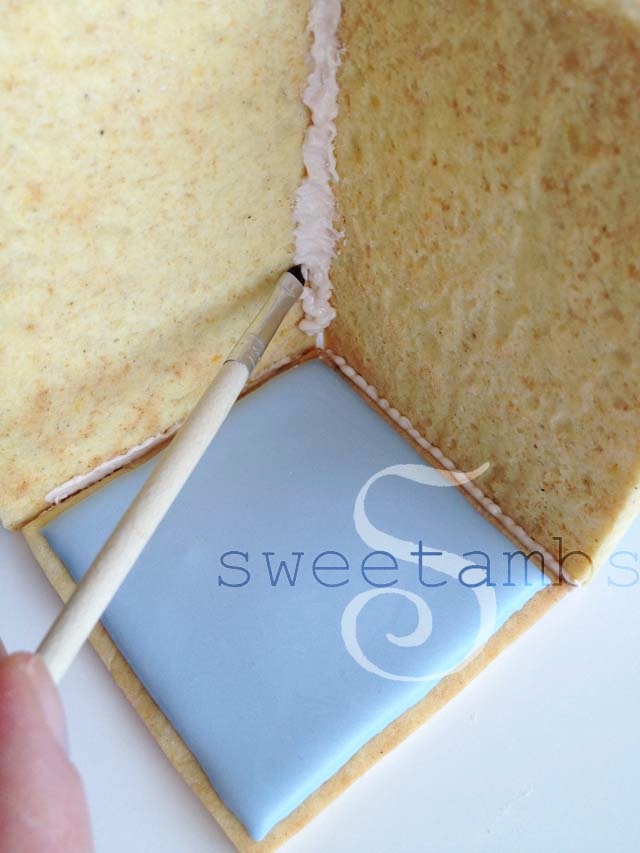
Pipe some icing in the seam and use the square tip brush to help push it into the crevice.
This joint will be the anchor for the rest of the box, so it’s important to make sure this side is stuck together really well.

Step 5
On the third side, apply the icing to the bottom edge and side of the cookie and attach it to the box.
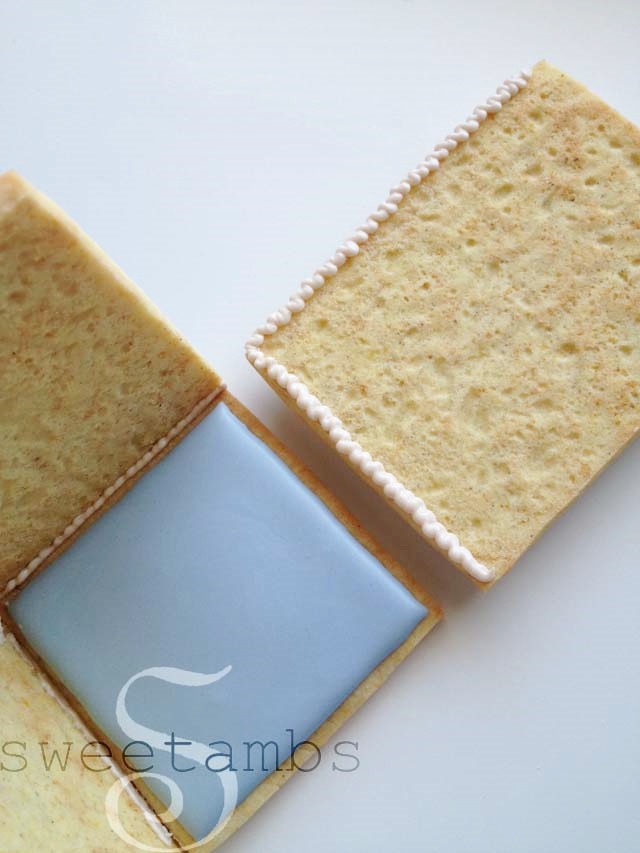

Put some pressure on these for about 30 seconds to make sure they stick.

Step 6
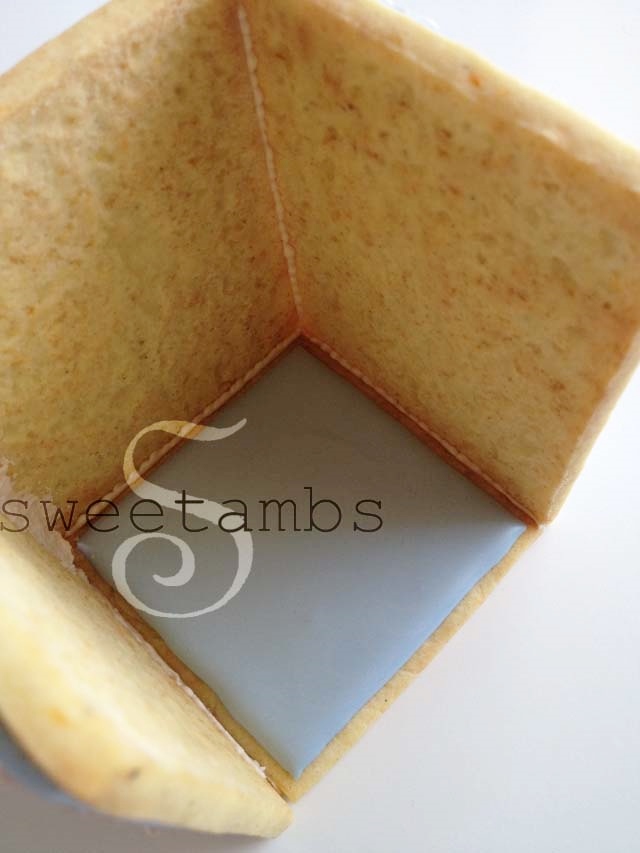
Apply the icing to both sides and the bottom edge of the fourth cookie.


Step 7
After the box has dried for about an hour, pipe some icing on the outside of the seams.

Step 8
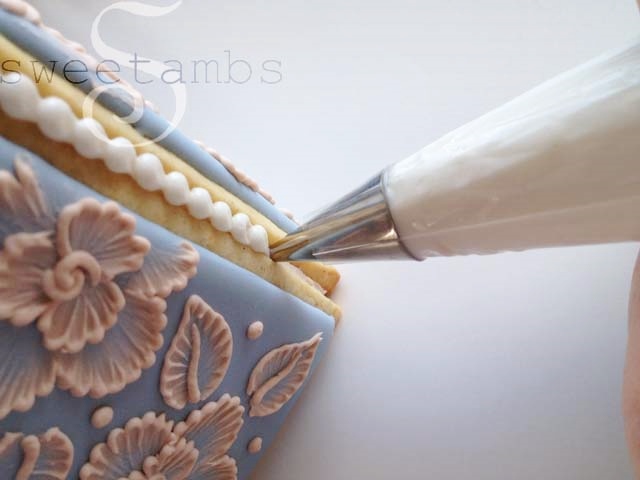
Using a tip 5 and white stiff consistency icing, pipe a bead border over the icing you just piped in the corners. There is a video with full instructions on piping a bead border available in my tutorial shop. Let the box dry completely (overnight is best).

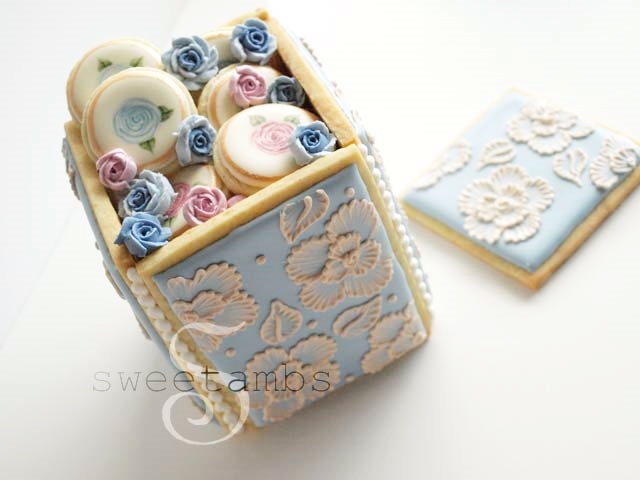
Now the box is ready to be filled.


I filled this box with mini cookies and royal icing roses. There is a video on piping royal icing roses and leaves available in my tutorial shop.