Cracked Glaze Royal Icing Technique Tutorial

This “cracked glaze” technique is something that I thought of a while back when I accidentally stuck my finger in icing that was dry on the surface, but still wet underneath.
Watch the video to learn how to create this effect!
The pattern that resulted from my clumsy move reminded me of those antique pottery pieces with very fine cracks in the glaze.
A few months later, I was playing around with ways to recreate that effect. The project changed quite a bit from what I thought it would be originally, as you’ll see in this tutorial.

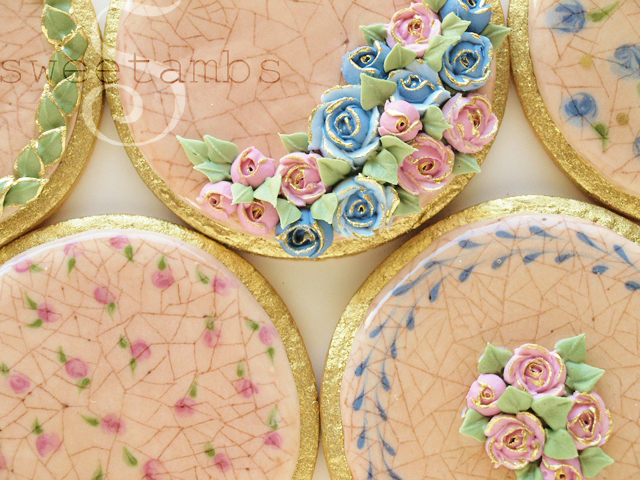
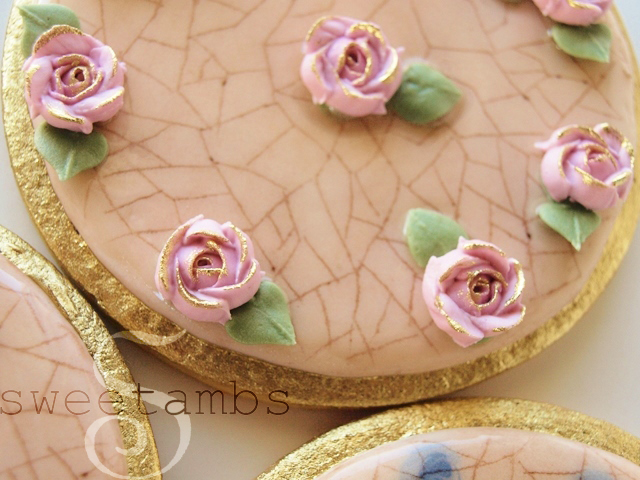
These cookies involve a lot of decoration and, depending on the type of “glaze” you are using (more on that in the video below), they are not ideal for shipping.
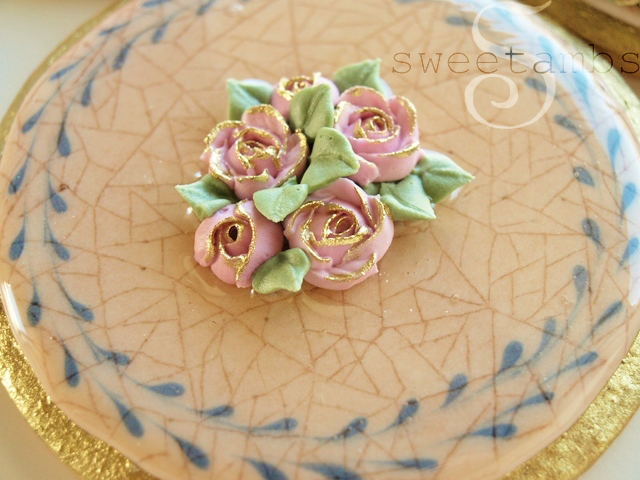
I created this design with the idea of an elaborate display cookie, rather than something you’d eat. I think they would be best arranged on a pretty platter and used as a display on a dessert table surrounded by mini cookies and other sweets, or as a centerpiece for an Easter or Mother’s Day brunch.
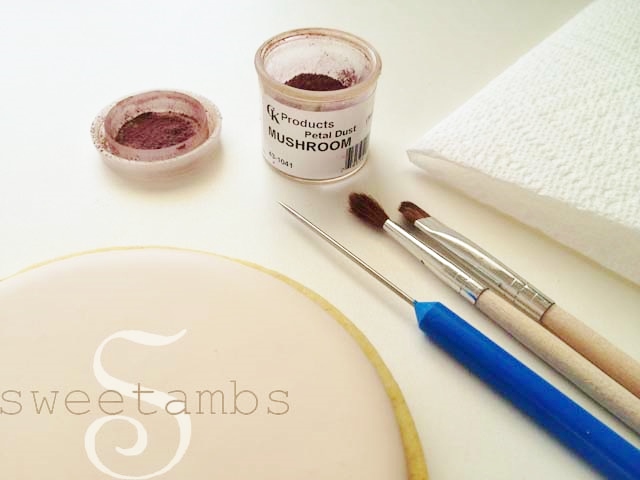
Here are the tools you’ll need to create the cracked glaze effect:
- Completely dry, iced cookie (visit my shop for a detailed video tutorial on how to flood a cookie)
- Dark shade of petal dust
- Scribe tool
- Soft round brush
- Angled brush
- Corn syrup mixed with vodka* OR use an edible glaze such as Wilton’s Dab-N-Hold (find it in my Amazon Store)
*I originally wrote this post before Wilton’s edible glaze was available. I would recommend using the edible glaze as it dries with no stickiness. Keep in mind that it’s not quite as shiny as the corn syrup mixture.
Any dark shade of petal dust will work for this method. For this tutorial I’m using CK products petal dust in mushroom, but you could try these FDA approved dusts from Sugarpaste.com.
I also tried using pearl dust, but it wasn’t fine enough to get into those small scratches in the surface of the icing.
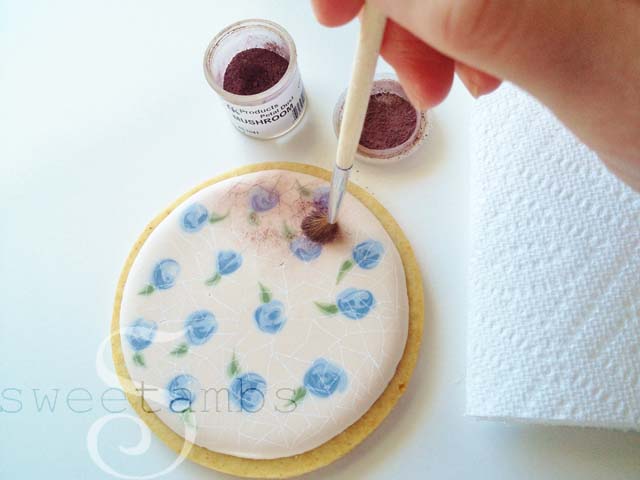
You can include floral details under the glaze by using the wet-on-wet technique when icing your cookie and then adding the cracked glaze after the icing dries. Read this post for a tutorial on making tiny roses in royal icing using the wet-on-wet technique.
Instructions
Step 1
Use the scribe tool to create scratches in the surface of the icing.
Step 2
Use the soft brush to dust the surface with petal dust. Use a stippling motion rather than a side-to-side motion. The stippling motion will ensure that the dust gets into the scratches.
Step 3
Use the angled brush to remove the excess dust from the surface. Use very light pressure to remove the dust so as not to smudge it.
Step 4
Apply the glaze and allow it to dry (if you’re using the corn syrup/vodka mixture, it will dry to the touch on the surface but will remain soft underneath).
Once you’ve finished glazing your cookies, paint the exposed edge of the cookie with a mixture of gold pearl dust and alcohol. Read my post on painting with gold pearl dust to learn more about this process.
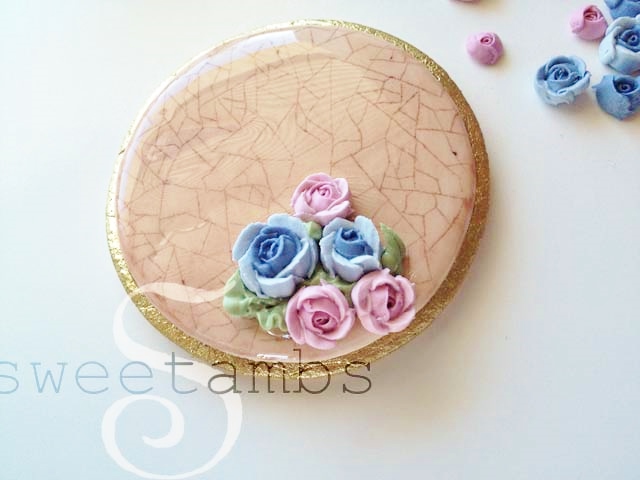
The roses shown here were piped using a petal tip 101 and allowed to dry overnight.
I used the colors from the Wilton Garden Tone 4-Piece Colors Set for the roses and leaves.
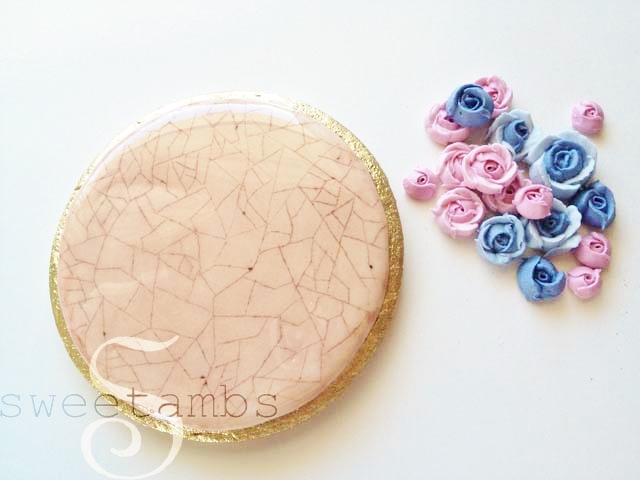
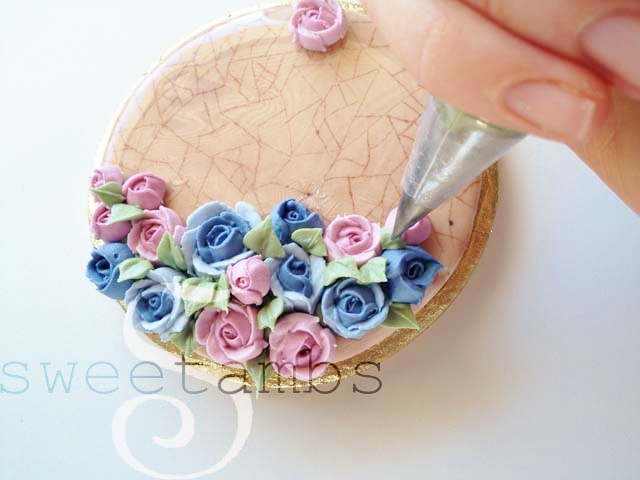
Pipe a mound of stiff consistency icing where your roses will be placed.
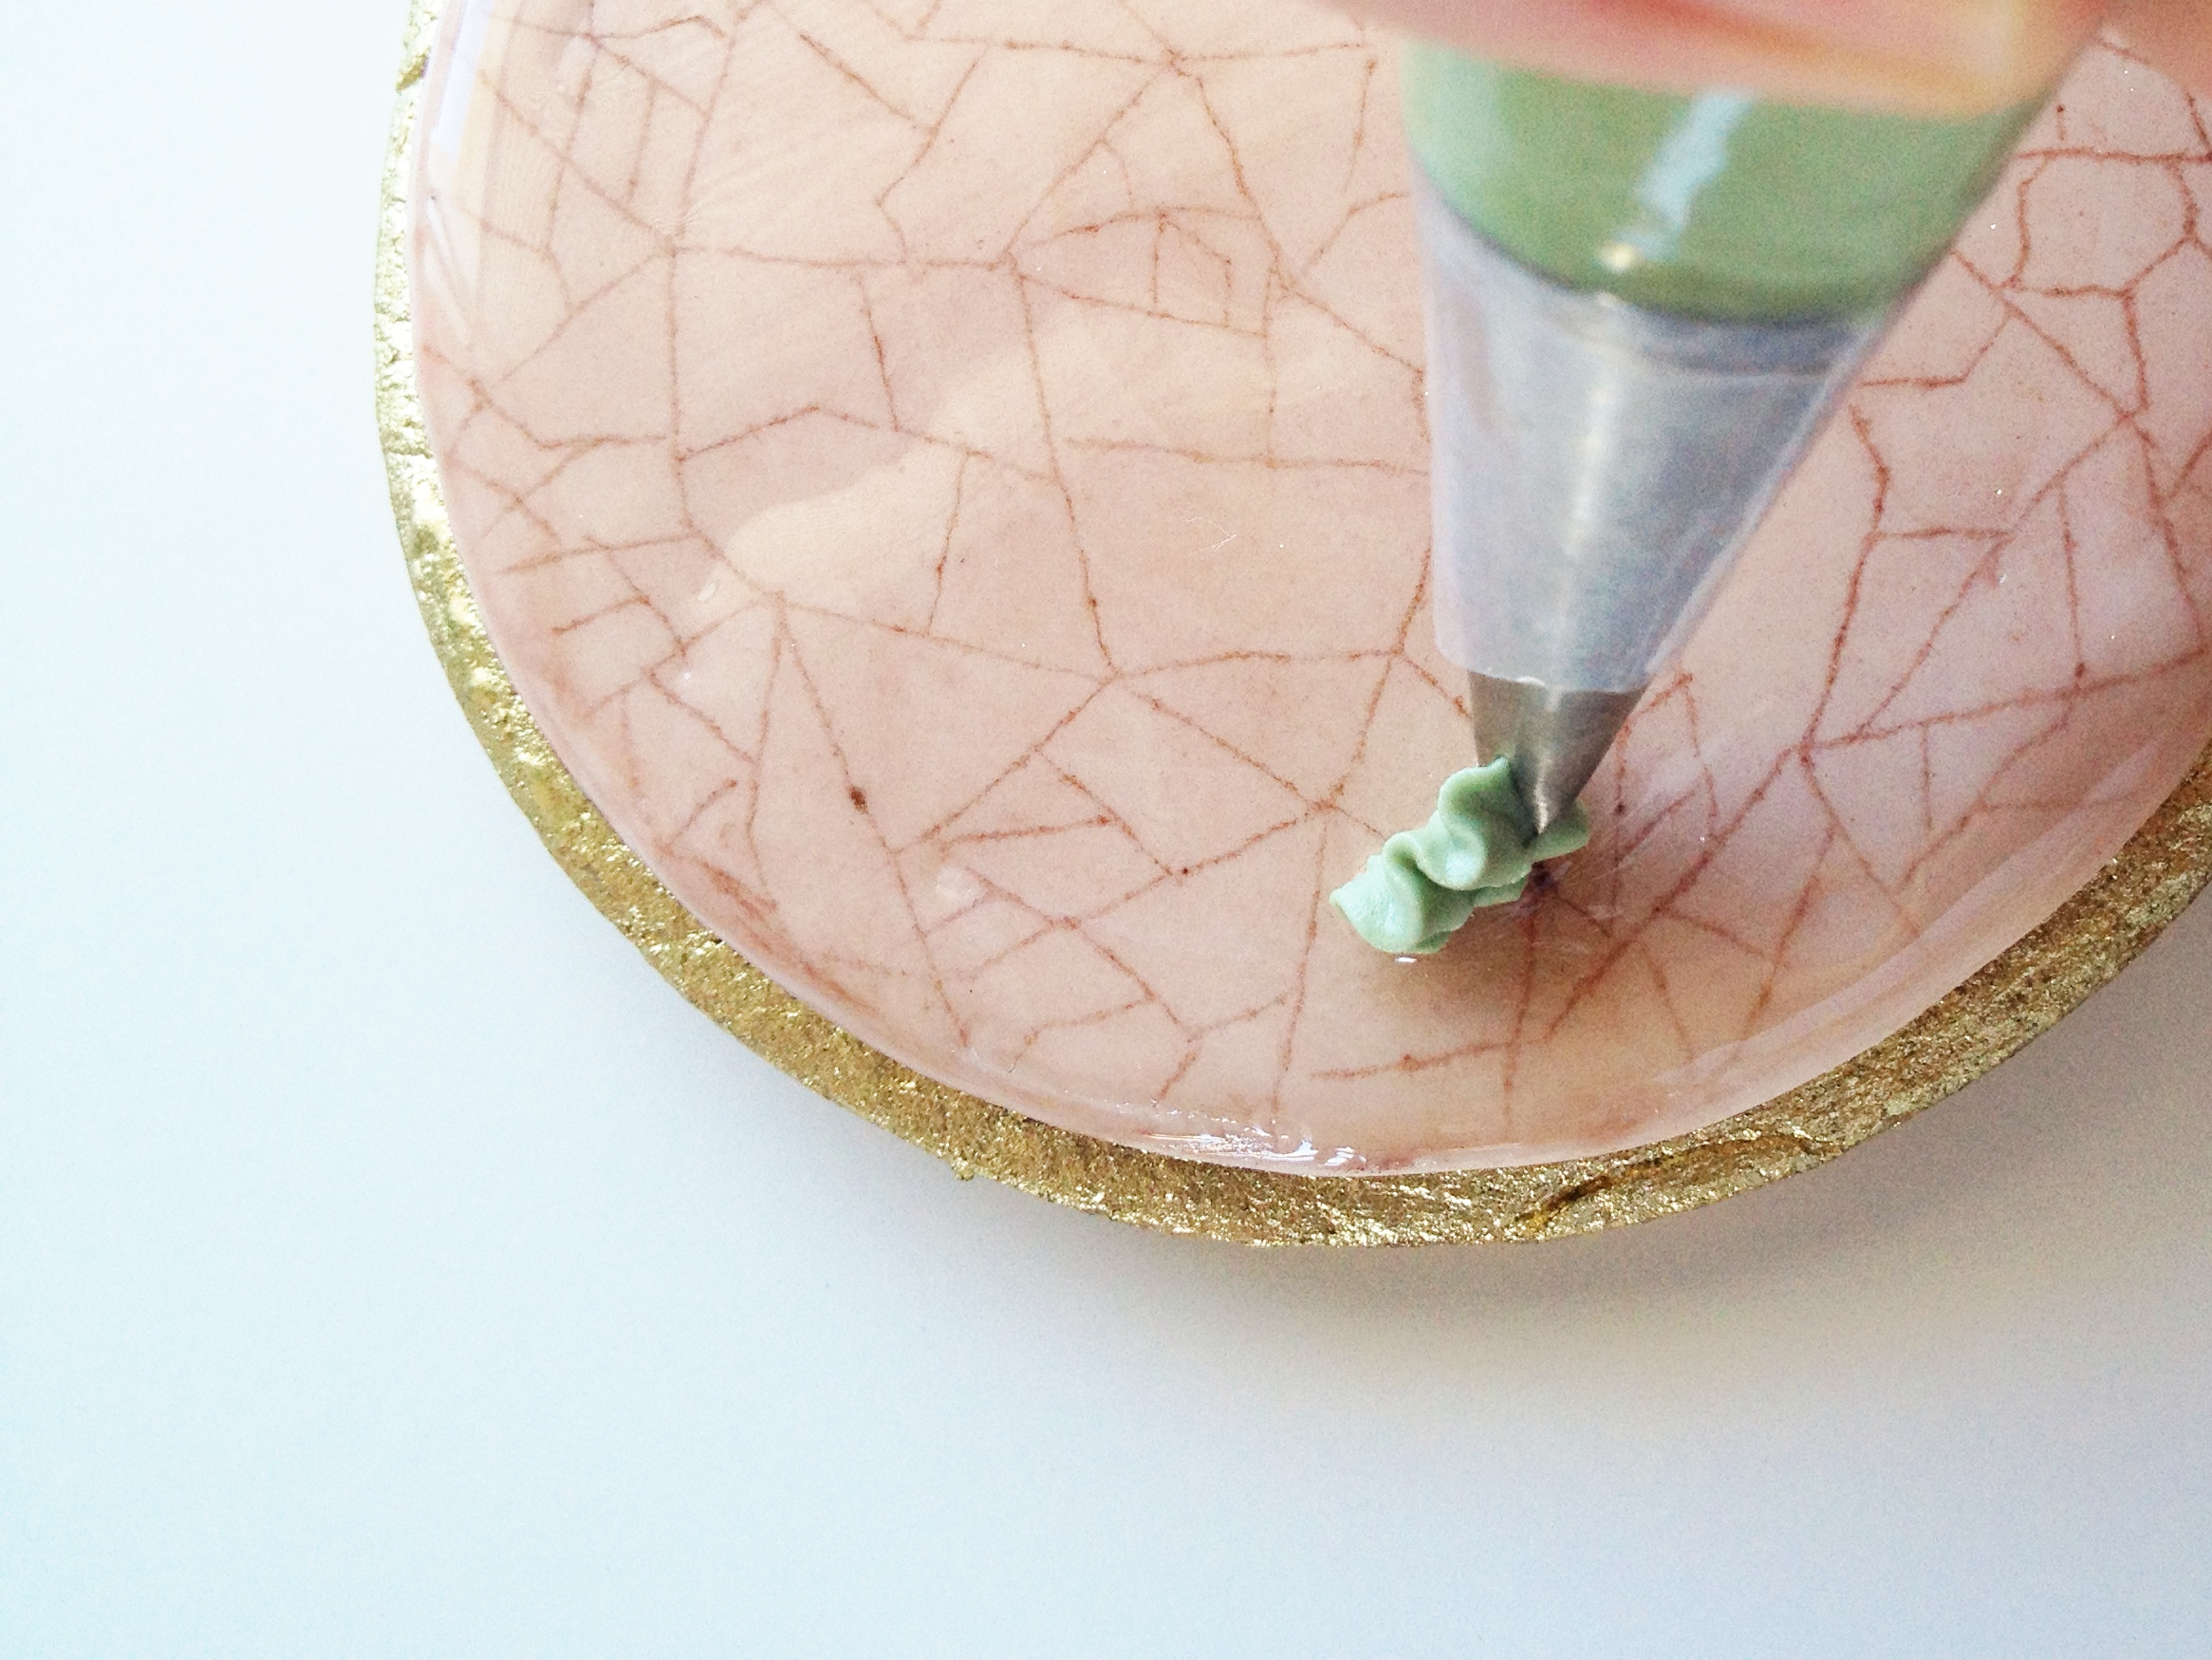
Press the roses into the mound of icing.
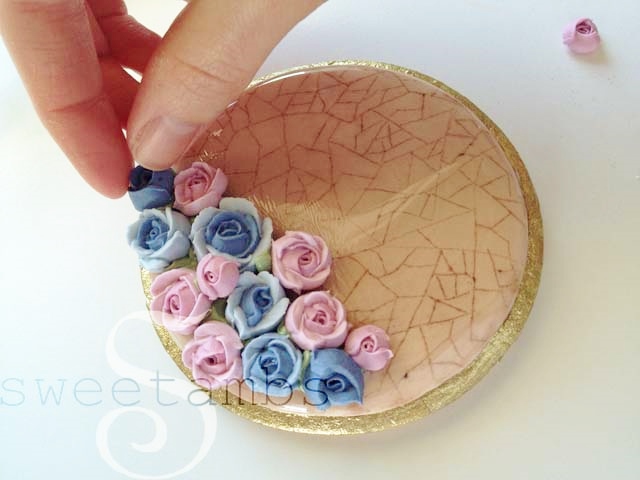
Add leaves using the leaf tip 352.

I also added a little gold paint to the edges of the roses.
Troubleshooting
If the dust seems to only stick to the surface of the icing and not in the cracks, it could be because your icing is porous. In order to prevent this, make sure that you have your cookies drying in front of a fan after you ice them.
The faster your icing dries, the smoother the surface will be. If the weather is hot and humid, this will cause the icing to dry slowly and you’ll have a dull, porous surface.
Read my Ultimate Guide To Royal Icing to learn more.
If your dust leaves blotchy spots on your icing, it might be caused by fingerprints. To prevent this, only touch the edges of the cookie when handling it.
If the dust is still not getting into the cracks, it could be because your dust is too coarse or because the cracks are not deep enough. Make sure to press hard when scratching the surface of the icing with the scribe tool.
Keep in mind that the dust will leave some color on the surface of the icing no matter what. The cookies shown in this tutorial were iced in white icing.

Shipping glazed cookies
A few months ago, I made some cookies using a similar technique and shipped them to see what would happen. Even though the glaze was dry to the touch, once the cellophane bag touched it, it got stuck.
The cookies that had raised decorations kept the cellophane bag from touching the glazed surface and arrived intact.
So, if you’ll be shipping these, make sure to place the roses or other decorations in such a way as to keep the bag lifted up off of the surface of the cookie. Or, use Wilton’s edible adhesive instead of the corn syrup and vodka mixture to glaze the cookies.
Read this post for more information on packaging cookies.
This post was originally published in March 2013
