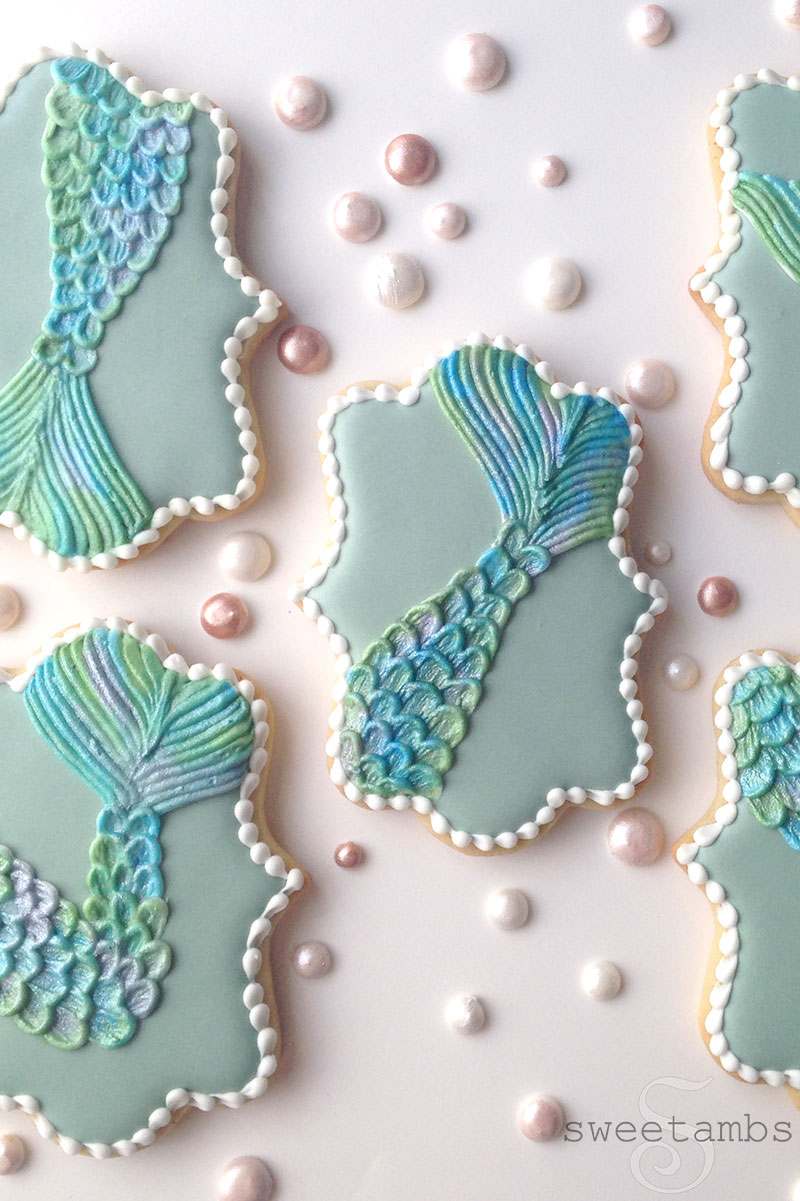
Mermaid Tail Cookies!
These mermaid tail cookies were inspired by a technique that I used to create a set of dinosaur cookies a few weeks ago.
This time, I used the brush embroidery technique to create the scales rather than using SugarVeil® as I did on the dino cookies, but the SugarVeil® Mesh Mat would work really well here, too. The pearlescent finish is achieved by applying a combination of colorful pearl dusts.
You can watch this members-only video tutorial when you join my Cookie Art Club!
Get access to exclusive cookie decorating tutorials, my cookie and royal icing recipes, and individualized cookie decorating advice by joining my Cookie Art Club!
 —
—
This post contains affiliate links. Read my affiliate disclosure here.
Here’s what you’ll need to make these mermaid tail cookies:
- Roll out cookie dough (use your favorite recipe or get mine in the tutorial shop)
- Plaque cookie cutter
- Flood consistency royal icing
- Stiff consistency royal icing
- Decorating tip 3
- Decorating tip 2
- 12″ decorating bags
- Scribe Tool
- Purple Pearl Dust
- Blue Pearl Dust
- Green Pearl Dust
- Square tip brush
- Soft brush
- Paint palette or small dish
- Alcohol (I like to use 160 proof vodka) or flavored extract (why? read this post on painting with pearl dust)
- Pale green icing made with the Wilton Color Right color system
—
To make the mermaid tail cookies, start by icing a plaque cookie with pale green flood consistency royal icing and a tip 3. This color was made using the chart that comes in the Wilton Color Right color system. You can make it by mixing blue, yellow, and brown. 
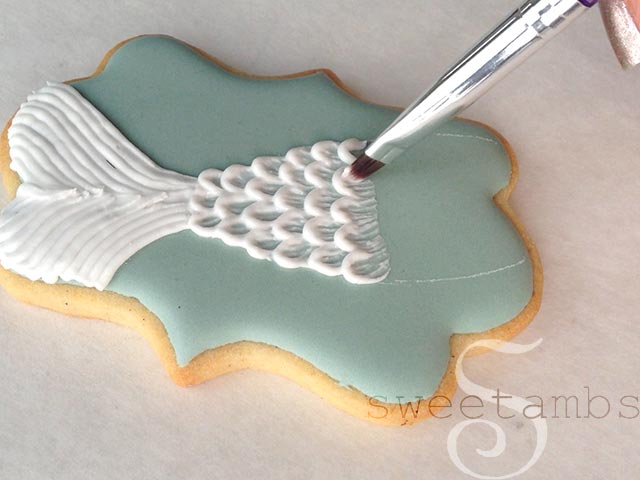
Once the icing is completely dry (I usually allow my icing to dry at least 8 hours), scratch a mermaid tail shape into the icing using a scribe tool. 
Fill in the fin with lines of stiff consistency royal icing and a tip 2. 
Fill in the rest of the tail using the brush embroidery technique. Start by piping a ruffled line with stiff icing and a tip 2, and then drag the icing with a square tip brush. Allow the icing to dry about 30 minutes.

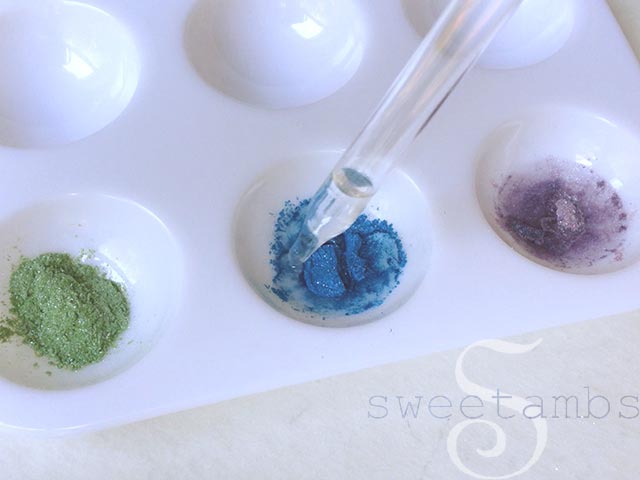
Place a small amount of pearl dust into a paint palette or small cups. I used Wilton blue, purple, and green pearl dusts. These are available at the craft store in the cake decorating aisle, or find them on Amazon.
Add a few drops of alcohol or flavored extract and mix well. Read this post to learn more about painting with pearl dust.
Use a soft brush to apply the edible pearl paint to the dry icing. Start with blue, then add purple, then green. The paint will be dry within a couple of minutes. I used this technique to make reptile skin on this set of dinosaur cookies I mentioned earlier.
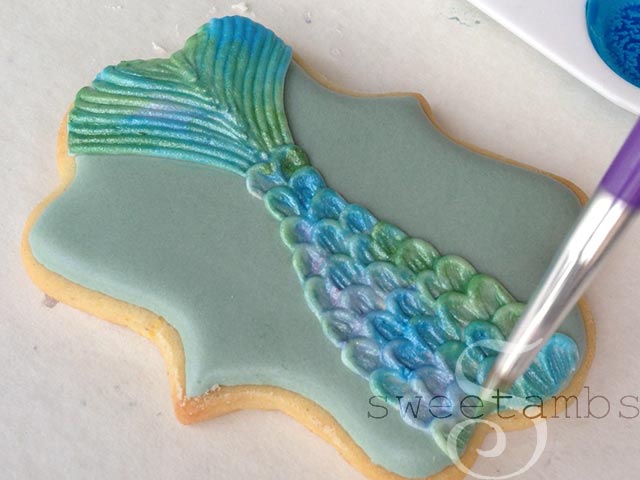
Finish the cookie by piping a bead border with stiff consistency icing and a tip 2. 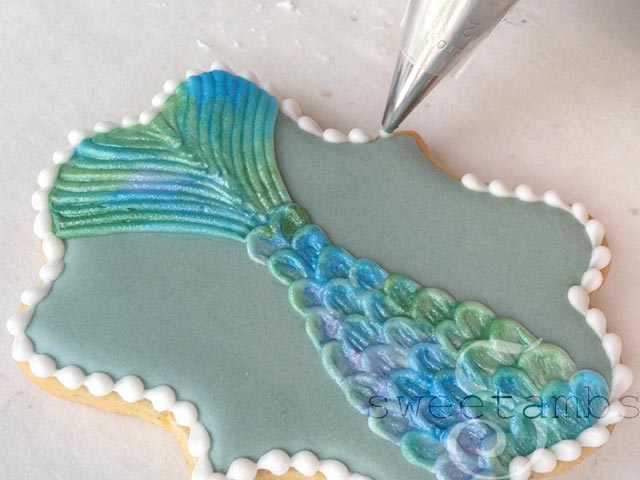
—
—
—
